There is a specific, undeniable magic to peeling back the plastic of a Starbucks treat, but nothing compares to the decadence of a homemade Starbucks chocolate cake pop recipe. Imagine biting through a thick, snappy shell of dark chocolate to reveal a center so incredibly dense and moist that it borders on truffle territory. This isn’t just a crumbled cupcake; it is a culinary masterpiece designed for the true chocolate lover.
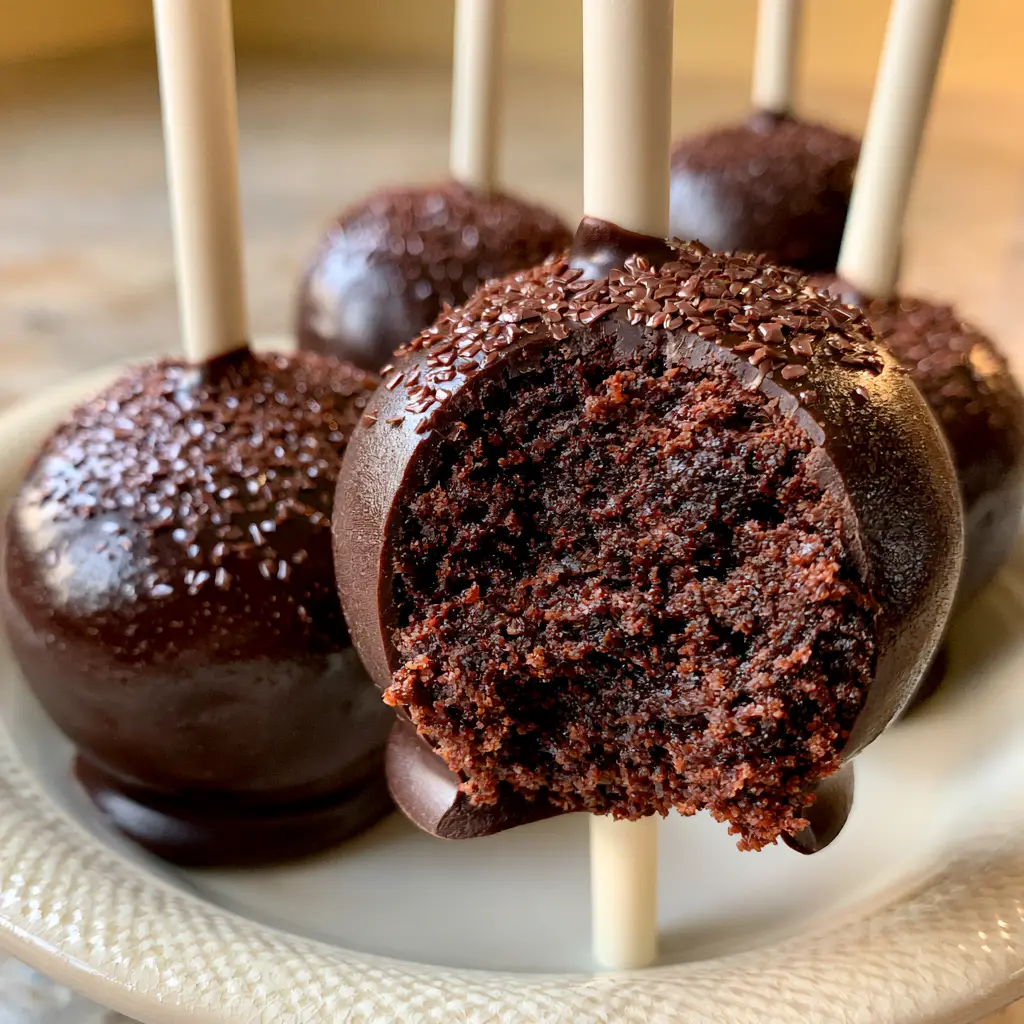
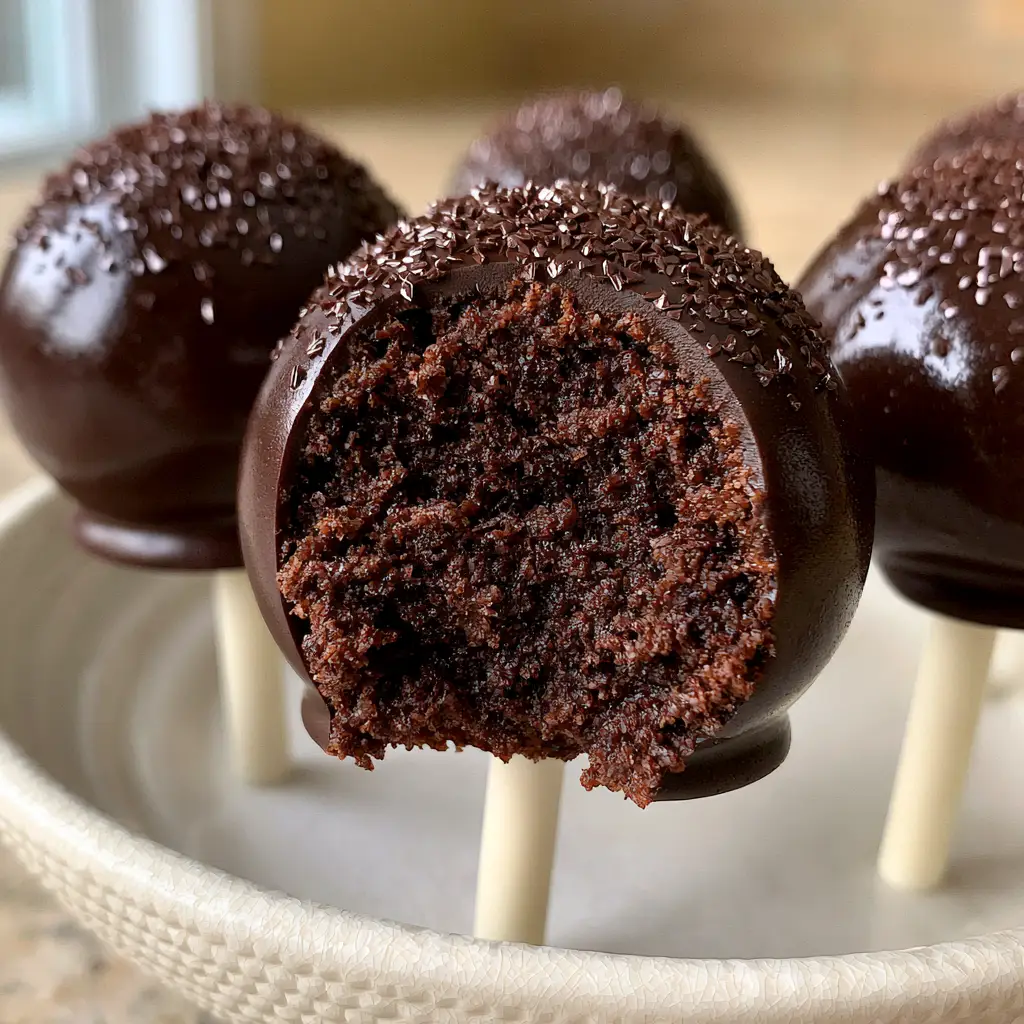
Achieving that professional, high-end look requires more than just luck; it requires a deep understanding of moisture ratios and chocolate tempering. We are recreating that iconic handheld smartphone photo look—a clean, perfect bite revealing a deep brown crumb, wrapped in a glossy dark chocolate coating that shines under natural daylight. If you have ever struggled with dry centers or cracked shells, this forensic breakdown will solve every technical hurdle.
By using premium cocoa and a specific binding technique, we ensure each pop stays firmly on its matte white lollipop stick without sliding. Whether you are prepping for a birthday party or just satisfying a mid-afternoon craving, this recipe delivers a result that looks like it came straight from a soft-focus, warm-toned kitchen professional shoot. Let’s dive into the science of the perfect fudgy crumb.
Why This Fudgy Chocolate Copycat Works
- Structural Integrity: The cake-to-frosting ratio is calibrated to create a dense, “fudgy” center that won’t fall apart when dipped.
- High-Gloss Finish: A touch of coconut oil in the dark chocolate coating ensures a mirror-like sheen without the need for complex tempering.
- Visual Precision: We use tiny chocolate sprinkle flakes to add texture and glisten, perfectly mimicking the premium aesthetic of the original.
- Moisture Retention: The inclusion of buttermilk in the cake base creates a deep brown crumb that remains moist for days.
The Master List of Ingredients for Fudgy Success
All-Purpose Flour: 1 ½ cups (190g). This provides the structural foundation for the cake, ensuring the crumb is tight enough to hold the stick.
Unsweetened Cocoa Powder: ½ cup (45g). Using a high-quality Dutch-processed cocoa gives the center that signature deep brown, almost black, chocolate color.
Granulated Sugar: 1 cup (200g). Sugar does more than sweeten; it hygroscopically holds onto moisture to keep the cake from becoming bread-like.
Baking Soda and Powder: 1 tsp (5g) each. These chemical leaveners provide just enough lift to keep the cake from being a solid brick while maintaining density.
Large Egg: 1 room temperature egg. The proteins in the egg act as a binder, crucial for creating a sturdy cake pop dough texture.
Full-Fat Buttermilk: ½ cup (120ml). The acidity in buttermilk reacts with the baking soda for a tender crumb and adds a subtle tang that balances the sugar.
Vegetable Oil: ¼ cup (60ml). Unlike butter, oil remains liquid at room temperature, which is the secret to a cake that feels “moist” even when chilled.
Pure Vanilla Extract: 1 tbsp (15ml). Vanilla acts as a flavor enhancer, deepening the perception of the chocolate notes.
Hot Water: ½ cup (120ml). Adding hot water at the end “blooms” the cocoa powder, releasing its full aromatic potential and thinning the batter for a smooth bake.
Chocolate Ganache or Frosting: ½ cup (120g). This acts as the glue; we use just enough to achieve a “dense and rich” texture without making the pops greasy.
Dark Chocolate Melting Wafers: 12 oz (340g). Opt for high-quality wafers with a high cocoa butter content to achieve a smooth, crack-free finish.
Coconut Oil: 1 tsp (5g). This is our secret for that “glossy dark chocolate coating” seen in the visual blueprint.
Tiny Chocolate Sprinkle Flakes: 2 tbsp (20g). These glistening flakes provide the elegant, sparse garnish that distinguishes a premium pop from a standard one.
Essential Tools for a Professional Finish
To recreate the visual of cake pops secured on matte-white lollipop sticks resting on a textured ceramic dish, you need the right gear. A standard baking pan (9×9 inch) is required for the initial cake bake. You will also need a large mixing bowl for the crumbling process.
For the dipping phase, a deep, narrow microwave-safe glass or silicone cup is superior to a wide bowl. This depth allows for a single, clean submergence, preventing the streaks and bubbles that ruin a perfectly smooth chocolate coating. Finally, a Styrofoam block or a dedicated cake pop stand is essential to let the pops dry upright without flat spots.
Phase 1: Baking the High-Moisture Chocolate Base
Mixing the Dry and Wet Foundations
Preheat your oven to 350°F (175°C). In a large bowl, whisk together the flour, cocoa powder, sugar, baking soda, and salt until no clumps of cocoa remain.
In a separate vessel, whisk the egg, buttermilk, oil, and vanilla. Slowly pour the wet ingredients into the dry, stirring gently. The batter will be thick and dark brown at this stage.
The Blooming Technique
Pour in the hot water and whisk slowly by hand. You will see the batter transform into a silky, thin liquid. This “blooming” step is what ensures the center of your Starbucks chocolate cake pop recipe has that incredibly dense, rich crumb.
Pour the batter into a greased 9×9 inch pan and bake for 25-30 minutes. Use the toothpick test; you want a few moist crumbs clinging to the stick, rather than a dry, clean pull.
Phase 2: Mastering the Fudgy Dough Consistency
The Destruction and Reconstruction
Once the cake has cooled completely, remove any browned edges with a serrated knife. Crumble the remaining cake into a large bowl until it resembles fine soil. There should be no large chunks left.
Add your frosting one tablespoon at a time. Using your hands, knead the mixture until it reaches the consistency of playdough. When you roll a small ball, it should be smooth with absolutely no cracks on the surface.
Scaling and Rolling
Measure out roughly 1 ½ tbsp (30g) of dough for each pop. Roll them between your palms until they are perfectly spherical. Place the balls on a parchment-lined tray and chill in the refrigerator for at least 2 hours. Chilling is the most vital step in preventing your pops from falling off the stick.
Phase 3: The Art of the Glossy Dark Coating
Preparing the Dip
Melt your dark chocolate wafers in the microwave in 30-second bursts, stirring vigorously between each session. Once fully liquid, stir in the coconut oil. This creates the “glossy, thick, and smooth” appearance we are aiming for.
Dip the tip of a matte white lollipop stick into the chocolate, then insert it about halfway into a chilled cake ball. Let these set for 5 minutes; this act creates a chocolate “seal” that anchors the cake pop.
The Perfect Submerge
Hold the stick and dip the entire cake ball into the chocolate until it reaches the base of the stick. Pull it straight up—do not stir. Gently tap your wrist (not the stick) to allow excess chocolate to fall off. This technique prevents the “cracks or imperfections” mentioned in our visual prompt.
While the coating is still wet, lightly dust the top with the tiny chocolate sprinkle flakes. The glistening flakes will adhere perfectly to the glossy surface. Place the stick into your stand to set.
Pro-Tips for Copycat Success
- Temperature Control: Never dip a frozen cake ball into hot chocolate. The extreme temperature difference will cause the chocolate to expand and crack as it cools.
- The Tap Method: If you see a bubble, use a toothpick to pop it immediately before the chocolate sets to maintain that “completely smooth” look.
- Oil Selection: Do not use olive oil for the coating; the flavor is too strong. Refined coconut oil is flavorless and provides the best sheen.
- Dough Texture: If your dough feels greasy, you’ve added too much frosting. Add a few more dry cake crumbs to balance the moisture.
What to Serve with Rich Chocolate Pops
These decadent treats are best enjoyed with a contrasting beverage, like a cold glass of milk or a sharp espresso. If you are building a dessert table, they pair beautifully with other handheld classics. Consider adding strawberry shortcake pops for a fruit-forward contrast or classic vanilla pops for those who prefer a lighter flavor profile.
For a full coffeehouse spread, you might also include cinnamon roll inspired treats to mimic the bakery case variety found at your favorite cafe.
Frequently Asked Questions
The secret to a professional gloss is adding a small amount of refined coconut oil or vegetable shortening to your high-quality dark chocolate melting wafers. This thins the chocolate for a smooth pour and high sheen.
Because of the high moisture content and protective chocolate shell, these pops stay fresh for up to 5 days in the refrigerator. For the best fudgy texture, let them sit at room temperature for 15 minutes before serving.
First, dip the tip of the stick into the melted chocolate before inserting it into the cake ball. Second, ensure the dough is dense enough; too much frosting makes the pops heavy and greasy, causing them to slide.
Cracking usually happens because of extreme temperature changes. If the cake balls are frozen and the chocolate is very hot, the cake expands as it warms, breaking the shell. Ensure the balls are chilled but not frozen.
The Ultimate Starbucks Chocolate Cake Pop Recipe
Starbucks Chocolate Cake Pop Recipe: The Ultimate Fudgy Copycat Guide
Ingredients
Equipment
Method
- Whisk flour, sugar, cocoa, baking soda, and salt. Add egg, buttermilk, vanilla, and oil, then stir in hot water until silky.
- Pour into a 9x9 pan and bake at 350°F (175°C) for 25-30 minutes until moist crumbs cling to a toothpick.
- Crumble the cooled cake and mix with frosting until a dense, fudge-like dough forms.
- Roll into 1.5 tbsp balls and chill for 2 hours to ensure they stay on the sticks.
- Melt chocolate wafers with coconut oil until completely smooth and glossy.
- Submerge the chilled pop vertically into the chocolate, tap off excess, and immediately dust with chocolate sprinkle flakes.
Notes
Use a deep, narrow glass for dipping to get a single smooth coat without imperfections.
Closing Thoughts on Handcrafted Treats
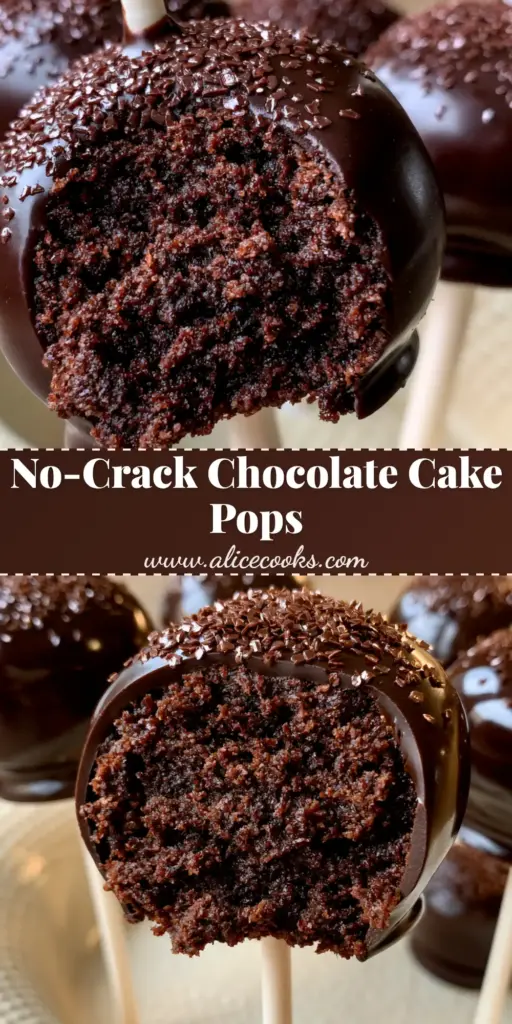
Mastering the Starbucks chocolate cake pop recipe at home is a rewarding journey into the textures of premium pastry work. From the incredibly dense, fudgy center to the glistening, glossy dark chocolate coating, every element of this recipe is designed to impress both the eyes and the palate. The use of matte white sticks and elegant sprinkle dusting ensures your results look as good as they taste.
We invite you to share your results! Did you achieve that perfect, crack-free shell? Leave a comment below or share your photos on Pinterest to show off your baking prowess. Happy dipping!


