There is a specific nostalgia associated with the thick, pale-pink frosted sugar cookies found in every grocery store bakery across the nation. The Lofthouse cookie cake pops take that iconic, cakey experience and transform it into a portable, high-fashion gourmet treat. By distilling the essence of the classic soft-baked sugar cookie into a dense, moist, and fudgy center, we have created a dessert that bridges the gap between childhood comfort and sophisticated pastry art.
Imagine biting through a flawlessly smooth, semi-thick, and glossy white chocolate candy coating to reveal a vibrant, fudgy pink core. This isn’t just a cake pop; it is a precision-engineered textural experience. The inclusion of tiny rainbow sprinkles within the dough provides a subtle crunch that contrasts beautifully with the velvet-smooth exterior and the delicate, precise zig-zag drizzle of pastel pink icing.
Whether you are preparing for a themed celebration or simply craving a professional-grade sugar cookie experience, these Lofthouse cookie cake pops deliver on every sensory promise. From the natural side-daylight illuminating the glossy shell to the moist crumb revealed in every bite, this recipe is designed for visual impact and culinary excellence. Let’s dive into the science of the perfect “fudgy” cookie pop.
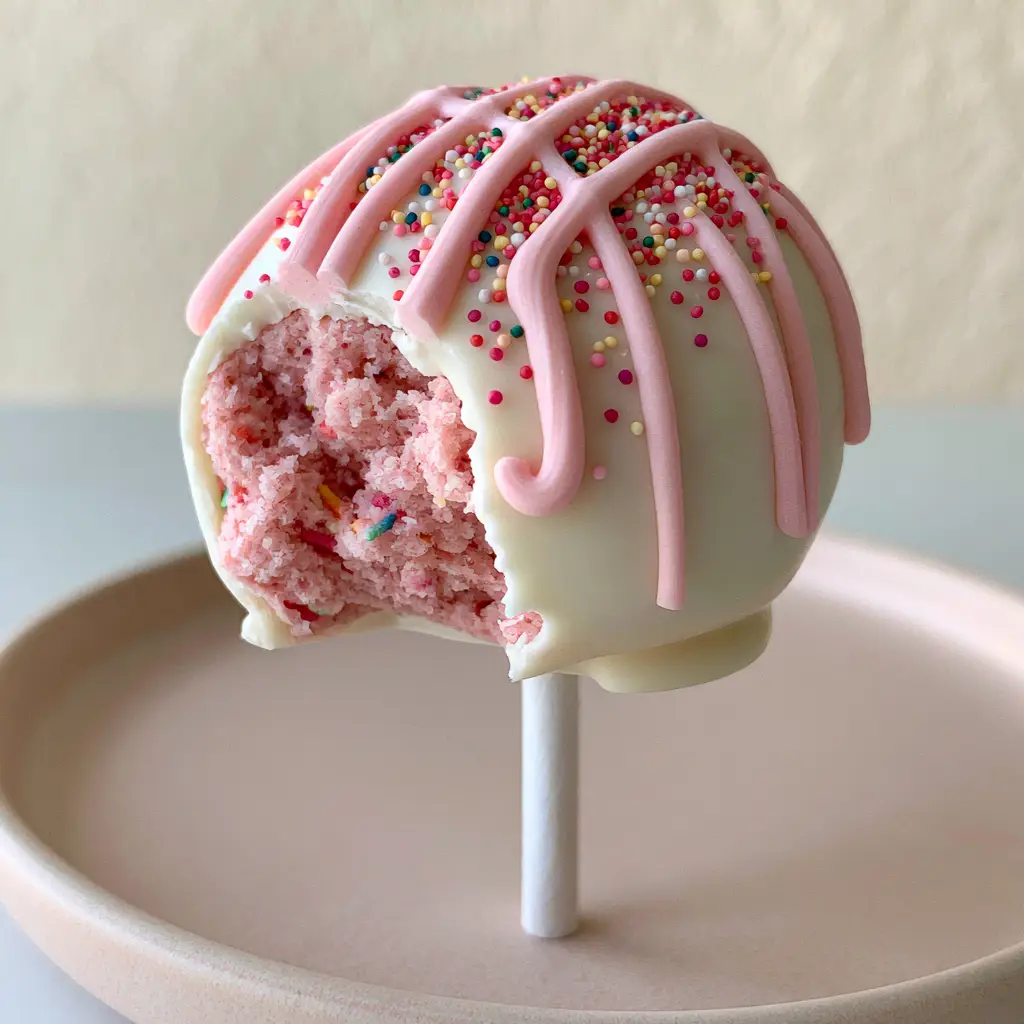
Why These Gourmet Sugar Cookie Pops Stand Out
- Unmatched Fudgy Texture: Unlike traditional cake pops that use dry cake crumbs, our base utilizes a specifically formulated soft-baked sugar cookie dough for a denser, more luxurious mouthfeel.
- Visual Precision: We mimic the exact aesthetic of the classic Lofthouse cookie using a two-tone pink and white palette, finished with signature miniature rainbow nonpareils.
- Pro-Grade Coating: Learn the technique for a “snap-perfect” white chocolate shell that doesn’t crack or sweat, providing a professional finish every time.
- Balanced Flavor Profile: By utilizing high-quality almond extract and sea salt, we elevate the sugary base into a multi-dimensional dessert that isn’t cloyingly sweet.
The Secret Science of the Pink Sugar Cookie Base
To achieve the signature “Lofthouse” crumb, we must manipulate the moisture content of our dough. Standard cookies are often crisp, but Lofthouse cookie cake pops require a cake-like structure that remains moist even after being crumbled and reformed. We achieve this by using a combination of all-purpose flour and cornstarch, which softens the gluten and creates that melt-in-your-mouth experience.
All-Purpose Flour (312g / 2.5 cups): This provides the necessary structure to hold the lollipop stick firmly without the pop falling apart. Ensure you measure by weight to keep the dough from becoming too dry and crumbly.
Cornstarch (15g / 2 tbsp): This is the “secret” to the tender, cakey texture. It prevents the flour from developing too much gluten, ensuring the interior of your pop remains fudgy rather than chewy.
Unsalted Butter (226g / 1 cup): High-quality, room-temperature butter provides the fat necessary for a rich flavor. We cream this with the sugar until it is pale and aerated, creating tiny air pockets for a lighter crumb.
Sour Cream (60g / 1/4 cup): This is a non-negotiable ingredient for authentic Lofthouse flavor. The acidity reacts with the leavening agents to provide a soft lift and a subtle tang that balances the sugar.
Pink Food Gel: Unlike liquid coloring, gel provides a vibrant “Lofthouse pink” without thinning the dough. A single drop is usually enough to achieve the soft pastel hue seen in our visual blueprint.
Tiny Rainbow Sprinkles (Jimmies): These are folded directly into the dough before baking. They provide the “funfetti” visual inside the pop that is revealed when the guest takes their first bite.
Essential Tools for Achieving a Glossy Finish
To recreate the ultra-realistic, gourmet look of our inspiration photo, you need a few key pieces of equipment. Achieving a flawlessly smooth white chocolate coating requires temperature control and the right dipping vessel. I recommend using a deep, narrow silicone cup rather than a wide bowl; this allows for a full vertical submergence of the pop, preventing uneven coating and air bubbles.
You will also need pristine white paper lollipop sticks. Plastic sticks can often be too slippery for the dense cookie dough, whereas paper sticks provide a slight grip that keeps the pop secure. A high-quality piping bag with a fine-cut tip is essential for the delicate, precise zig-zag drizzle of the pink icing, ensuring your lines are sharp and professional rather than messy.
Mastering the Perfect Cake Pop Texture
Phase 1: Crafting the Soft-Baked Cookie Foundation
Begin by creaming your butter and granulated sugar for at least 3-5 minutes. You are looking for a visual change: the mixture should turn from yellow to a very pale cream color. This aeration is vital for the cake pop dough to have the right volume. Add your egg, sour cream, and a splash of almond extract, whisking until the mixture is cohesive and smooth.
Sift your dry ingredients—flour, cornstarch, baking powder, and salt—into the wet mixture. Fold gently by hand to avoid overworking the gluten. Once the dough is formed, fold in your tiny rainbow sprinkles and a drop of pink gel. Bake at 350°F (175°C) until the edges are just set but the centers are still pale; we want to avoid browning to keep the pink color pure.
Phase 2: Crumbling and Binding for “Fudginess”
Once the cookies have cooled completely, crumble them into fine shards. To achieve the “dense, moist, fudgy” interior described in our prompt, we use a minimal amount of binder. Instead of heavy buttercream, use a tablespoon of softened cream cheese or a small amount of vanilla frosting. Mix until the dough feels like damp sand that holds its shape when squeezed.
Roll the dough into 1.5-inch (3.8cm) spheres. Precision is key here; use a cookie scoop to ensure every pop is identical. Place the spheres on a minimalist, matte-beige ceramic plate and chill in the freezer for 20 minutes. This “flash chill” ensures the dough doesn’t dissolve or fall off the stick when it hits the warm chocolate later.
Achieving the High-Gloss White Chocolate Shell
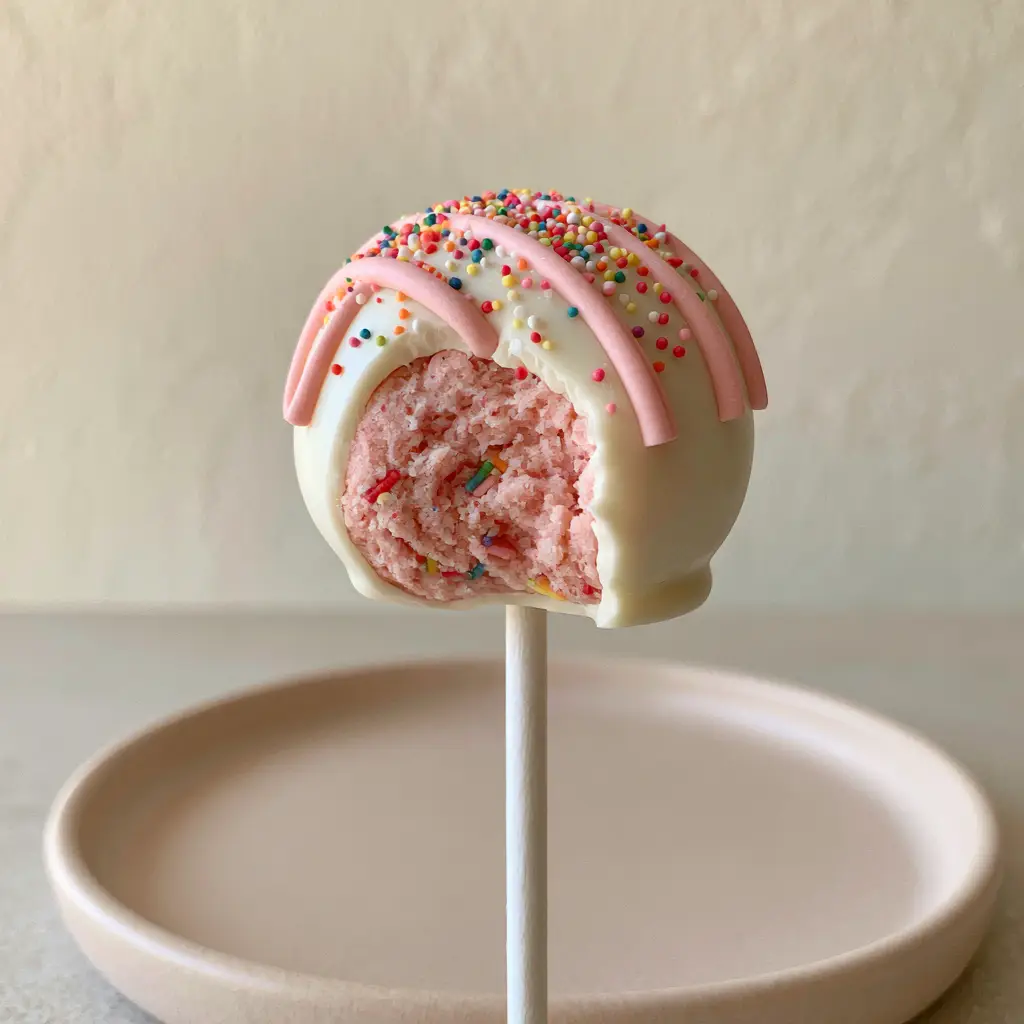
The exterior of the Lofthouse cookie cake pops must be flawlessly smooth and semi-thick. To achieve this, use high-quality white chocolate candy melts or tempered white chocolate couveture. If the chocolate is too thick, add a teaspoon of paramount crystals or coconut oil to thin it to a “3-second ribbon” consistency.
Dip the tip of your white paper lollipop stick into the melted chocolate, then insert it halfway into the chilled cookie ball. This acts as a “glue.” Let it set for 2 minutes before submerging the entire pop. Dip vertically, lift straight up, and gently tap your wrist—not the stick—to remove excess coating. This technique is the key to coating cake pops without leaving unsightly drips or thinning the shell at the top.
The Art of the Pastel Zig-Zag Drizzle
Wait for the white shell to harden completely before attempting the drizzle. Melt a small amount of pastel pink candy coating and transfer it to a piping bag. Snip a tiny hole at the tip. In one fluid, continuous motion, move your hand in a zig-zag pattern over the pops. For the cleanest lines, start the drizzle in the air next to the pop and end it past the other side.
Immediately—before the drizzle sets—fine-dust the pop with miniature rainbow nonpareil sprinkles. Because these sprinkles are so small, they will adhere to the wet drizzle without overwhelming the delicate white background. This layering creates the gourmet, multi-textured look that defines this recipe.
Expert Tips for Success
- Temperature Control: Never dip a frozen cookie ball into hot chocolate. The extreme temperature difference will cause the shell to crack as the dough expands. Aim for “fridge-cold” balls and “warm-to-the-touch” chocolate.
- The Tap Technique: When removing excess chocolate, tap your wrist gently while holding the stick. Tapping the stick directly against the bowl can cause the cookie ball to vibrate off the stick and into the chocolate.
- Sift Your Flour: For the softest “Lofthouse” texture, sifting is mandatory. It aerates the flour and removes clumps, ensuring the fudgy interior is smooth rather than grainy.
- Storage Matters: White chocolate is sensitive to odors. Store your finished pops in an airtight container to prevent them from picking up scents from the refrigerator.
Storage, Reheating, and Freezing
These Lofthouse cookie cake pops are incredibly shelf-stable thanks to the protective chocolate coating. At room temperature, they will stay fresh for up to 3 days. For longer storage, keep them in the refrigerator for up to a week. If you choose to refrigerate them, let them come to room temperature before serving to ensure the white chocolate shell regains its glossy, semi-thick mouthfeel.
You can freeze the undipped cookie balls for up to 3 months. Simply thaw them in the fridge overnight before proceeding with the dipping and decorating steps. Do not freeze the fully decorated pops, as the condensation can cause the nonpareils to bleed and the chocolate to bloom (turn white and streaky).
What to Serve With This
These pops are a showstopper on their own, but they pair beautifully with other classic treats. If you are hosting a dessert bar, consider pairing these with a vanilla cake pops recipe or even a strawberry shortcake cake for a pink-themed spread. For those who love the “soft-baked” aesthetic, these are the perfect companion to funfetti sheet cake.
For a coffee-themed afternoon, the sweetness of the sugar cookie dough is perfectly balanced by a bitter espresso or a cold brew. If you want to expand your skills even further, check out my guide on homemade cake pops recipe basics to master the foundation of this art form.
Frequently Asked Questions
Yes, but real white chocolate must be tempered to set firmly and remain glossy. Candy melts are more beginner-friendly for a semi-thick shell.
The key is using a soft-baked cookie recipe with sour cream and cornstarch, and adding just enough binder (frosting) so the dough feels like damp sand.
Use a piping bag with a tiny opening and move your hand in a fast, continuous zig-zag motion rather than going slowly, which causes ‘shaky’ lines.
Cracking occurs when there is a large temperature difference. If your cookie balls are frozen and your chocolate is very hot, the balls will expand as they warm, cracking the shell.
This usually happens if the dough is too heavy or the stick wasn’t ‘glued’ with chocolate first. Ensure you dip the stick in melted chocolate before inserting it into the chilled dough ball.
The Ultimate Lofthouse Cookie Cake Pops Recipe
Lofthouse Cookie Cake Pops: The Ultimate Soft-Baked Copycat Recipe
Ingredients
Equipment
Method
- Cream the room-temperature butter and sugar for 3-5 minutes until pale and fluffy. Beat in the egg, sour cream, and almond extract.
- Sift in the flour, cornstarch, and baking powder. Add pink food gel and fold in rainbow jimmies until just combined. Bake at 350°F (175°C) for 10-12 minutes. Do not brown.
- Crumble the cooled cookies. Add a small amount of binder (frosting or cream cheese) until the dough is moist and fudgy. Roll into 24 uniform spheres.
- Dip the ends of paper sticks into melted white chocolate and insert halfway into the balls. Chill in the freezer for 20 minutes.
- Dip each pop into the smooth white chocolate coating. Tap your wrist to remove excess. Let the shell harden completely.
- Pipe a zig-zag drizzle of pink icing over each pop. While still wet, dust with miniature rainbow nonpareils.
Notes
Use a deep cup for dipping to achieve a perfectly smooth, single-coat finish.
Closing & Call to Action
Creating these Lofthouse cookie cake pops is a rewarding blend of baking science and artistic expression. The contrast between the vibrant pink, sprinkle-studded interior and the pristine white chocolate shell makes them a guaranteed hit at any gathering. They capture the essence of a classic bakery favorite while elevating it into a gourmet, handheld experience.
Did you try this recipe? I would love to see your results! Leave a comment below and tell me how your “fudgy” centers turned out. Don’t forget to share your creations on Pinterest and tag me so I can see your beautiful pastel drizzles!


