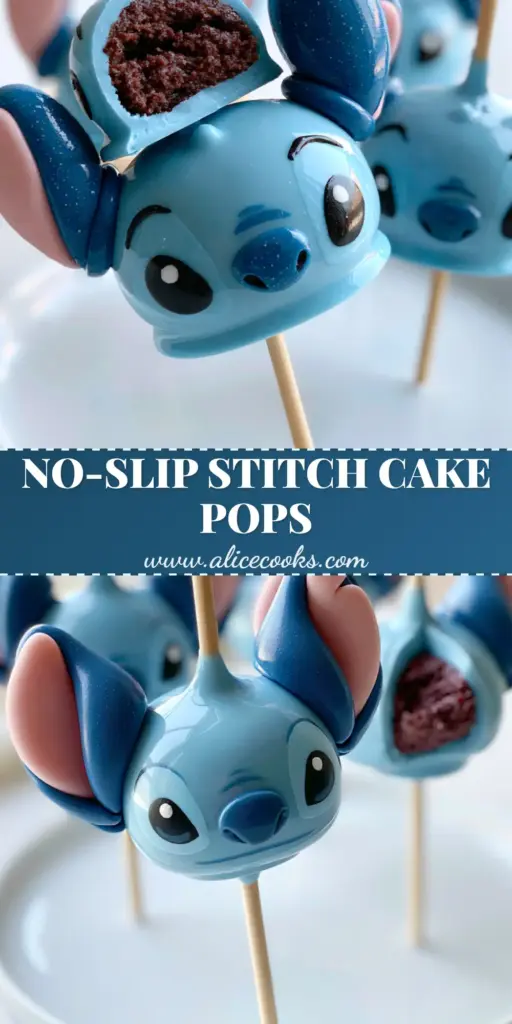
If you are looking to bring a touch of Disney magic into your kitchen, these stitch cake pops are the ultimate project for any baking enthusiast. Inspired by everyone’s favorite blue extraterrestrial, these treats feature a moist, decadent chocolate truffle center encased in a perfectly smooth, glossy sky-blue shell. The contrast between the vibrant blue coating and the rich, dark interior makes every bite a sensory experience.
Creating these adorable characters requires a blend of culinary precision and artistic flair. From crafting the signature pink-lined ears to hand-painting the curious facial expressions with royal icing, every step is designed to achieve a professional, bakery-quality result. Whether you are hosting a themed birthday party or simply want to master the art of the perfectly smooth coating, this guide will lead you through the forensic details of candy melt chemistry and cake structure.
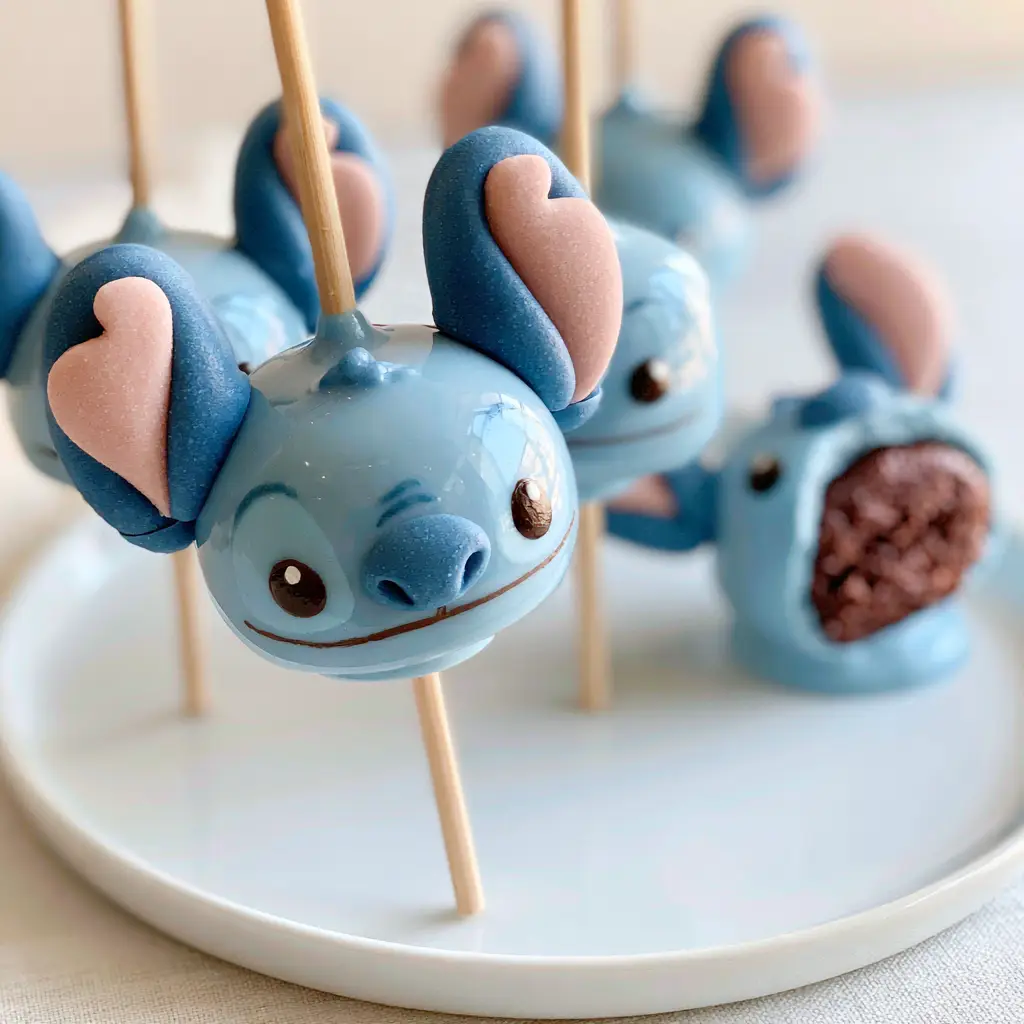
Why You Will Love These Hand-Crafted Stitch Treats
- Decadent Texture: Unlike standard dry cake balls, these feature a chocolate truffle-style interior that melts in your mouth.
- Visual Perfection: The recipe is engineered to produce a high-gloss, sky-blue finish that mimics the professional look of Starbucks-style treats.
- Customizable Expressions: Using royal icing allows you to capture Stitch’s mischievous personality in every single pop.
- Structural Integrity: We use specific ratios of fats and sugars to ensure the large candy melt ears stay securely fastened without cracking the shell.
The Essential Components for Galactic Stitch Cake Pops
To achieve the specific visual results described in our blueprint, you need high-quality ingredients that behave predictably under heat and manipulation. We aren’t just making cake; we are building a structural dessert.
For the Moist Chocolate Truffle Interior
Chocolate Cake Scraps: You will need 4 cups (approx. 400g) of crumbled chocolate cake. A high-moisture cake works best to achieve that truffle-like consistency when mixed with binder.
Chocolate Ganache or Buttercream: 1/2 cup (120ml) of frosting or ganache acts as the “glue.” This creates the ideal cake pop dough that is pliable but not greasy.
Sea Salt: A pinch (1g) of fine sea salt is the “invisible” ingredient that cuts through the intense sweetness of the candy coating, elevating the chocolate profile.
For the Sky-Blue Shell and Iconic Details
Sky-Blue Candy Wafers: 2 cups (340g) of blue candy melts. This provides the primary color for Stitch’s body and ensures a uniform, “snap-able” shell.
Pink Candy Melts: 1/2 cup (85g) for the inner ear detail. These will be molded or piped separately to create the distinct two-tone ear look.
Paramount Crystals or Coconut Oil: 1 tbsp (15g) to thin the candy coating. This is the secret to achieving that macro-shot-worthy glossy finish without bubbles.
Royal Icing: A small batch made from 1 cup (120g) powdered sugar and 1 tbsp (15g) meringue powder. This is used for the hand-painted eyes, nose, and mouth details.
Professional Tools for Precision Decorating
To mirror the handheld smartphone photo aesthetic, your stitch cake pops must be structurally sound and flawlessly finished. You will need a few specific items to ensure success.
- White Lollipop Sticks: 6-inch (15cm) sticks are the standard for maintaining balance.
- Styrofoam Block or Cake Pop Stand: Essential for letting the pops dry upright so the “sky-blue” coating remains smooth and round.
- Fine-Tip Food-Safe Brushes: For painting the royal icing facial details with precision.
- Microwave-Safe Silicone Cup: A narrow, deep cup is better for dipping than a wide bowl, as it allows for a full, single-submerge coat.
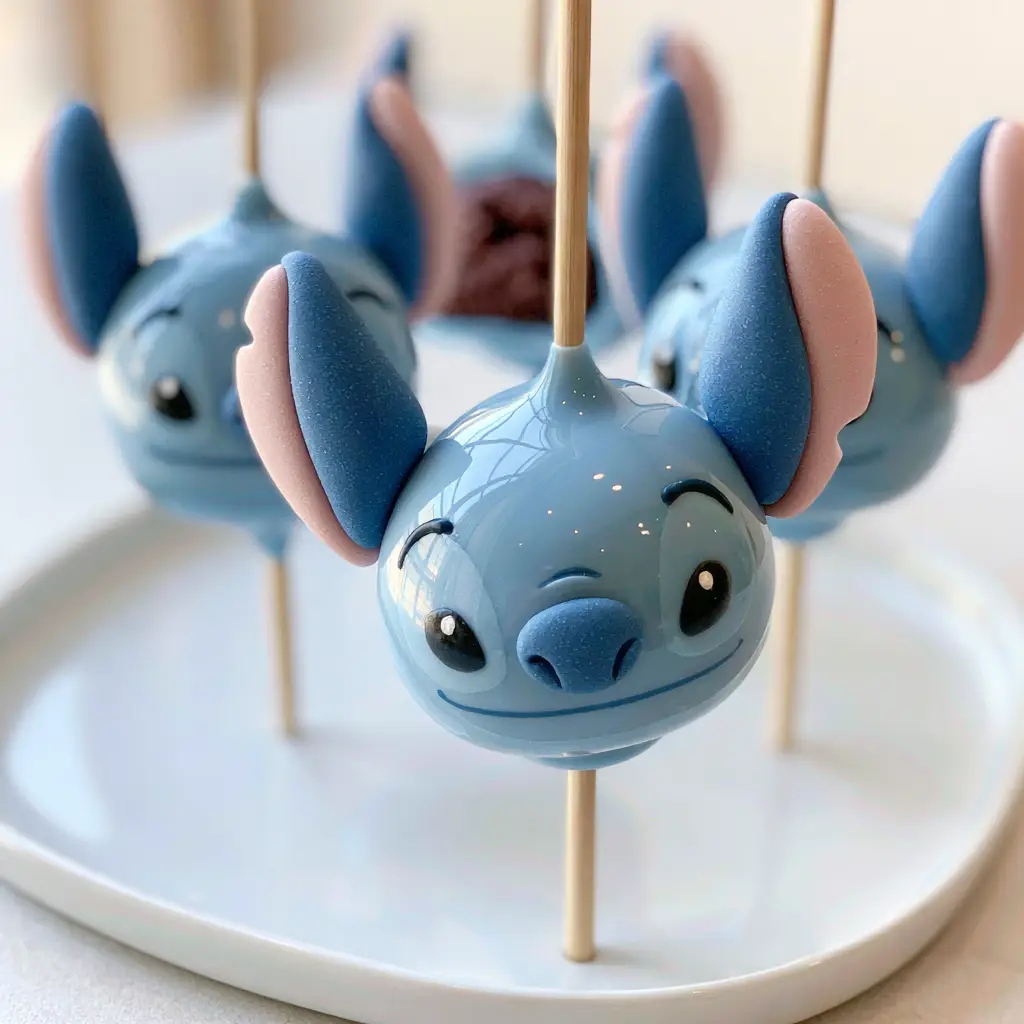
Step-by-Step Instructions for the Perfect Stitch Design
Phase 1: Engineering the Chocolate Truffle Base
Start by crumbling your chocolate cake into fine, uniform crumbs. Avoid leaving any large chunks, as these will create lumps in your final stitch cake pops.
Slowly add your chocolate ganache or frosting, one tablespoon at a time. Mix until the dough feels like damp sand and holds its shape when squeezed. If you add too much frosting, the pops will be too heavy and slide off the sticks.
Scoop approximately 2 tablespoons (30g) of dough and roll it into a smooth, spherical ball. Place the balls on a parchment-lined tray and chill in the refrigerator for at least 30 minutes to firm up the fats.
Phase 2: Anchoring and Dipping the Pops
Melt a small amount of the sky-blue candy wafers. Dip the tip of a white lollipop stick into the melted candy, then insert it about halfway into a chilled cake ball. This acts as a “weld” to keep the pop secure.
Once the weld has set, prepare the full batch of blue coating. Melt the wafers in 30-second intervals, stirring in the paramount crystals or coconut oil until the mixture flows like warm honey. This fluidity is key for mastering the dipping technique.
Submerge the cake pop vertically into the blue coating until the cake is fully covered. Lift it out, and gently tap your wrist to shake off the excess. You are looking for a glossy, perfectly smooth surface with no visible cake showing through.
Phase 3: Crafting and Attaching the Ears
While the blue shell is still slightly tacky (or using a drop of melted candy as glue later), you need to attach the ears. To make the ears, pipe small almond-shaped pieces of blue candy melts onto parchment paper. Once set, pipe a smaller pink almond shape inside the blue to create the inner ear.
Carefully press the ears into the sides of the stitch cake pops. Hold them for a few seconds until the candy sets. The result should be “flawlessly secured large blue and pink ears” as seen in our visual blueprint.
Phase 4: Hand-Painting the Facial Details
Mix your royal icing to a stiff peak consistency. Divide and tint portions black and white. Use a fine-tip brush to paint Stitch’s large, expressive eyes. Start with the black outer shape, then add a tiny white dot for the “pupil” highlight to give him that cute, soulful look.
Add a slightly darker blue or black nose and a simple curved line for the mouth. Allow the icing to dry completely in a cool, dry place before handling or packaging.
Expert Tips for a Flawless Finish
- Temperature Control: Never dip a frozen cake ball into hot candy melts. The extreme temperature difference will cause the shell to crack as the cake expands. Aim for chilled cake and warm (not hot) coating.
- The Gloss Secret: If your coating looks dull, it’s likely too thick. Adding a tiny bit more coconut oil will increase the shine, capturing that soft, side-angled daylight highlight.
- Bubble Trouble: After melting your candy, let it sit for a minute to allow air bubbles to rise to the surface. Pop them with a toothpick before dipping.
- Dough Consistency: For the most “moist chocolate cake truffle interior,” ensure your crumbs are finely processed. You can learn more about this in our guide on achieving the right dough texture.
Storage and Preservation Advice
Because these stitch cake pops are fully encased in a candy shell, they stay fresh longer than traditional cake. You can store them in an airtight container at room temperature for up to 3 days, or in the refrigerator for up to a week.
If refrigerating, be aware that condensation may form on the glossy blue shell when brought back to room temperature. To avoid this, place paper towels in the container to absorb moisture. For long-term storage, these can be frozen for up to 6 weeks, though the royal icing details may soften upon thawing.
What to Serve with Themed Cake Pops
If you are creating a full dessert table for a Disney-themed event, these pops pair beautifully with other handheld treats. Consider serving them alongside strawberry shortcake pops for a color contrast, or even some cinnamon roll pops for a variety of flavors. A bright tropical fruit platter also complements the “Lilo & Stitch” Hawaiian theme perfectly.
Frequently Asked Questions
Absolutely! Using a pre-made chocolate cake or even leftover scraps is a great way to save time. Just ensure you crumble it finely to get that truffle-like interior.
The secret to a glossy finish is adding a small amount of coconut oil or paramount crystals to your candy melts. This thins the coating, allowing it to flow evenly and air bubbles to escape.
Attach the ears while the blue coating is still slightly wet. If the coating has already hardened, use a small ‘dot’ of melted candy melts as edible glue to secure them in place.
Use royal icing rather than gel food coloring alone. Royal icing dries hard and matte, which prevents the facial details from smearing when the pops are handled.
Cracking usually happens due to extreme temperature changes. If your cake balls are frozen and your candy coating is very hot, the cake will expand as it warms, causing the shell to snap.
The Ultimate Stitch Cake Pop Recipe
Stitch Cake Pops: The Ultimate Galactic Chocolate Treat Recipe
Ingredients
Equipment
Method
- Mix crumbled chocolate cake with ganache and salt until a pliable dough forms.
- Shape into 12 uniform balls and chill for 30 minutes until firm.
- Dip sticks in melted blue candy and insert into cake balls; let set.
- Submerge each pop into the sky-blue coating, tapping off excess for a glossy finish.
- Attach pre-made blue and pink candy ears to the sides of the pop while coating is tacky.
- Paint eyes and nose using royal icing and fine-tip brushes.
Notes
Add coconut oil to the candy melts to achieve the professional high-gloss shine.
Share Your Galactic Creations!
These stitch cake pops are more than just a dessert; they are a piece of edible art. The combination of the moist chocolate center and the vibrant, glossy exterior makes them a guaranteed hit at any gathering. If you enjoyed this forensic deep-dive into Disney-inspired baking, please leave a comment below and share your results!
Don’t forget to follow us and pin this recipe to your favorite boards on Pinterest so you can find it for your next celebration. Happy baking!