There is nothing quite like the sensory experience of breaking open warm chocolate stuffed cookies. As you gently pull the golden-brown crust apart, the tension gives way to a thick, molten, and glossy dark brown hazelnut-cocoa spread that slowly oozes out. It is a moment of pure culinary theater, captured perfectly in the way the soft, chewy dough yields to a liquid heart.
This recipe isn’t just about a hidden surprise; it is about the architecture of texture. From the pools of melted dark chocolate chunks on the surface to the crunch of flaky sea salt crystals, every bite is designed to balance richness with a sophisticated finish. If you have ever craved a professional bakery-style cookie at home, this is the blueprint you have been waiting for.
Whether you are preparing these for a special occasion or a cozy weekend treat, the aroma of toasted hazelnuts and browning butter will fill your kitchen. These cookies represent the pinnacle of home baking—a sophisticated, multi-textured dessert that looks as good as it tastes. Get ready to master the art of the “lava center” cookie.
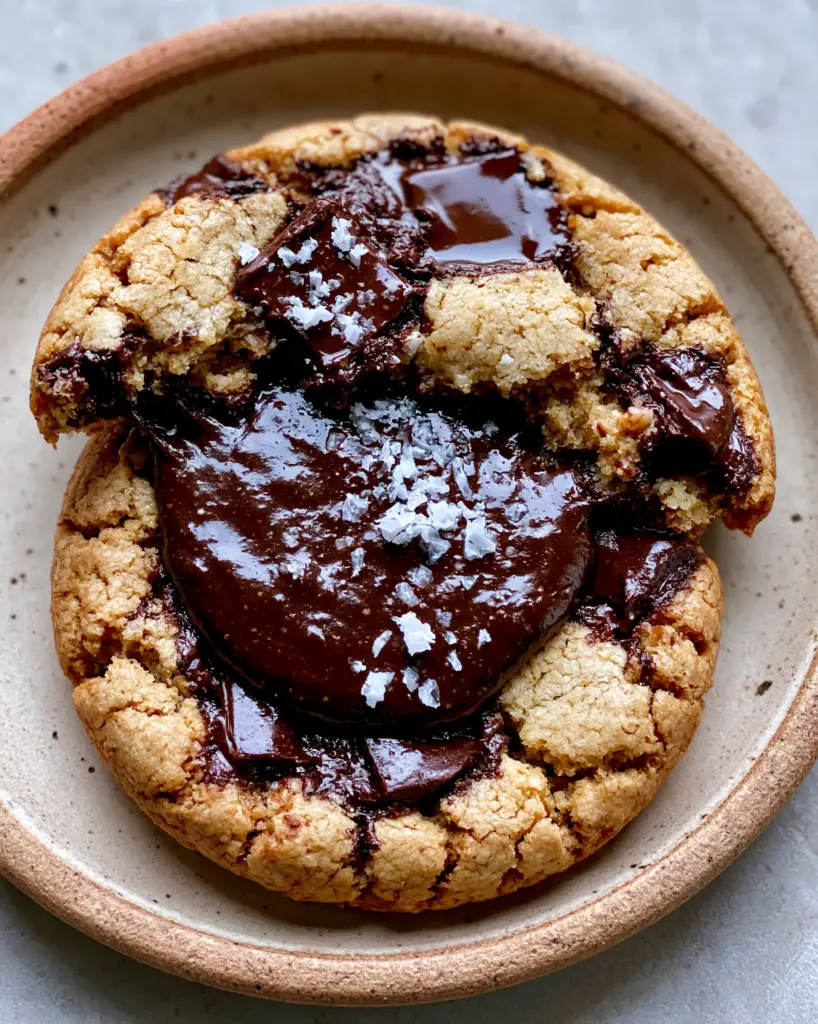
The Irresistible Appeal of the Ultimate Lava Cookie
- The Molten Core: A generous center of glossy dark brown hazelnut-cocoa spread that remains liquid even after baking.
- Textural Contrast: A soft and chewy interior protected by a golden-brown, cracked, and slightly crisp outer crust.
- Premium Chocolate: Hand-chopped dark chocolate chunks that create intense “pools” of cocoa throughout the dough.
- The Finishing Touch: A pinch of flaky white sea salt crystals to cut through the sweetness and enhance the hazelnut notes.
The Essential Pantry Items for Gooey Lava Centers
To achieve the visual and structural results described in our blueprint, every ingredient serves a specific scientific purpose. We aren’t just mixing dough; we are building a vessel for molten chocolate. If you enjoy experimenting with different textures, you might also love our soft peanut butter pudding cookies for another twist on the classic treat.
Unsalted Butter: 1 cup (227g) of room temperature butter provides the fat necessary for a tender, melt-in-your-mouth crumb. It carries the flavor of the sugars and ensures the cookie has enough structure to hold the heavy stuffing.
Brown Sugar: 1 cup (200g) of packed light brown sugar is non-negotiable for that soft, chewy texture. The molasses in the sugar attracts moisture, preventing the cookie from becoming a dry biscuit.
Granulated Sugar: ½ cup (100g) of white sugar assists in creating those beautiful golden-brown cracked edges. It helps the dough spread just enough while encouraging the Maillard reaction for a toasted flavor.
Large Eggs: 2 room temperature eggs act as the primary emulsifier. They bind the fats and liquids together, providing the protein structure needed to keep the hazelnut spread from leaking out during the bake.
All-Purpose Flour: 2 ¾ cups (345g) provides the foundational structure. We use a precise amount to ensure the cookie is sturdy enough to be “stuffed” but light enough to remain soft.
Cornstarch: 1 tsp (3g) is our “secret” ingredient for a professional bakery finish. It softens the proteins in the flour, resulting in a more delicate and chewy bite that stays fresh longer.
Dark Chocolate Chunks: 1 ½ cups (250g) of high-quality dark chocolate (60% cacao or higher). Using chunks instead of chips is vital for creating those large, glossy pools of chocolate seen in the visual prompt.
Hazelnut-Cocoa Spread: ½ cup (150g) of chilled spread. This will be frozen into dollops to ensure it remains a molten, glossy dark brown center rather than baking into the dough.
Flaky Sea Salt: 1 tbsp (10g) for finishing. These large crystals provide a visual pop against the dark chocolate and a sharp contrast to the rich hazelnut center.
Critical Tools for the Stuffed Cookie Specialist
Achieving the perfect chocolate stuffed cookies requires more than just a bowl and spoon. You need tools that ensure consistency in size and temperature control. A standard cookie scoop is essential for portioning the dough evenly so that every cookie bakes at the same rate.
A high-quality parchment paper or a silicone baking mat is a must to prevent the bottom of the cookies from browning too quickly. You will also need a small tray that fits in your freezer to prep the hazelnut spread dollops. Finally, a wire cooling rack is necessary to stop the cooking process once the cookies leave the oven, ensuring the bottoms don’t become hard.
The Master Class on Stuffing and Baking the Perfect Cookie
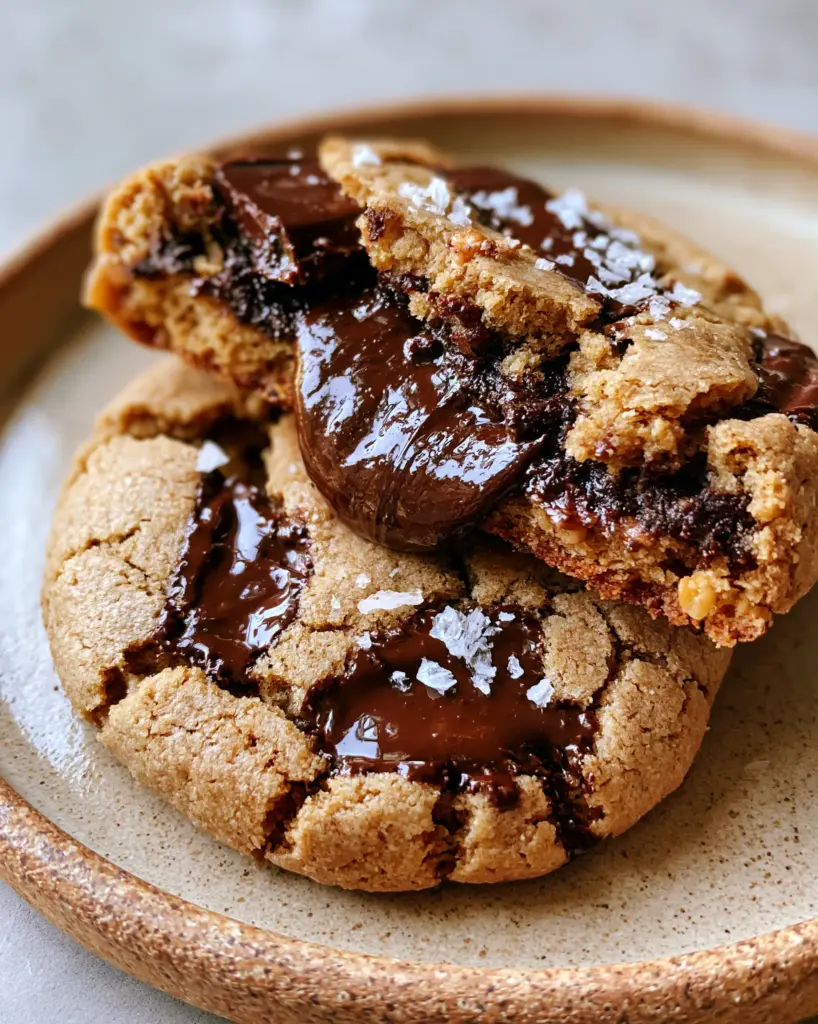
Preparing the Molten Core
The secret to a truly “oozing” center starts hours before you turn on the oven. Take your glossy hazelnut spread and drop teaspoon-sized dollops onto a parchment-lined tray. Freeze these for at least 30-60 minutes until they are rock hard.
If you skip this step, the spread will simply melt into the dough, and you will lose that distinct molten center. We want that thick, dark brown liquid to be the star of the show when the cookie is pulled apart. This technique is similar to how we handle the rich fillings in our brown butter espresso brownies.
Creaming for Maximum Softness
In a large bowl, cream together the softened butter and both sugars for at least 3-4 minutes. You are looking for a pale, fluffy texture. This process incorporates air, which helps the cookies rise and creates the soft, chewy texture we are aiming for.
Add the eggs one at a time, followed by the vanilla extract. Scrape down the sides of the bowl to ensure a homogenous mixture. This ensures that every bite of your chocolate stuffed cookies has a consistent flavor profile.
Folding in the Flour and Chunks
Whisk together the flour, cornstarch, baking soda, and a pinch of table salt. Slowly add the dry ingredients to the wet, mixing only until just combined. Over-mixing at this stage will develop gluten, making your cookies tough instead of soft.
Fold in the dark chocolate chunks by hand. You want them distributed evenly so that the “cracked surface” of the finished cookie is studded with those beautiful pools of melted chocolate. If you enjoy this flavor profile, you should check out our brookie recipe for more chocolatey goodness.
The Art of the Stuffing Technique
Take about 2 tablespoons of dough and flatten it in the palm of your hand. Place one frozen hazelnut dollop in the center. Carefully fold the edges of the dough around the hazelnut spread, pinching the seams together to seal it completely.
Roll the dough into a smooth ball. Ensure there are no thin spots where the hazelnut spread might leak out. Place the stuffed balls on your prepared baking sheet, leaving about 3 inches (7.5cm) of space between each cookie to allow for spreading.
Baking to Golden Perfection
Bake at 350°F (175°C) for 10-12 minutes. You are looking for specific visual cues: the edges should be a light golden-brown, and the surface should have developed those characteristic cracks. The center may still look slightly “underdone,” but that is exactly what we want for a soft, chewy texture.
As soon as you remove them from the oven, sprinkle each cookie with a generous pinch of flaky white sea salt crystals. This is the moment when the residual heat melts the salt slightly into the dark chocolate pools, creating a stunning visual and flavor contrast.
Expert Tips for Bakery-Quality Results
- The Freezer is Your Friend: If your dough feels too soft after stuffing, chill the entire tray of dough balls for 15 minutes before baking. This prevents the cookies from spreading too thin and keeps the filling centered.
- Quality Chocolate Matters: Use a bar of dark chocolate and chop it yourself rather than using chips. Chips contain stabilizers that prevent them from melting into the glossy pools seen in the prompt.
- The “Cookie Scoot”: If your cookies come out in irregular shapes, use a large circular glass or cookie cutter to “scoot” the hot cookies into a perfect circle immediately after they leave the oven.
- Don’t Overbake: The “molten” effect relies on the cookie being slightly soft. If you bake them until they are hard, the center will solidify more quickly as they cool.
Storage, Reheating, and Preserving the Goo
These chocolate stuffed cookies are best enjoyed warm, about 10 minutes after baking. To store leftovers, keep them in an airtight container at room temperature for up to 3 days. However, the hazelnut center will firm up as it cools.
To recapture that “fresh from the oven” molten center, microwave a cookie for 8-10 seconds before serving. This will re-melt the dark chocolate chunks and the hazelnut core. For long-term storage, you can freeze the unbaked stuffed dough balls for up to 3 months and bake them directly from frozen (just add 2-3 minutes to the bake time).
What to Serve with Molten Chocolate Treats
These cookies are incredibly rich, so they pair best with beverages that can cut through the sugar. A cold glass of milk is the classic choice, but a bitter espresso or a dark roast coffee highlights the hazelnut notes beautifully. If you’re hosting a party and want more variety, consider serving these alongside our tangy strawberry rhubarb pie for a fruit-forward contrast.
For a complete dessert spread, you might also include various cake pop flavors to give guests bite-sized options alongside the heavy, indulgent cookies. If you are looking for more no-bake options for a summer event, our no-bake chocolate peanut butter dessert is always a crowd-pleaser.
Frequently Asked Questions
Absolutely. You can store the stuffed, unbaked dough balls in the refrigerator for up to 48 hours or freeze them for up to 3 months for fresh cookies on demand.
You can, but chunks are preferred. Chocolate chips contain stabilizers to help them hold their shape, whereas chopped chocolate bars create those glossy, liquid pools seen in the photos.
The cracked texture comes from the ratio of sugars and the use of baking soda. For extra cracks, you can gently ‘bang’ the baking sheet on the oven rack halfway through baking.
Yes, as long as the internal temperature of the dough has reached 160°F (71°C). The soft center is a combination of the molten hazelnut spread and a deliberate ‘soft-bake’ technique.
This usually happens if the hazelnut dollops weren’t frozen solid before stuffing. Ensure they spend at least 45 minutes in the freezer so they stay intact during the initial bake time.
The Ultimate Recipe for Chocolate Stuffed Cookies
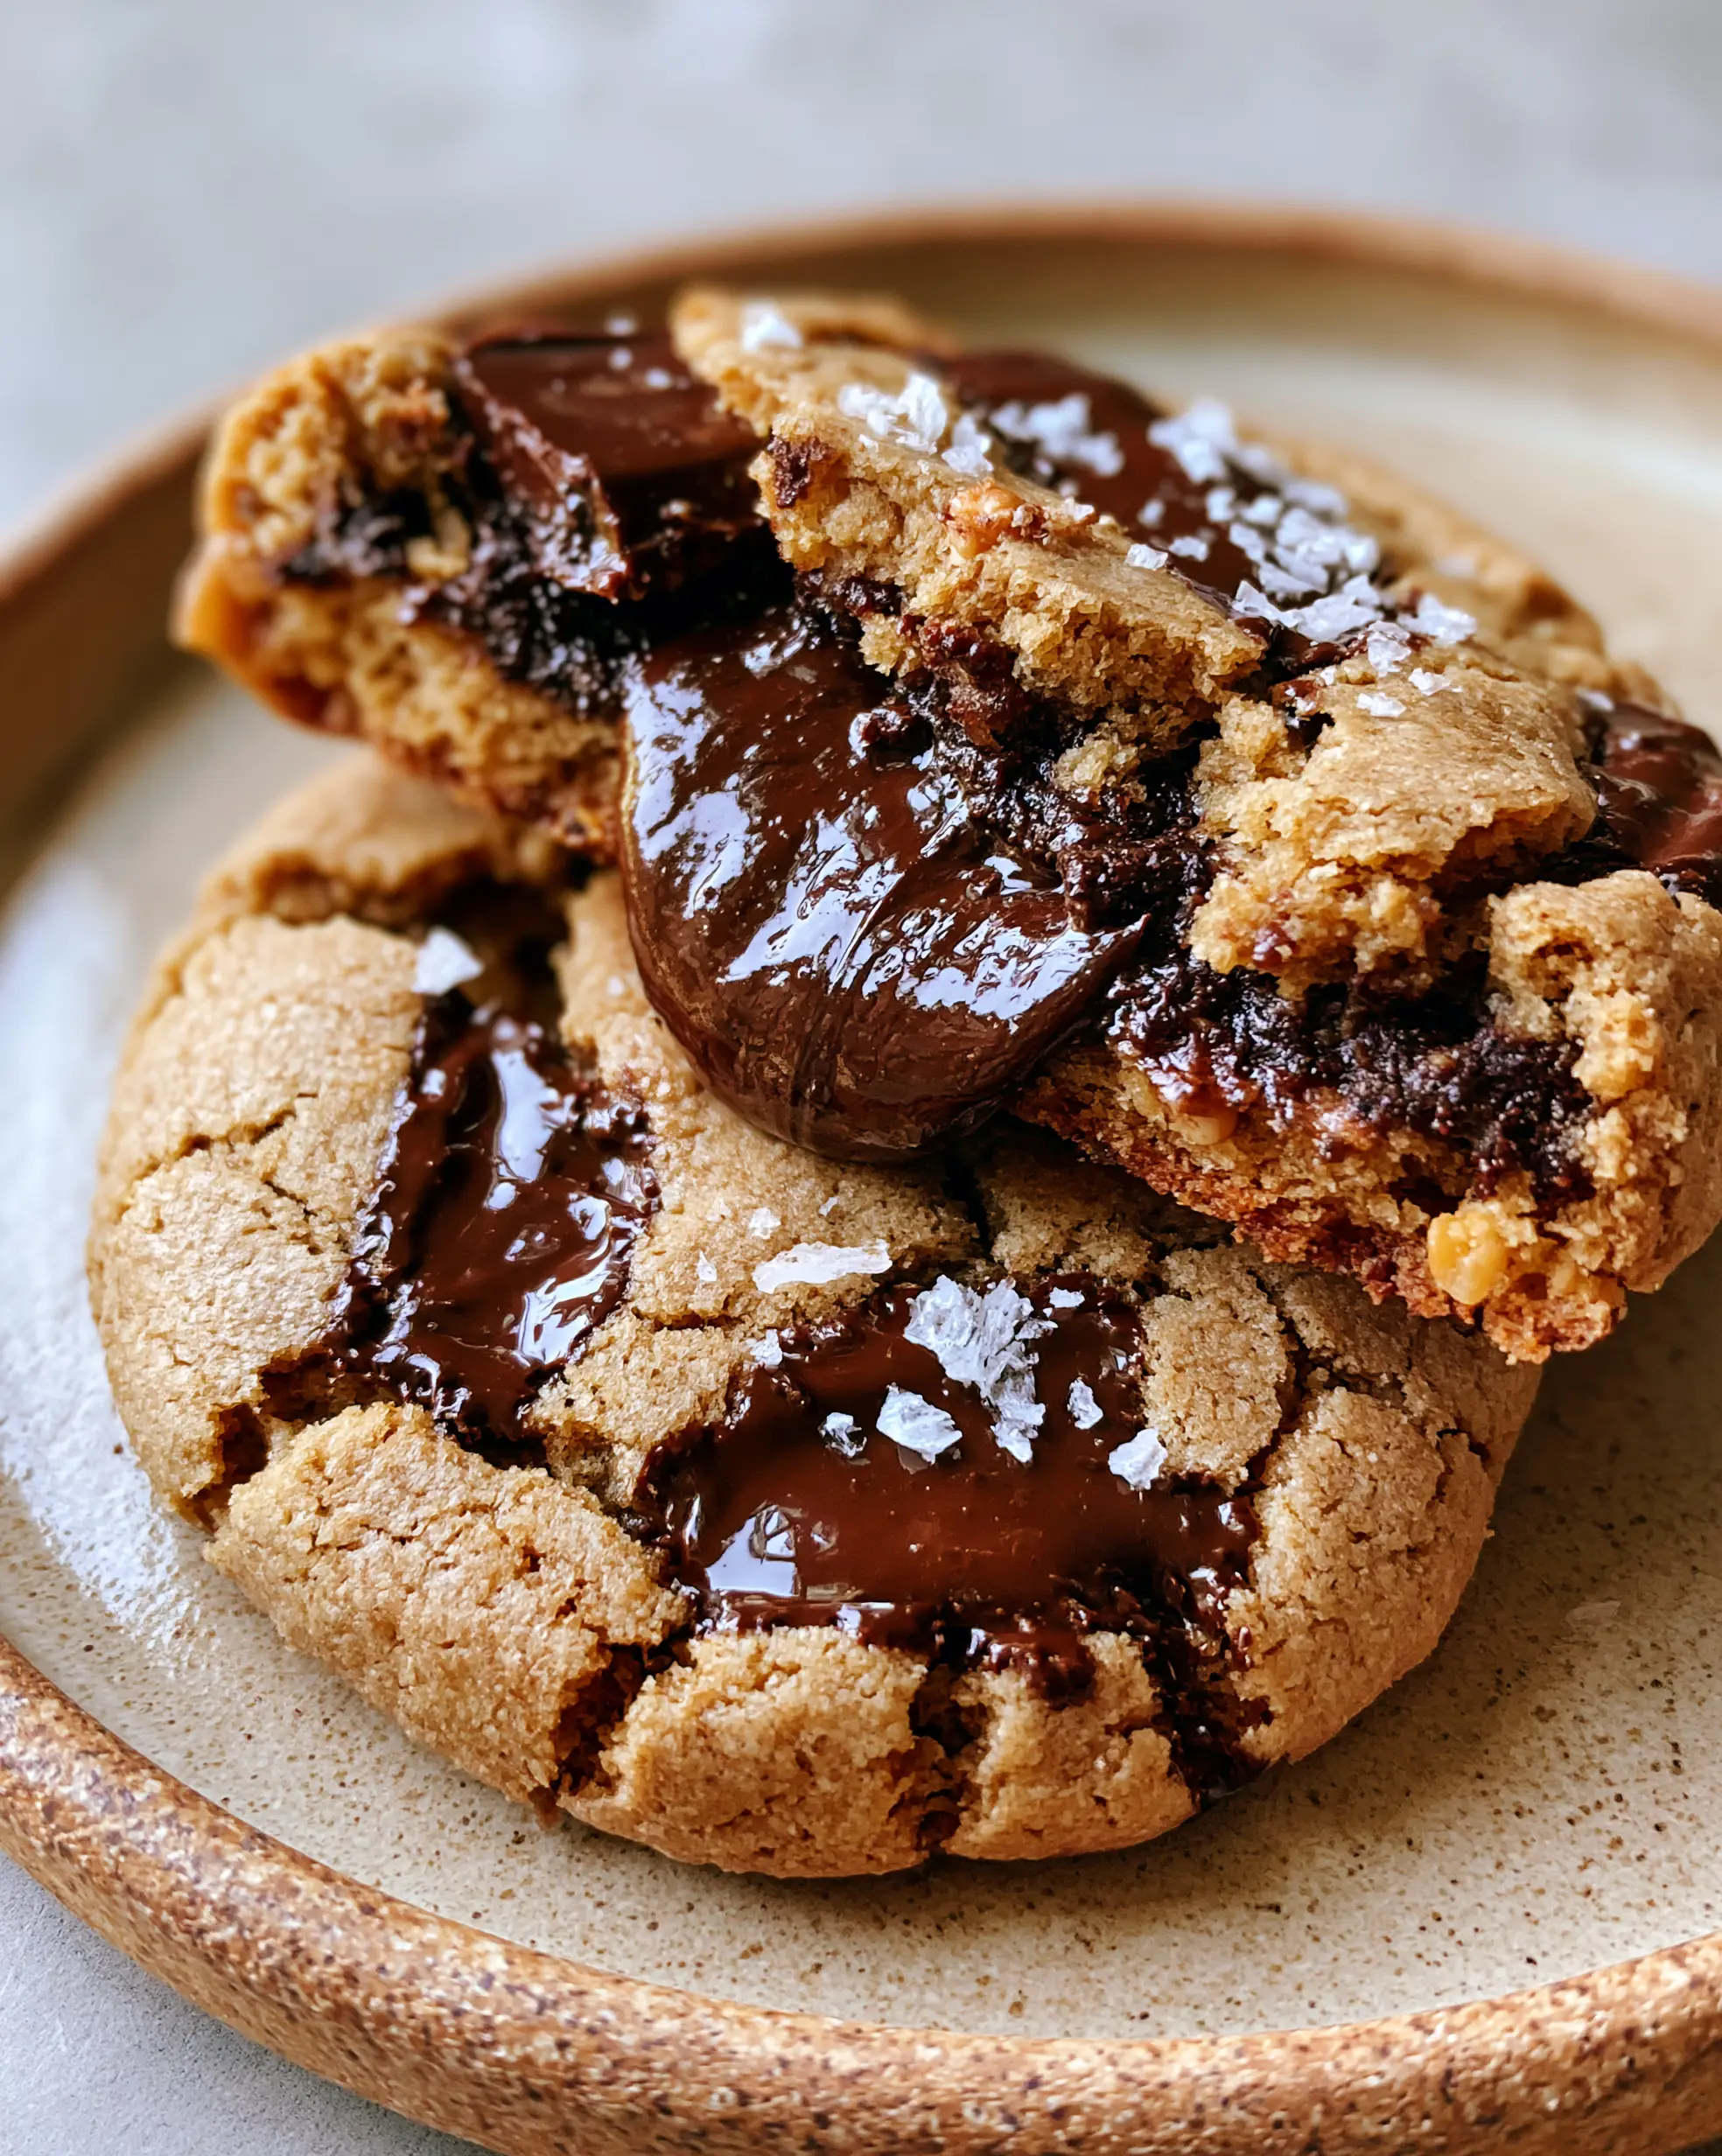
Chocolate Stuffed Cookies with a Molten Hazelnut Center and Flaky Sea Salt
Ingredients
Equipment
Method
- Scoop 12 teaspoon-sized dollops of hazelnut spread onto a parchment-lined tray and freeze for 30-60 minutes until solid.
- Cream the butter, brown sugar, and white sugar until light and fluffy. Beat in the eggs one at a time.
- Fold in the flour, cornstarch, and baking soda. Gently stir in the chopped dark chocolate chunks until evenly distributed.
- Take 2 tablespoons of dough, flatten it, and place a frozen hazelnut dollop in the center. Seal the dough around the filling and roll into a ball.
- Bake at 350°F (175°C) for 10-12 minutes until the edges are golden and the surface is cracked.
- Immediately sprinkle with flaky sea salt while the chocolate pools are still molten.
Notes
Use hand-chopped chocolate for better melting pools than standard chips.

Closing and Call to Action
Mastering these chocolate stuffed cookies is a surefire way to become the favorite baker in your circle. The combination of the golden-brown crust, the molten hazelnut heart, and the sharp hit of sea salt creates a dessert that is truly world-class. If you enjoyed this recipe, please leave a comment below and share your results!
Don’t forget to follow us on Pinterest for more decadent dessert inspiration and visual recipe guides. Happy baking!


