When you imagine the perfect dessert, these No Bake Cheesecake Bars are exactly what should come to mind. They represent the pinnacle of home-style elegance, combining a rustic, rugged base with a sophisticated, velvet-like filling. Unlike traditional baked versions that can crack or become rubbery, this recipe focuses on a controlled, chilled set that preserves the ivory-white purity of the dairy.
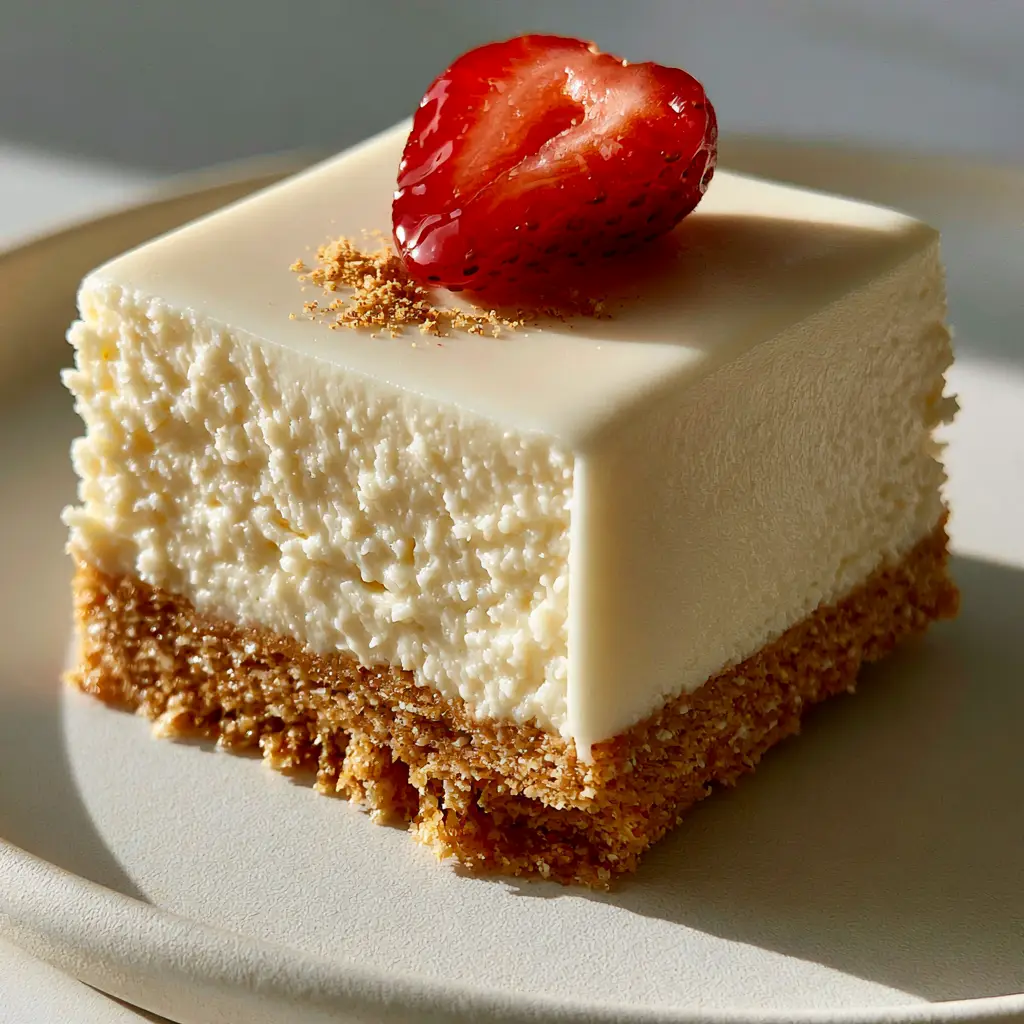
The visual appeal of these No Bake Cheesecake Bars is defined by a striking architectural contrast. We are moving away from the thin, flimsy crusts of the past. Instead, we are building a foundation that is a full inch thick—a golden-brown, buttery pedestal that provides a satisfying crunch against the dense, matte finish of the cream cheese layer.
Whether you are preparing for a summer soirée or a quiet weekend treat, the simplicity of the “no-bake” method ensures a stress-free experience. By following this forensic approach to recipe development, you will achieve a result that looks exactly like a high-end food blog photograph, complete with perfectly clean vertical cuts and vibrant fruit garnishes.
Why You Will Obsess Over These Dense No Bake Cheesecake Bars
- Structural Integrity: A massive 1-inch (2.5cm) graham cracker crust that holds its shape without crumbling, providing a jagged, rustic aesthetic.
- The “Matte” Factor: An ultra-smooth, 2-inch (5cm) ivory-white filling that lacks the glossy, translucent look of over-gelatinized desserts.
- Clean Slicing: Engineered for precision, allowing you to lift a single, perfectly square bar with flawlessly clean vertical sides.
- Sensory Contrast: The marriage of buttery, granular graham crackers with the dense, velvet-textured cream cheese and the snap of a fresh strawberry.
- Effortless Elegance: A high-end aesthetic achieved with zero oven time, making it the ultimate reliable showstopper.
Essential Components for the Perfect Ivory-White Filling
To achieve the visual result of a 2-inch (5cm) thick filling, we must prioritize high-fat, low-moisture ingredients. Using a standard cream cheese won’t suffice; you need full-fat blocks to ensure that “matte” finish. If you enjoy experimenting with different textures in your desserts, you might also find interest in the construction of banana pudding ice cream cake.
Full-Fat Cream Cheese: 24 oz (680g) of brick-style cream cheese provides the essential structure. It must be softened to room temperature to avoid lumps and ensure that velvet-like ivory texture described in our visual blueprint.
Heavy Whipping Cream: 1.5 cups (360ml) of chilled heavy cream (at least 36% fat) acts as our aerator. When whipped to stiff peaks and folded into the cheese, it creates the density needed for a clean vertical cut.
Confectioners’ Sugar: 1.25 cups (150g) of finely powdered sugar provides sweetness without the grit. This is the secret to the matte, non-reflective surface of the filling.
Fresh Lemon Juice: 1 tbsp (15ml) serves as a chemical stabilizer. The acidity reacts with the proteins in the cream cheese, helping the bars firm up into a dense block without the need for heat.
Pure Vanilla Extract: 1 tsp (5ml) adds a floral depth that complements the ivory-white appearance. Use a clear vanilla if you want to maintain an absolute porcelain-white color.
Fine Sea Salt: 0.25 tsp (1.5g) is the “invisible” ingredient that balances the richness of the dairy and enhances the buttery granules of the crust.
Designing the Sturdy 1-Inch Jagged Graham Foundation
The hallmark of this specific recipe is the 1-inch (2.5cm) compressed golden-brown graham cracker crust. This is not just a base; it is a structural necessity that supports the weight of the dense filling. Achieving that “jagged, rustic bottom edge” requires a specific ratio of crumb to fat. If you love bar-style desserts with unique bases, check out these peanut butter butterscotch marshmallow squares.
Graham Cracker Crumbs: 3 cups (375g) of finely pulsed crackers. You want a mix of fine dust and slightly larger “buttery granules” to create the visible texture seen in the high-angle visual prompt.
Unsalted Butter: 12 tbsp (170g) of melted butter. This acts as the “glue.” We use unsalted to control the seasoning, ensuring the crust tastes of toasted honey and cream.
Granulated Sugar: 0.25 cup (50g) helps the crust caramelize slightly in its chilled state, adding a subtle snap that contrasts with the soft filling.
Professional Tools for Clean Vertical Cuts
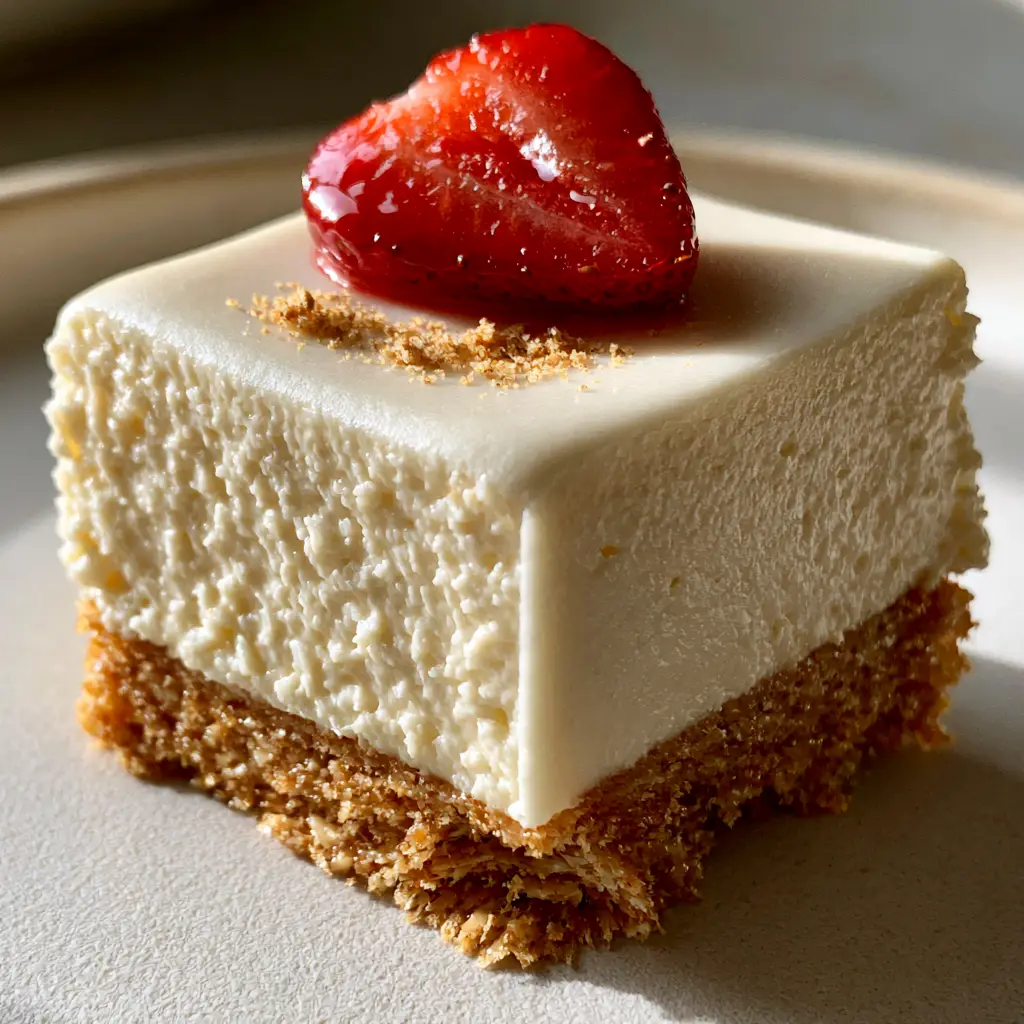
To recreate the “perfectly square” look from our Midjourney prompt, equipment choice is paramount. You will need an 8×8 inch (20x20cm) square baking pan, ideally with a removable bottom or lined with high-quality parchment paper. Using an offset spatula will help you achieve that “flawlessly flat” top surface.
For the clean sides, a sharp chef’s knife dipped in hot water and wiped clean between every single cut is the professional’s secret. This ensures the 2-inch (5cm) filling doesn’t drag or smear down the side of the 1-inch (2.5cm) crust. If you’re interested in more precision-based dessert decorating, you should learn how to make cake pops.
Step-by-Step Guide to a Flawless Velvet Finish
Preparing the Buttery Crumb Base
Start by combining your 3 cups (375g) of graham cracker crumbs with the melted butter and granulated sugar. Stir until the mixture resembles wet sand. The goal is to see “visible buttery granules” throughout the mixture.
Pour the mixture into your lined 8×8 inch (20x20cm) pan. Use the bottom of a heavy measuring cup to press the crumbs down with significant force. Focus on the center, but leave the very bottom edges slightly less compressed to achieve that “jagged, rustic” look seen in the visual prompt. Chill the crust for at least 30 minutes before adding the filling.
Whipping the Matte Cream Cheese Filling
In a large bowl, beat the 24 oz (680g) of cream cheese until it is ultra-smooth and ivory-white. Gradually sift in the powdered sugar and salt, beating on low speed to prevent air bubbles. We want a “matte, velvet-like texture,” not a foamy one.
In a separate chilled bowl, whip your 1.5 cups (360ml) of heavy cream until stiff peaks form. Gently fold the whipped cream and lemon juice into the cream cheese mixture using a silicone spatula. The result should be a thick, dense ivory-white filling that can hold its weight.
Achieving the Flawlessly Flat Surface
Spoon the filling over your chilled 1-inch (2.5cm) crust. Use an offset spatula to smooth the top until it is perfectly flat. Tap the pan firmly on the counter to remove any trapped air pockets, ensuring the “clean vertical side-cut” later on.
Chill the bars in the refrigerator for at least 6 hours, though overnight is preferred for the most “dense” results. This cooling period is non-negotiable for the structural integrity of the 2-inch (5cm) filling layer.
The Final Artistry: Strawberries and Dusting
Just before serving, slice your No Bake Cheesecake Bars into 16 perfect squares. Take fresh, vibrant red strawberries and halve them vertically through the green stem (or remove the stem for a cleaner look). Place a single halved strawberry, cut-side down, in the center of each bar.
To finish, take a small amount of reserved graham cracker crumbs and create a “tiny sprinkle of fine graham cracker dust” over the strawberry and the corner of the cheesecake. Serve each bar on a matte off-white ceramic plate to replicate the high-end food blog aesthetic.
Expert Tips for Success
- Temperature Control: Ensure your cream cheese is truly room temperature. Cold cream cheese will create small white beads that ruin the “matte velvet” visual effect.
- Parchment “Slings”: Use two strips of parchment paper crossing each other. This allows you to lift the entire block of bars out of the pan for easier slicing.
- The “Hot Knife” Technique: I cannot stress this enough—wipe your knife after every cut. This is how you get the “perfectly clean vertical side-cut.”
- Strawberry Selection: Choose berries that are glossy and deep red. If they look dull, a tiny brush of diluted apricot jam can give them that “glossy, vibrant” look.
- Density Hack: If your kitchen is very warm, add 1 tsp (5g) of gelatin dissolved in water to the filling to maintain that 2-inch (5cm) height.
Storing Your Bars for Peak Freshness
These No Bake Cheesecake Bars are surprisingly resilient. They can be stored in an airtight container in the refrigerator for up to 5 days. However, the graham cracker dust garnish should be added just before serving to prevent it from absorbing moisture and losing its “fine dust” appearance.
You can also freeze these bars for up to 3 months. If freezing, do not add the fresh strawberry until you are ready to serve. Defrost them in the refrigerator overnight to maintain the matte texture of the ivory-white filling.
Elegant Pairings to Elevate Your Dessert Table
These bars are rich and creamy, making them the perfect companion for a refreshing beverage. For a summer gathering, consider serving them alongside strawberry rum cocktails to echo the fresh fruit garnish.
If you are looking for a more whimsical pairing, the buttery notes of the 1-inch crust pair beautifully with a creamy strawberry poke cake on a dessert buffet. The contrast between the dense cheesecake and a light, airy cake creates a dynamic tasting experience for your guests.
Frequently Asked Questions about Cheesecake Stability
Yes, but ensure they are fresh. For the best ‘buttery granules’ look, pulsing whole crackers in a food processor allows for a better mix of fine dust and rustic texture.
While not required due to the high fat content and lemon juice stabilization, 1 teaspoon of gelatin can be added if you need the bars to sit out in warm weather for long periods.
Use a sharp chef’s knife dipped in hot water. Wipe the blade completely clean and dry after every single cut to prevent the filling from smearing.
The secret is using 3 full cups of crumbs and 12 tablespoons of butter. Most recipes use half this amount, which results in a thin, fragile base.
Runny filling usually results from using low-fat cream cheese or not whipping the heavy cream to stiff enough peaks. Ensure you use full-fat blocks and chill for the full 6 hours.
The Ultimate No Bake Cheesecake Bars Recipe
No Bake Cheesecake Bars with Ultra-Thick Graham Cracker Crust
Ingredients
Equipment
Method
- Combine graham cracker crumbs, melted butter, and sugar until it resembles wet sand with visible buttery granules.
- Press firmly into a lined 8x8 pan to create a thick, 1-inch foundation with slightly jagged edges.
- Beat softened cream cheese, powdered sugar, vanilla, and salt until ivory-white and smooth.
- In a separate bowl, whip heavy cream to stiff peaks, then fold gently into the cheese mixture with lemon juice until dense and matte.
- Spread filling over crust and use an offset spatula to create a flawlessly flat top.
- Chill for at least 6 hours until firm enough for a clean vertical side-cut.
- Slice into 16 squares, top each with a halved glossy strawberry and a sprinkle of graham dust.
Notes
Wipe your knife with a hot, damp cloth between every slice for perfectly clean edges.
Closing & Call to Action
Mastering these No Bake Cheesecake Bars is about more than just mixing ingredients; it is about the architecture of dessert. With a 1-inch (2.5cm) buttery crust and a 2-inch (5cm) dense, matte filling, you have created a masterpiece that is as visually stunning as it is delicious. The “clean vertical cut” and “ivory-white” finish will make you feel like a professional pastry chef.
If you enjoyed this forensic look at dessert building, please leave a comment below with your results! Don’t forget to share your photos and follow me on Pinterest for more culinary inspiration and high-end food blog aesthetics.


