When the humidity rises and the sun hangs heavy in the sky, nothing beats the heat quite like a thick slice of banana pudding ice cream cake. This isn’t just a dessert; it’s a nostalgic journey through Southern summers, reimagined into a frozen masterpiece that looks just as good as it tastes. Imagine the iconic flavors of a classic banana pudding—creamy custard, crisp wafers, and ripe fruit—transformed into a multi-layered ice cream cake that captures that perfect, melting texture.
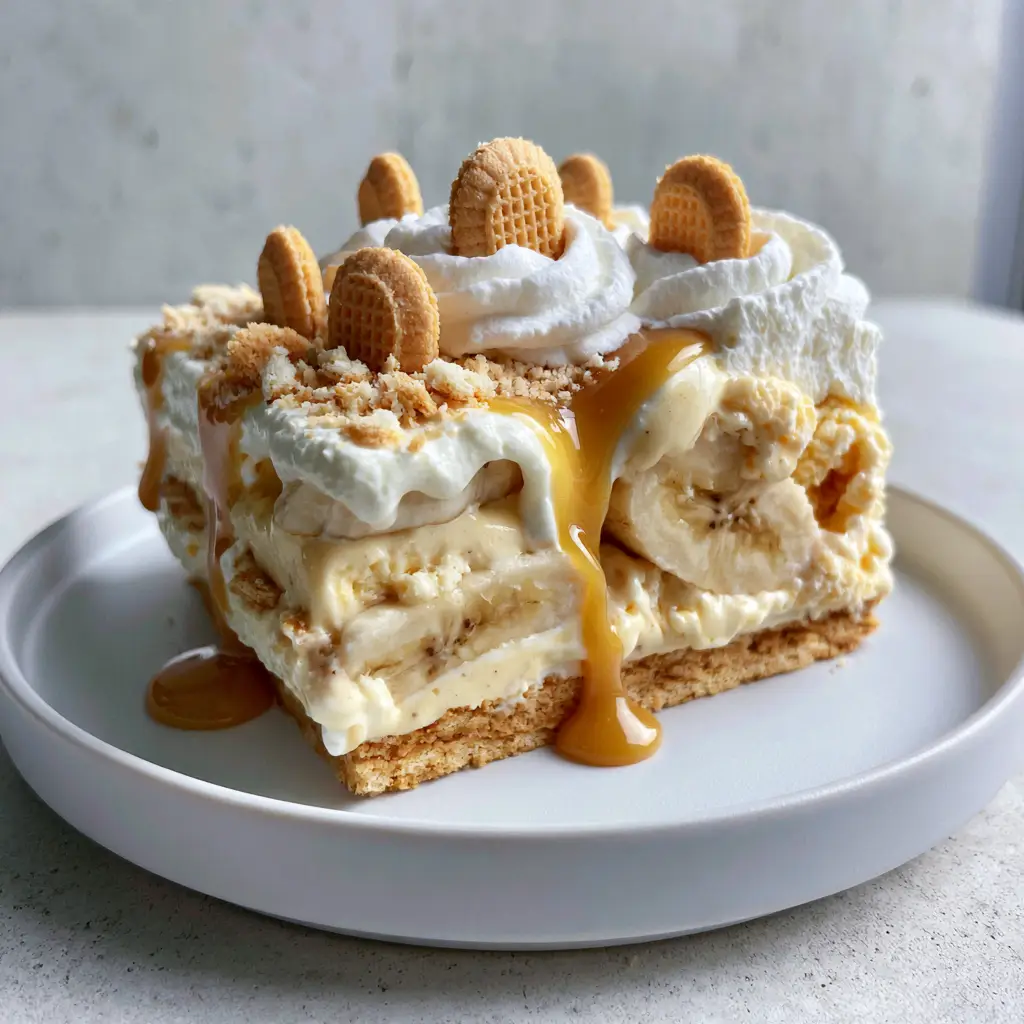
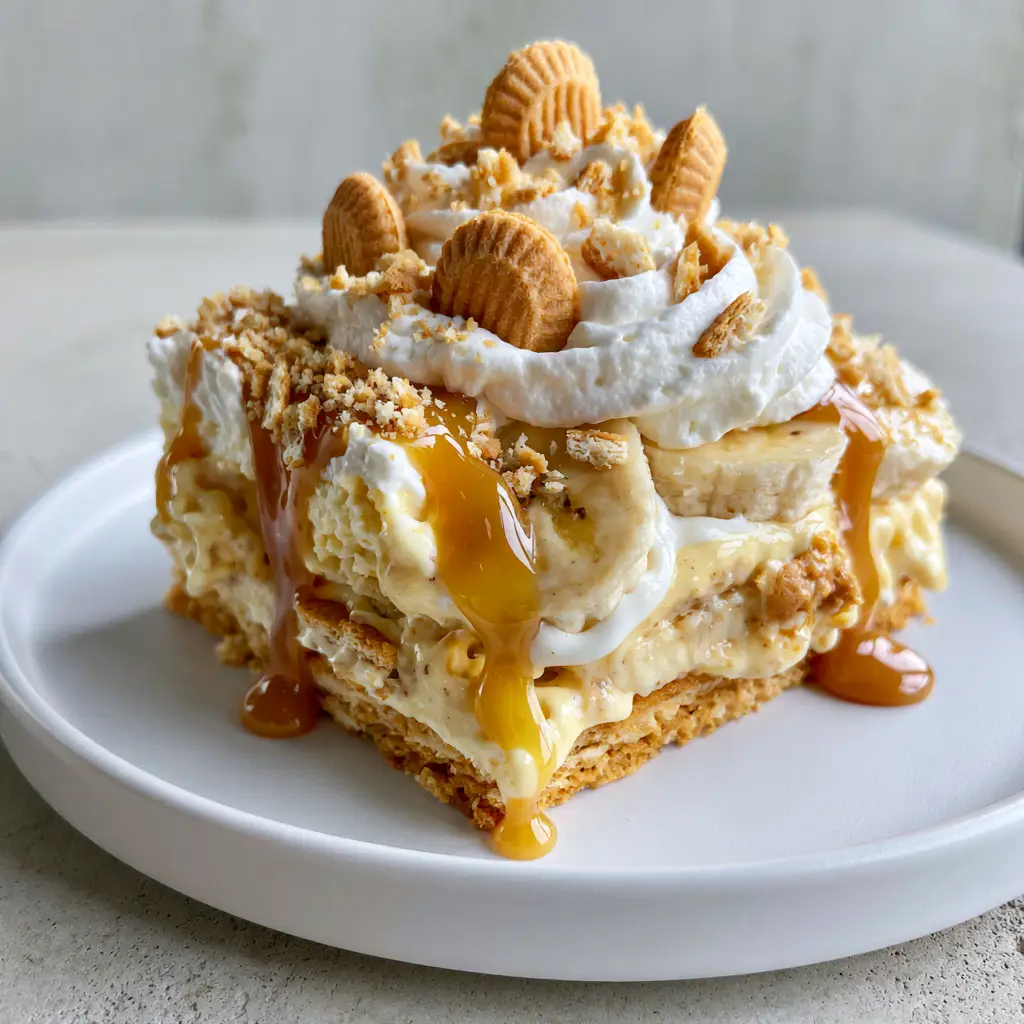
Captured in soft natural daylight, this cake is designed to be the centerpiece of your next gathering. Whether you are hosting a backyard barbecue or a quiet Sunday dinner, the visual appeal of the golden-brown crushed Nilla wafer crust against the pale-yellow banana pudding ice cream is simply irresistible. The glossy golden caramel drizzle running down the sides provides that “smartphone photo” aesthetic that makes every home cook feel like a professional food stylist.
Why This Frozen Banana Masterpiece Works Every Time
- Structural Integrity: A solid base of 2 cups (240g) of crushed Nilla wafers ensures every slice holds its shape while providing a buttery, crunchy contrast to the creamy layers.
- No-Churn Simplicity: We use a high-fat heavy cream and sweetened condensed milk base to achieve a professional ice cream texture without the need for an expensive machine.
- Visual Texture: The combination of miniature whole Nilla wafers and a light dusting of crushed crumbs creates a tiered, professional look that mimics high-end patisserie styling.
- Flavor Depth: By using both instant pudding mix for stability and real ripe banana slices for freshness, we achieve a dual-layered banana profile that is both nostalgic and sophisticated.
The Foundation: Essential Ingredients for Your Banana Pudding Ice Cream Cake
Success in the kitchen starts with quality components. For this banana pudding ice cream cake, each ingredient plays a specific scientific role in ensuring the final result is sliceable, flavorful, and visually stunning.
Nilla Wafers: You will need 11 ounces (312g) total. Most of these are crushed for the crust, but we reserve a handful of miniature whole wafers for that signature garnish seen in our visual blueprint.
Unsalted Butter: 1/2 cup (115g), melted. This acts as the “glue” for your wafer crust, ensuring it doesn’t crumble away when you cut into the frozen cake.
Heavy Whipping Cream: 2 cups (480ml), chilled. This provides the aeration and volume needed for the “fluffy white whipped cream” layers and the ice cream base.
Sweetened Condensed Milk: 1 can (14oz/396g). This provides the sugar and the silky mouthfeel, preventing large ice crystals from forming in the freezer.
Instant Vanilla Pudding Mix: 1 package (3.4oz/96g). This is our “secret” ingredient for color and stability, giving the ice cream that iconic pale-yellow hue and a slightly chewy, fudge-like texture.
Fresh Ripe Bananas: 3-4 large bananas. Look for “cheetah-spotted” bananas—the ones with brown speckles—as they have the highest sugar content and the strongest aroma.
Lemon Juice: 1 tbsp (15ml). Essential for tossing with your fresh banana slices to prevent oxidation, keeping them looking bright and fresh inside the frozen layers.
Salt: 1/4 tsp (1.5g). A small pinch of fine sea salt balances the intense sweetness of the condensed milk and caramel.
Caramel Sauce: 1/2 cup (120ml). Use a high-quality, thick caramel to achieve those glossy, slow-moving drips down the side of the cake.
Must-Have Equipment for Professional Results
To achieve the “thick slice” look shown on our modern matte white ceramic plate, you need a 9-inch (23cm) springform pan. The removable sides are non-negotiable for an ice cream cake, allowing you to reveal the beautiful layers without damaging the structure. You will also need a high-speed hand mixer or stand mixer to whip the cream to stiff peaks, ensuring the whipped cream layers remain fluffy even when frozen.
An offset spatula is your best friend here. It allows you to smooth the top of the ice cream and whipped cream layers with precision, creating the clean lines necessary for a professional-grade cross-section. Finally, ensure you have plenty of parchment paper to line the bottom of your pan for an easy release.
Step-By-Step: Crafting the Ultimate Frozen Dessert
Constructing the Buttery Nilla Wafer Crust
Begin by pulsing your Nilla wafers in a food processor until they resemble coarse sand. Combine 2 cups (240g) of the crumbs with 1/2 cup (115g) of melted butter and a pinch of salt. Press this mixture firmly into the bottom of your lined springform pan. Use the bottom of a flat measuring cup to pack it tightly; a compressed crust is the key to a clean slice.
Creating the Creamy Banana Pudding Ice Cream Layer
In a large bowl, whisk together the sweetened condensed milk and the dry vanilla pudding mix until smooth. This will be thick and bright yellow. In a separate chilled bowl, beat the heavy cream until stiff peaks form. Gently fold the whipped cream into the condensed milk mixture. This preservation of air is what makes the banana pudding ice cream cake feel light rather than icy. Fold in 1 cup (240ml) of mashed ripe bananas for authentic flavor.
Layering for Visual Impact
Pour half of the banana ice cream mixture over your prepared crust. Arrange a single layer of fresh ripe banana slices (tossed in lemon juice) over the top. Cover with the remaining ice cream mixture. The goal is to see those distinct layers of fruit when the cake is sliced. Freeze this for at least 4 hours before adding the final whipped topping.
The Final Flourish: Garnish and Drizzle
Once the cake is firm, spread a final layer of stabilized whipped cream over the top. Now, follow the visual blueprint: arrange miniature whole Nilla wafers around the border, sprinkle with the remaining wafer crumbs, and generously apply the glossy golden caramel drizzle. For the best “handheld smartphone photo” look, let the caramel pool slightly at the base of the wafers.
Expert Tips for a Picture-Perfect Slice
- The Hot Knife Trick: To get the clean edges seen in the Midjourney prompt, dip a long sharp knife in hot water and wipe it dry between every single cut.
- Banana Placement: Place your banana slices about 1/2 inch away from the edge of the pan. This prevents them from poking out the sides, keeping the exterior of the cake smooth and white.
- Temper Before Serving: Let the cake sit at room temperature for 10-15 minutes before slicing. This creates those “delicious, melting textures” mentioned in the visual description.
- Avoid Over-Mixing: When folding the whipped cream into the pudding base, use a “cut and fold” motion to keep the ice cream layer airy.
Storage and Make-Ahead Advice
This banana pudding ice cream cake is the ultimate make-ahead dessert. It can be stored in the freezer for up to two weeks. To prevent freezer burn, wrap the entire springform pan in a double layer of plastic wrap once the top has fully hardened. If you have leftovers, store individual slices in airtight containers to preserve that fresh banana flavor.
What to Serve With This Frozen Treat
Since this cake is rich and decadent, it pairs beautifully with light, acidic beverages. A glass of strawberry kiwi lemonade provides a refreshing contrast to the creamy banana. If you are serving this at an adult gathering, a peach moscato sangria complements the caramel notes perfectly. For those who want to double down on the banana theme, try serving it alongside a salted caramel banana Ritz icebox cake for a tasting flight of frozen Southern desserts.
Frequently Asked Questions
Yes, you can use a standard 9×5 loaf pan lined with plastic wrap. Ensure enough overhang so you can lift the entire cake out once it is fully frozen.
Absolutely! If you want an even more intense banana flavor and a brighter yellow color, subbing vanilla pudding mix for banana pudding mix works perfectly.
Thanks to the sweetened condensed milk and high-fat heavy cream, the ice cream remains creamy. However, letting it sit at room temperature for 10 minutes makes slicing much easier.
Toss your fresh banana slices in 1 tablespoon of lemon juice or pineapple juice before layering. The acid prevents oxidation, keeping them bright yellow even when frozen.
A food processor is best for a uniform, sandy texture. Alternatively, place them in a zip-top bag and use a rolling pin to crush them into coarse crumbs.
The Master Recipe: Banana Pudding Ice Cream Cake
Banana Pudding Ice Cream Cake: The Ultimate No-Bake Southern Fusion Dessert
Ingredients
Equipment
Method
- In a medium bowl, combine the crushed Nilla wafers, melted butter, and salt. Press firmly into the bottom of a 9-inch springform pan until a solid golden-brown crust forms. Freeze for 15 minutes.
- Whisk the sweetened condensed milk and dry pudding mix until smooth and pale-yellow.
- Beat heavy cream to stiff peaks. Gently fold the whipped cream and mashed bananas into the pudding base until no streaks remain.
- Spread half the ice cream over the crust. Add a layer of sliced bananas (tossed in lemon juice). Top with remaining ice cream. Smooth the top with a spatula.
- Freeze for at least 6 hours or overnight until completely firm.
- Top with a fresh layer of whipped cream. Arrange miniature Nilla wafers and crushed crumbs on top. Drizzle generously with glossy golden caramel sauce before serving.
Notes
For a clean slice, let the cake sit at room temperature for 10 minutes and use a hot knife.
Closing Thoughts: Join the Alice Cooks Community
Creating this banana pudding ice cream cake is about more than just following steps; it’s about capturing a moment of pure, frozen joy. The way the golden caramel mingles with the melting whipped cream is a sensory experience your guests won’t forget. We would love to see your creations! Share your photos on Instagram and tag us, or pin this recipe to your dessert boards on Pinterest so you never lose it. Don’t forget to leave a comment below with your favorite way to customize your Nilla wafer crust!


