If you have ever bitten into a classic candy bar and wished it had the soul of a rich, decadent cake, these Mounds brownies are the answer to your deepest dessert cravings. There is something fundamentally satisfying about the contrast between a dark, slightly bitter chocolate and the sweet, tropical chew of shredded coconut.
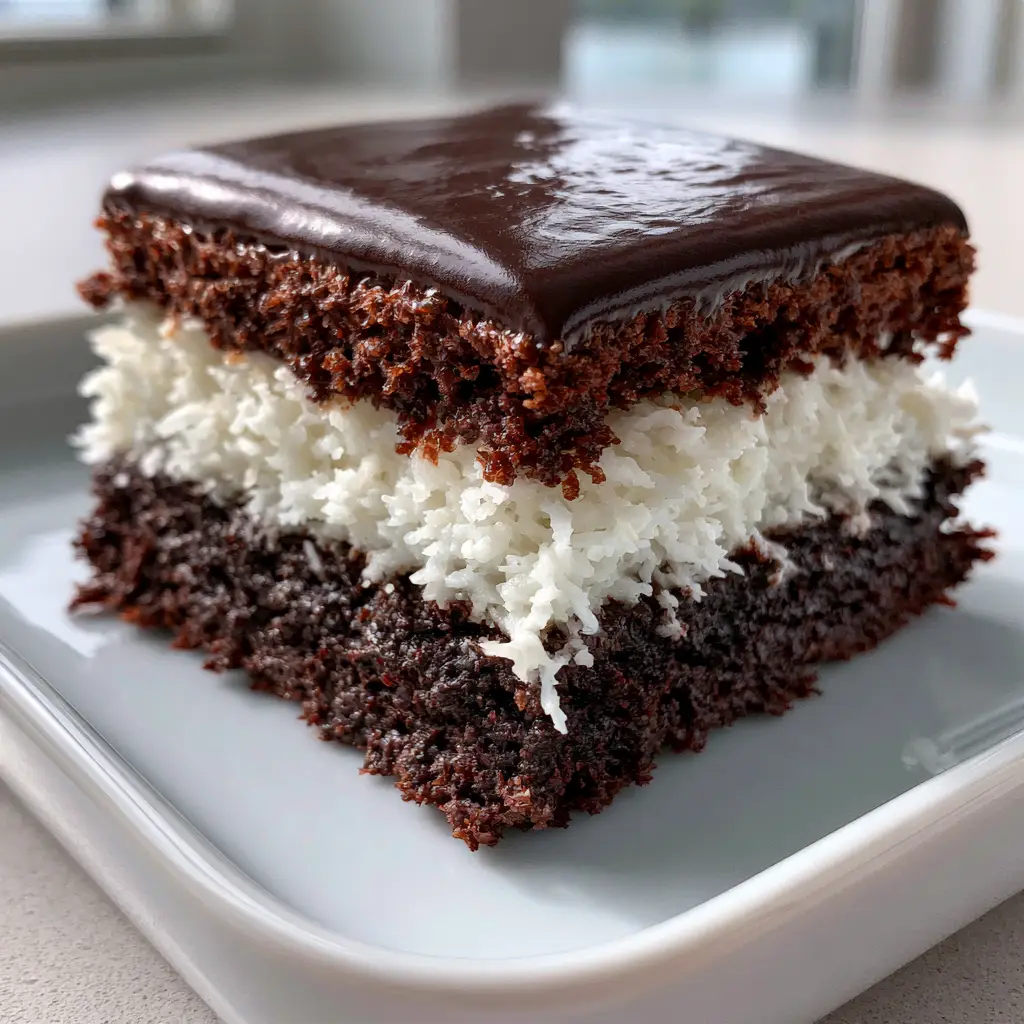
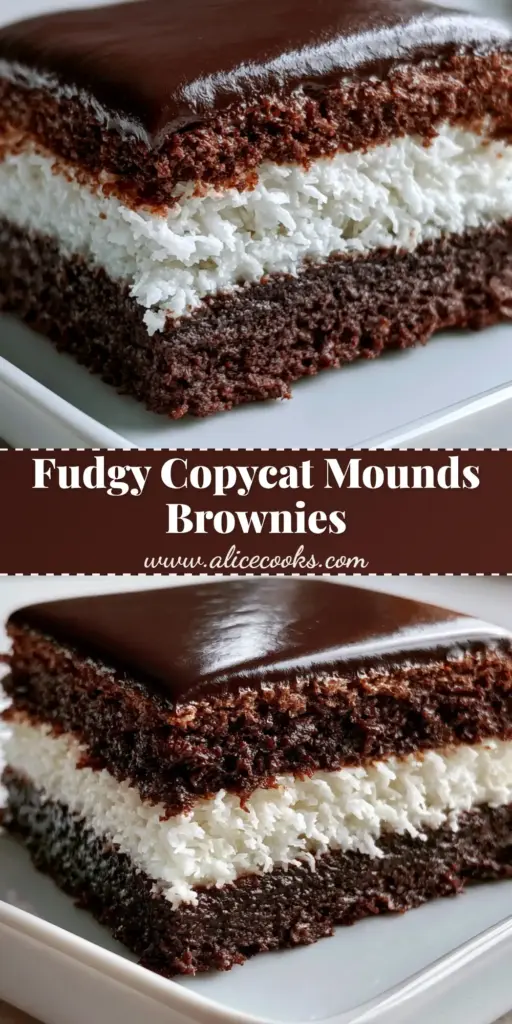
This recipe isn’t just a simple box mix upgrade; it is a meticulously engineered three-layer masterpiece designed to replicate the exact visual and textural experience of the iconic treat. We are talking about a dense fudgy dark chocolate base that provides a sturdy foundation for a thick, snowy-white shredded coconut center, all finished with a mirror-like glossy dark chocolate glaze.
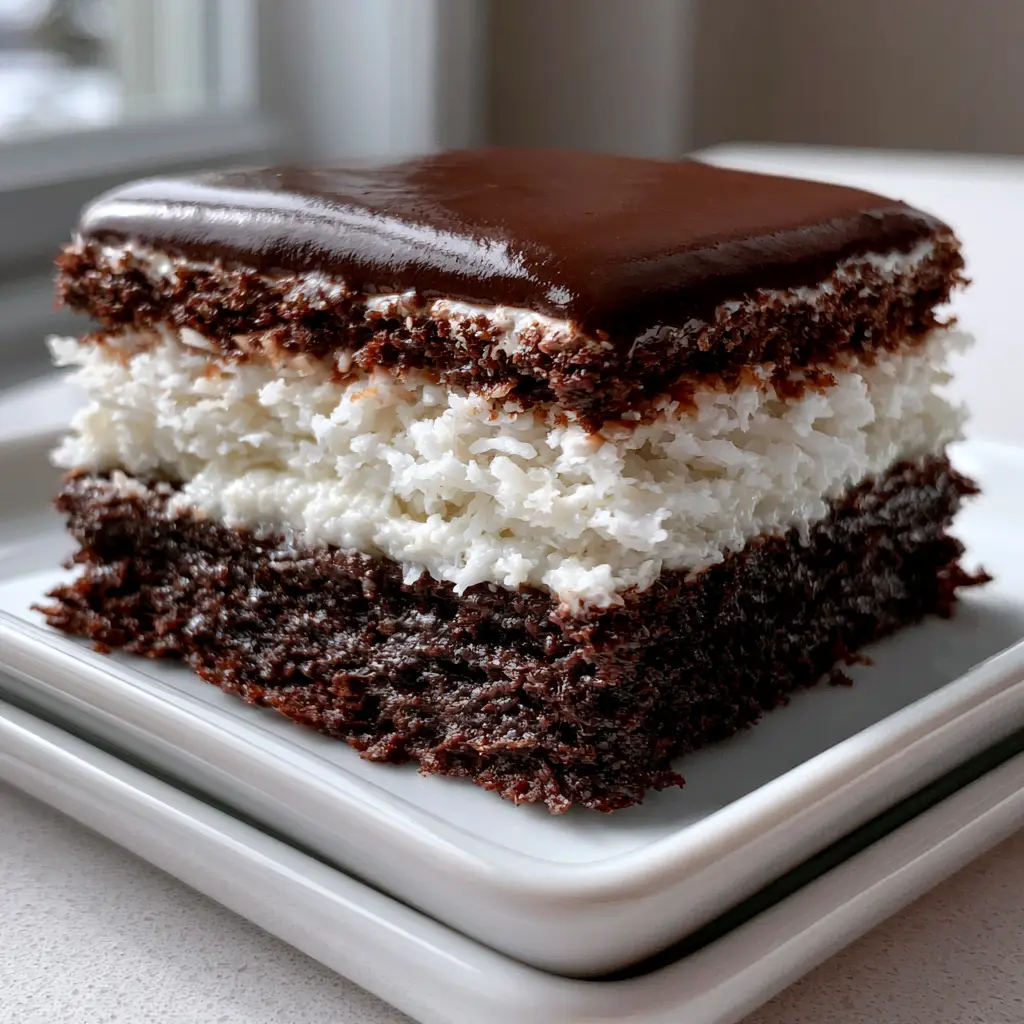
When you hold a slice of these Mounds brownies, you will immediately notice the distinct, sharp lines between the layers—a visual hallmark of a professionally crafted dessert. Whether you are serving these at a summer potluck or keeping a stash in your freezer for late-night cravings, these brownies deliver a high-end bakery experience from your very own kitchen.
Why These Layered Mounds Brownies Are the Ultimate Indulgence
- Textural Trifecta: You get the fudgy, toothsome bite of the brownie, the moist and airy chew of the coconut, and the silky melt-in-your-mouth finish of the dark chocolate glaze.
- Visually Stunning: The stark contrast between the “snowy-white” coconut and the “dark chocolate” elements makes these a showstopper on any dessert table.
- Scientifically Balanced: We use specific ratios of fats and sugars to ensure the coconut layer stays moist without making the brownie base soggy.
- Pantry Staple Success: Despite their gourmet appearance, these brownies rely on accessible ingredients that you likely already have in your kitchen.
Creating the perfect Mounds brownies requires an understanding of how moisture moves between layers. By stabilizing the coconut center with sweetened condensed milk, we create a barrier that keeps the dark chocolate base dense and fudgy while maintaining that iconic “Mounds” interior texture.
Essential Ingredients for the Perfect Fudgy Contrast
To achieve the results seen in our visual blueprint, every ingredient serves a specific culinary purpose. We are building flavor from the ground up, starting with high-quality fats and premium cocoa.
Unsalted Butter (1 cup / 227g): Using unsalted butter allows us to control the exact sodium content. We melt this down to ensure the brownie base remains dense rather than cakey, as creaming butter traps air which we want to avoid here.
Granulated Sugar (2 cups / 400g): Sugar does more than sweeten; it provides the structural integrity and the slight “crackle” on the edges of the brownie. It also helps retain moisture in the chocolate base.
Dark Cocoa Powder (3/4 cup / 75g): For that “dense fudgy dark chocolate base,” we opt for Dutch-processed cocoa. It provides a deeper color and a smoother chocolate flavor that perfectly complements the sweet coconut.
Large Eggs (4 count): Eggs act as the primary binder. By using four eggs, we ensure the brownie has enough structure to support the heavy weight of the thick coconut layer without collapsing.
All-Purpose Flour (1 cup / 125g): We keep the flour ratio relatively low compared to the fat and sugar. This is the secret to achieving that fudgy, truffle-like consistency instead of a bread-like texture.
Sweetened Shredded Coconut (4 cups / 340g): This is the star of the show. The shredded texture provides the “snowy-white” visual described in our prompt and the essential chew of a Mounds bar.
Sweetened Condensed Milk (14 oz / 397g): This acts as the “glue” for our coconut center. It provides a creamy, milky sweetness and ensures the shredded coconut stays moist and stays put when sliced.
Dark Chocolate Chips (1.5 cups / 255g): For the glossy chocolate glaze, we use high-quality chips with a high cocoa butter content. This ensures a smooth melt and a professional shine.
Heavy Cream (1/2 cup / 120ml): When combined with the chocolate, this creates a ganache-style glaze that stays soft enough to bite through without shattering, maintaining that glossy finish.
Kitchen Tools for Pro-Level Layering
To replicate the authentic handheld smartphone photo look, you need clean lines. The right tools make the difference between a messy treat and a “perfectly sliced layered brownie.”
You will need a 9×9 inch (23×23 cm) square baking pan. I highly recommend a metal pan over glass, as metal conducts heat more evenly, ensuring the edges of your Mounds brownies don’t overbake before the center is set. If you enjoy this format, you might also like exploring brownie cheesecake cups for individual servings.
Parchment paper is non-negotiable. You need enough overhang (often called “parchment slings”) to lift the entire block of brownies out of the pan once cooled. This is the only way to get those clean, sharp cuts through the three distinct layers.
A heavy-duty spatula and a whisk are essential for the brownie base. For the glaze, a small offset spatula will help you spread the chocolate into a perfectly flat, glossy dark chocolate glaze that catches the light just like in the prompt images.
Step-by-Step Guide to Achieving the Perfect Slice
Preparing the Dense Dark Chocolate Base
Preheat your oven to 350°F (175°C). Start by melting your butter in a large microwave-safe bowl. Whisk in the sugar and cocoa powder until the mixture looks like wet sand. This process, known as “blooming” the cocoa in the warm butter, intensifies the chocolate flavor significantly.
Add the eggs one at a time, whisking vigorously after each addition. You want the batter to look glossy and smooth. Fold in the flour and a pinch of salt just until no white streaks remain. Pour this into your prepared pan and bake for 22-25 minutes. Visual Cue: The edges should be set and slightly pulling away from the sides, but the center should still have a very slight wobble.
Creating the Snowy-White Coconut Center
While the base cools for about 10 minutes, prepare your filling. In a medium bowl, combine the shredded coconut and the sweetened condensed milk. Stir until every flake of coconut is hydrated and the mixture is thick and tacky.
Spread the coconut mixture evenly over the warm brownie base. Use the back of a spoon or a clean hand to press the coconut down firmly. This compression is vital for creating the “thick snowy-white shredded coconut center” that stays together when handled. Return the pan to the oven for another 10-12 minutes. You aren’t looking for browning; you just want the layer to “set.”
Applying the Glossy Dark Chocolate Glaze
For the final layer, heat your heavy cream until it just begins to simmer. Pour it over your dark chocolate chips in a heat-proof bowl and let it sit for 5 minutes. Gently whisk from the center outward until a smooth, mirror-like ganache forms.
Pour the glaze over the coconut layer, tilting the pan to ensure it reaches every corner. If you see air bubbles, gently tap the pan on the counter to pop them. This ensures the surface remains perfectly smooth for your Mounds brownies. If you love this flavor profile, you should also try Bounty brownies for a slightly different take on the coconut-chocolate duo.
Expert Secrets for Glossy Glaze and Clean Cuts
- The Chill Factor: Do not attempt to cut these brownies at room temperature. For those “perfectly sliced” edges, refrigerate the pan for at least 4 hours, or ideally overnight. The fat in the glaze and the condensed milk needs to fully solidify.
- Hot Knife Technique: Run a sharp chef’s knife under hot water, wipe it dry, and make one long, clean stroke. Wipe the knife clean and re-heat it between every single cut. This prevents the coconut from sticking to the blade and smearing into the dark chocolate base.
- Coconut Quality: Use “sweetened” shredded coconut. Unsweetened coconut is often too dry and won’t achieve that translucent, moist “Mounds” texture we are aiming for.
- Preventing Seizing: When making your glaze, ensure no water touches the chocolate. Even a single drop can cause the chocolate to seize, ruining that glossy dark chocolate glaze.
Best Practices for Keeping Your Brownies Fresh
These Mounds brownies are incredibly moisture-stable thanks to the coconut and condensed milk. You can store them in an airtight container at room temperature for up to 3 days, but for the best texture, I recommend the refrigerator. Cold brownies have a much denser, fudgier mouthfeel that heightens the “candy bar” experience.
In the fridge, they will stay fresh for up to a week. If you want to store them longer, these brownies freeze beautifully. Wrap individual squares in plastic wrap and then foil. They can be frozen for up to 3 months. In fact, many people prefer eating them straight from the freezer for a firm, chewy treat that resembles a frozen Mounds bar.
Perfect Pairings for Your Chocolate Indulgence
Because these Mounds brownies are so rich and dark, they pair exceptionally well with beverages that offer a bit of acidity or brightness. A cold glass of milk is the classic choice, but for a more sophisticated pairing, try a banana pudding latte to lean into the tropical vibes.
If you are serving these at a party, consider a refreshing fruit-based drink to cleanse the palate between bites of dense chocolate. A raspberry lemonade or even a coconut pineapple lemonade would complement the coconut center while cutting through the richness of the dark chocolate glaze.
For those who love a variety of brownie textures, you might also enjoy comparing these to Samoa brownies, which offer a caramel-heavy twist on the chocolate and coconut combination.
Frequently Asked Questions
Yes, you can substitute the butter with vegan butter, use sweetened condensed coconut milk, and ensure your dark chocolate chips and cream (use coconut cream) are dairy-free.
It is not recommended. Unsweetened coconut is much drier and lacks the characteristic chew and moisture required for a Mounds-style filling. If you must use it, you will likely need to add extra sweetened condensed milk to compensate.
While they are shelf-stable for a few days, refrigeration is highly recommended. It keeps the coconut layer moist and gives the dark chocolate base a superior, fudgier texture.
The secret is two-fold: chill the brownies for at least 4 hours (overnight is best) and use a sharp knife dipped in hot water and wiped dry between every single cut.
The coconut layer should only be baked until it is set, not toasted. If it is browning, your oven may be running hot, or you may be baking it for too long. Keep a close eye on it after the 10-minute mark.
The Ultimate Mounds Brownies Recipe Card
Mounds Brownies with a Thick Coconut Layer and Dark Chocolate Glaze
Ingredients
Equipment
Method
- Whisk melted butter, sugar, and cocoa powder. Add eggs one at a time, then fold in flour until smooth.
- Pour into a lined 9x9 pan and bake at 350°F (175°C) for 22-25 minutes until the edges are set.
- Stir together shredded coconut and condensed milk until fully combined.
- Spread the coconut mixture over the warm brownie base and press down firmly. Bake for an additional 10-12 minutes.
- Heat heavy cream to a simmer, pour over chocolate chips, and let sit for 5 minutes before whisking smooth.
- Spread the glaze over the coconut layer. Refrigerate for at least 4 hours before slicing with a hot knife.
Notes
Use a hot knife wiped clean between every single cut to maintain the distinct layers.
Closing & Call to Action
Mastering these Mounds brownies is a rite of passage for any serious home baker. The interplay between the dark, fudgy base and the bright, snowy coconut layer creates a dessert that is as visually striking as it is delicious. By following our tips for chilling and slicing, you will produce brownies that look like they came straight from a professional photo shoot.
We would love to see your results! If you bake these, please leave a comment below and tell us how the layering turned out. Did you achieve that perfect glossy glaze? Don’t forget to share your photos and pin this recipe to your favorite boards on Pinterest so you never lose track of this tropical chocolate treasure.