When the sun hits its peak and the farmer’s market stalls overflow with crimson fruit, there is only one dessert that truly captures the essence of the season. These strawberry shortcake biscuits are not your average sponge-cake-from-a-grocery-store-packet; they are a masterclass in textural contrast.
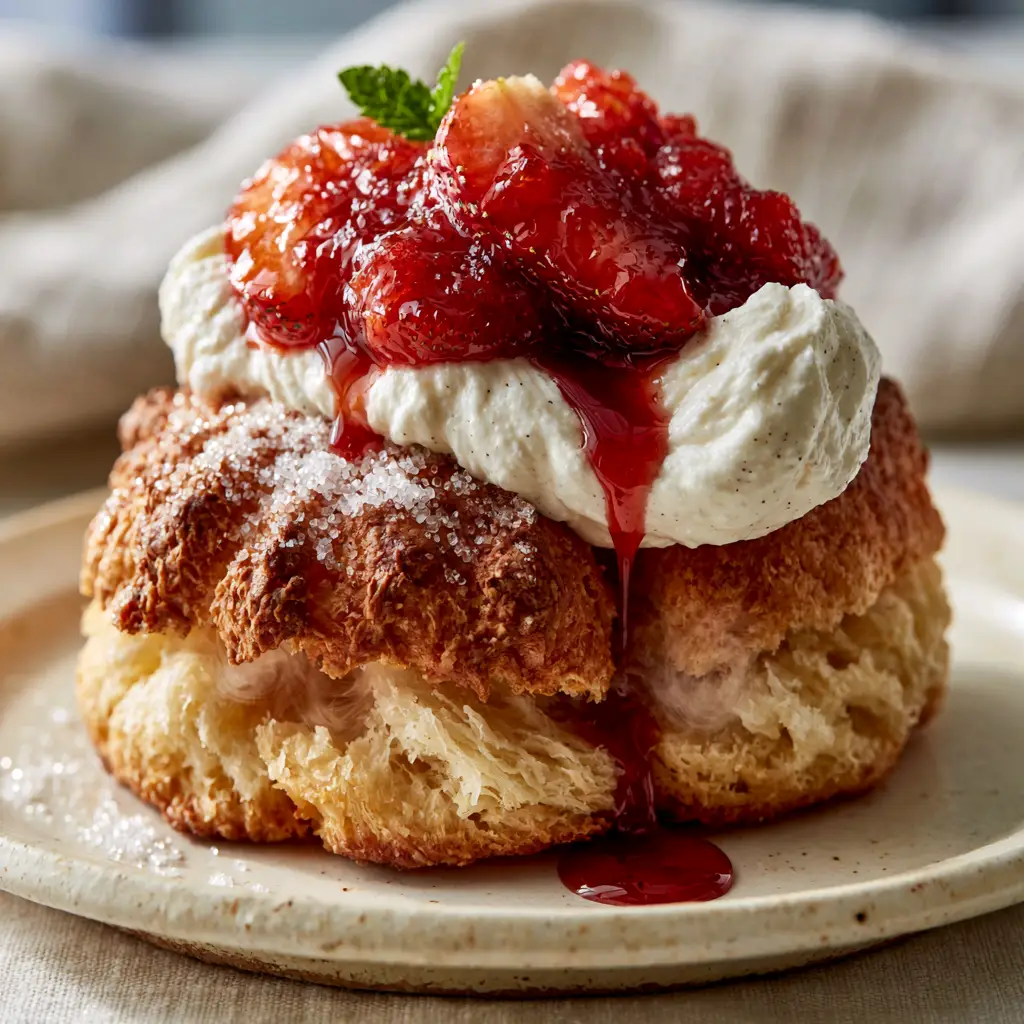
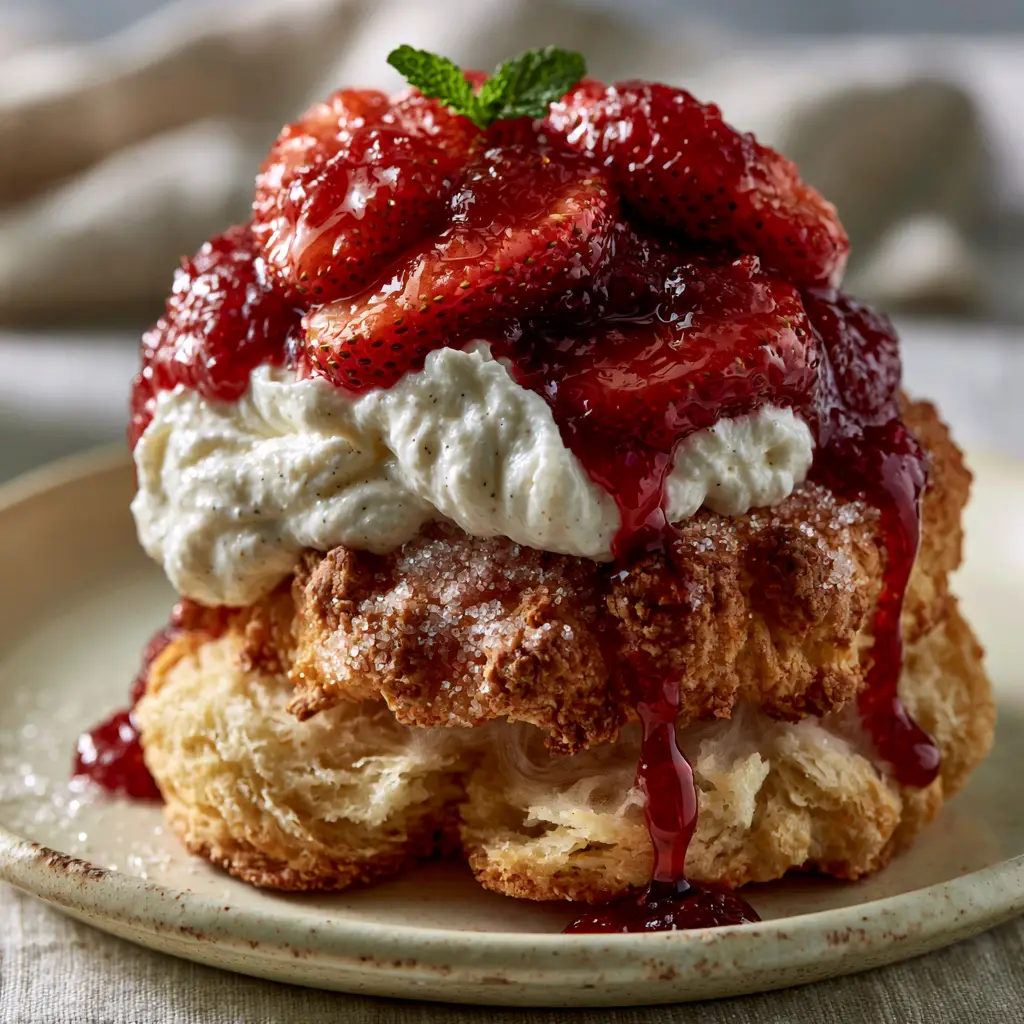
Imagine a warm, split-open drop biscuit, its exterior a deep golden-brown with a craggy, sugar-dusted crust that shatters slightly when bitten. Inside, you find a steaming, flaky interior ready to soak up the glistening ruby-red syrup of macerated berries and a thick, billowy dollop of vanilla bean whipped cream.
This recipe was engineered to deliver that exact handheld smartphone photo aesthetic—rustic, gourmet, and unapologetically messy. Whether you are hosting a backyard gathering or craving a nostalgic treat, these strawberry shortcake biscuits provide a professional-grade culinary experience right in your home kitchen.
Why These Craggy-Top Strawberry Shortcake Biscuits Stand Out
- Textural Perfection: The drop-biscuit method creates a craggy crust and a moist, flaky interior that absorbs strawberry juice without becoming mushy.
- Sensory Elevation: We use real vanilla bean and a heavy dusting of coarse sparkling sugar to mimic the gourmet look of a high-end bakery.
- Glistening Syrup: By macerating the berries with a specific ratio of sugar and time, we create a rich, ruby-red sauce that drips perfectly down the sides of the biscuit.
- Visual Contrast: The pop of a fresh mint leaf against the white cream and red berries creates a professional finish that is 100% camera-ready.
Foundational Ingredients for the Flakiest Biscuits and Billowy Cream
To achieve the visual recipe blueprint, every ingredient serves a dual purpose: structural integrity and aesthetic appeal. High-quality fats and fresh produce are non-negotiable for this dessert.
All-Purpose Flour: 2 1/4 cups (280g). This provides the essential structure for our drop biscuits, ensuring they hold their height while remaining tender and light.
Cold Unsalted Butter: 1/2 cup (115g), cubed. Keeping the butter ice-cold is the secret to those flaky interiors; as it melts in the oven, it creates pockets of steam that lift the dough.
Baking Powder: 1 tbsp (15g). A generous amount of leavening ensures our biscuits aren’t just flat pucks but rather soaring, craggy peaks that look beautiful on a rustic plate.
Granulated Sugar: 1/3 cup (65g) for the dough, plus 1/2 cup (100g) for the berries. Sugar tenderizes the biscuit crumb and draws the moisture out of the fruit to create that glistening syrup.
Buttermilk or Heavy Cream: 1 cup (240ml). This adds the necessary hydration and a subtle tang that balances the sweetness of the macerated strawberries.
Coarse Sparkling Sugar (Turbinado): 2 tbsp (25g). This is the “secret” to the visual blueprint, providing that shimmering, crunchy exterior that defines a gourmet shortcake.
Fresh Strawberries: 1 lb (450g), hulled and sliced. Look for deep ruby-red berries; the darker the berry, the more vibrant and rich your strawberry syrup will be.
Heavy Whipping Cream: 1 1/2 cups (360ml). Use cold cream to achieve those billowy peaks that hold their shape against the warmth of the biscuit.
Vanilla Bean Paste or Extract: 1 tsp (5ml). The visible specks from a vanilla bean paste add an artisanal touch to the billowy whipped cream.
Fresh Mint Leaves: For garnish. This provides the final “pop” of green that completes the visual prompt’s color palette.
Essential Equipment for Gourmet Results
To recreate the eye-level close-up shot of our strawberry shortcake biscuits, you need tools that promote even browning and proper aeration. A heavy-duty baking sheet lined with parchment paper prevents the bottoms from burning before the craggy tops turn golden-brown.
A pastry cutter or two forks will help you incorporate the butter without melting it with your hands. For the “billowy” whipped cream, an electric hand mixer or stand mixer is vital to incorporate enough air for those thick, stable dollops shown in the blueprint.
Step-by-Step Instructions: Mastering the Craggy Biscuit Architecture
Phase 1: Macerating the Ruby-Red Strawberries
In a large bowl, combine your sliced strawberries with 1/2 cup (100g) of granulated sugar. Stir gently to coat every slice, then let them sit at room temperature for at least 30 minutes.
You are looking for a visual cue here: the sugar should completely dissolve, replaced by a thick, ruby-red liquid that coats the berries in a glossy sheen. This syrup is what will eventually drip down the sides of your biscuit.
Phase 2: Crafting the Perfect Drop Biscuit Dough
Preheat your oven to 425°F (220°C). In a large mixing bowl, whisk together the flour, 1/3 cup (65g) sugar, baking powder, and a pinch of salt. Using a pastry cutter, work the cold butter into the dry ingredients until it resembles coarse crumbs with some pea-sized pieces remaining.
Pour in the buttermilk or cream and stir just until a shaggy dough forms. Do not overmix; the “craggy” texture comes from the uneven, unrefined lumps in the dough. If you are looking for more summer dessert inspiration, consider how this technique differs from a strawberry shortcake sheet cake.
Phase 3: Baking for a Golden-Brown Craggy Crust
Scoop 1/3 cup portions of dough onto your prepared baking sheet. Leave them rough and “messy”—this creates the craggy crust mentioned in the blueprint. Sprinkle the tops generously with the coarse sparkling sugar.
Bake for 15-18 minutes. Look for the visual cue of deep golden-brown edges and a shimmering, crystallized top. The interior should be steaming and flaky when split. If you enjoy this flavor profile, you might also love the convenience of a strawberry shortcake poke cake for larger crowds.
Phase 4: Whipping the Billowy Vanilla Cream
While the biscuits cool slightly, whip the heavy cream, vanilla bean paste, and 2 tbsp of powdered sugar in a chilled bowl. Beat until stiff peaks form, but stop before the cream becomes grainy. You want it to look billowy and soft, yet stable enough to hold the weight of the strawberries.
Expert Tips for Success
- Cold is Key: Ensure your butter and cream are as cold as possible. This is the only way to achieve the flaky, steaming interior shown in the smartphone photo style.
- The “Drop” Technique: Don’t smooth out the dough balls. The more ridges and bumps you have, the more “craggy” and golden-brown the crust will become.
- Timing the Maceration: If your berries are tart, let them macerate longer. If you run out of fresh berries, you can supplement with a homemade strawberry sauce for extra richness.
- Assembly Cues: Always assemble just before serving. The heat from a “warm, split-open biscuit” will eventually melt the cream, creating that gourmet “drip” look.
Storage, Reheating, and Make-Ahead Advice
These strawberry shortcake biscuits are best enjoyed fresh out of the oven. However, you can bake the biscuits up to 24 hours in advance and store them in an airtight container at room temperature. To restore the “craggy crust” and “steaming interior,” reheat them in a 350°F (175°C) oven for 5 minutes before serving.
The macerated strawberries will keep in the refrigerator for 2-3 days, though they will continue to soften. The whipped cream is best used within 4 hours. Do not freeze the assembled shortcakes, as the biscuit will lose its texture and the cream will deflate.
What to Pair with Your Summer Shortcake
This dessert is the quintessential summer treat, and it pairs beautifully with other seasonal flavors. For a refreshing beverage pairing, try a triple berry lemonade to lean into the fruit profile.
If you are serving this at a large cookout, these biscuits act as a wonderful plated alternative to a strawberry pretzel salad. For those who want to keep the “no-bake” vibe going alongside their biscuits, a strawberry dole whip is a perfect cooling companion.
Frequently Asked Questions
You can prep the dry ingredients and cut in the butter, then store that ‘crumb’ mixture in the fridge. However, do not add the buttermilk until just before you are ready to bake for the best rise.
While fresh ruby-red strawberries provide the best texture and ‘glistening’ appearance, frozen sliced strawberries can be used. Thaw them completely and macerate with sugar as directed, though the syrup may be slightly thinner.
Use heavy cream with at least 36% milkfat and ensure your bowl and beaters are chilled before whipping. Whip until stiff peaks form so the cream holds the weight of the strawberries.
Wait about 5 minutes for the biscuits to set, then use a serrated knife to gently saw through the middle. This preserves the ‘flaky, steaming interior’ without compressing the dough.
This usually happens if the oven temperature is too low or the dough is overmixed. Ensure your oven is preheated to 425°F and that you ‘drop’ the dough roughly onto the pan without smoothing it out.
The Perfect Strawberry Shortcake Biscuits Recipe
Strawberry Shortcake Biscuits: The Ultimate Craggy-Crust Summer Dessert
Ingredients
Equipment
Method
- Combine sliced strawberries and sugar in a bowl. Let sit for 30 minutes until a glistening ruby-red syrup forms.
- Whisk flour, sugar, and baking powder. Cut in cold butter until it forms pea-sized crumbs.
- Fold in cold buttermilk until a shaggy dough forms. Do not overmix.
- Drop 1/3 cup portions onto a baking sheet. Sprinkle with coarse sugar. Bake at 425°F (220°C) for 15-18 minutes until golden-brown and craggy.
- Beat heavy cream and vanilla bean paste until billowy stiff peaks form.
- Split warm biscuits, top with a large dollop of cream, a spoonful of berries, and extra syrup. Garnish with a mint leaf.
Notes
Don't skip the turbinado sugar; it provides the essential crunch and visual sparkle.
Summary: A Nostalgic Summer Classic Reimagined
Mastering the strawberry shortcake biscuits is about embracing the beauty of the rustic and the gourmet. By focusing on the craggy texture of the drop biscuit and the glossy, macerated finish of the berries, you create a dessert that tastes even better than it looks. This recipe bridges the gap between simple home cooking and professional pastry arts.
We invite you to share your results and tag us in your photos! If you enjoyed this recipe, please leave a comment below and share this post with your fellow dessert lovers. For more daily inspiration, follow alicecooks_official on Pinterest.