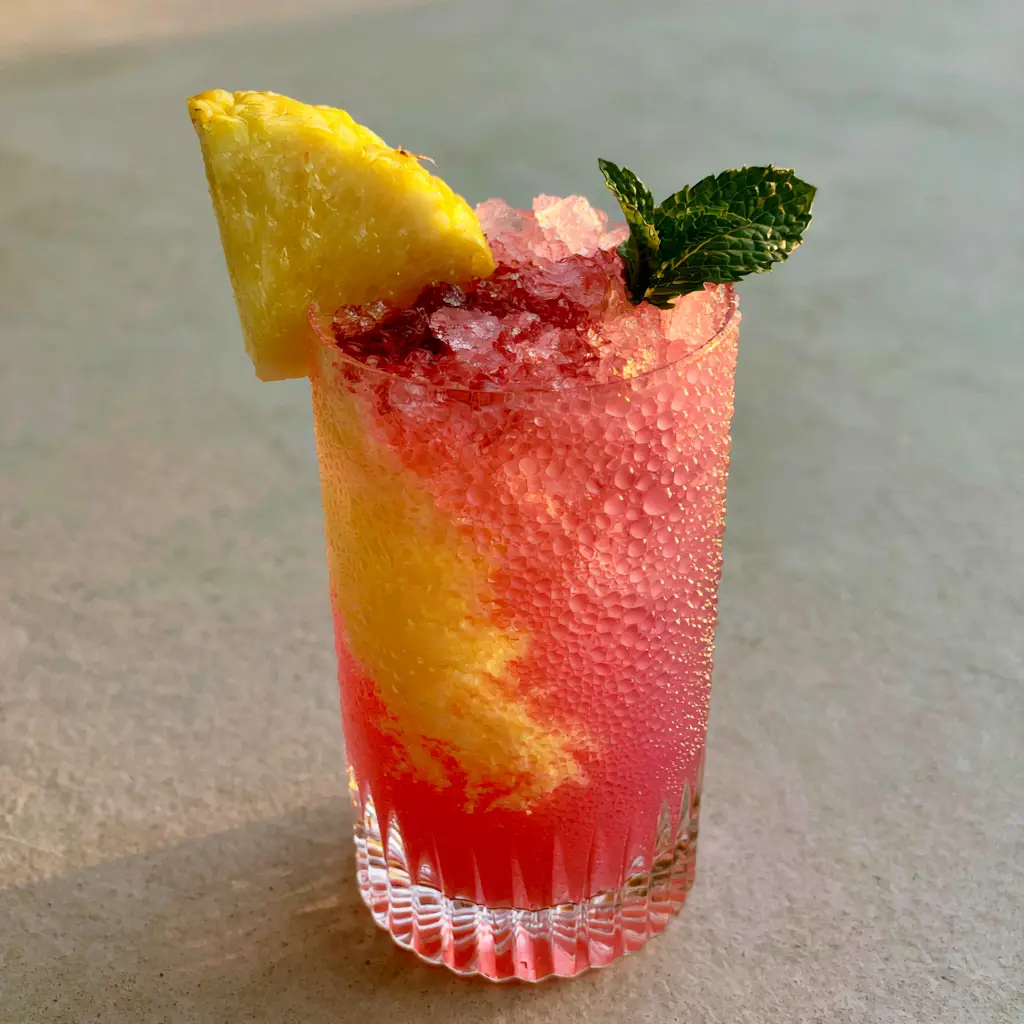
There is nothing quite like the sensory experience of holding a tall, modern ribbed crystal glass on a sweltering afternoon. Imagine the feeling of heavy condensation beads cooling your palm as you admire a vibrant blush pink lemonade, perfectly layered over a mountain of crushed ice. This Pineapple Pink Lemonade isn’t just a drink; it is a visual masterpiece where a thick, golden-yellow pineapple juice swirl bleeds into the pink liquid, creating a sunset in a glass.
Inspired by the soft, warm natural daylight of a perfect summer day, this recipe focuses on achieving that professional “handheld smartphone photo” aesthetic while delivering a flavor profile that balances tart citrus with tropical sweetness. Whether you are hosting a garden party or just want to elevate your hydration game, this drink is designed to impress both the palate and the camera lens.
In this guide, we will dive deep into the culinary science of liquid density to ensure your pineapple swirl remains distinct, and we will explore the best techniques for creating that signature “heavy condensation” look that makes every sip feel ten degrees colder. Get ready to master the art of the layered mocktail.
Why This Tropical Blush Drink is the Ultimate Crowd-Pleaser
- Visually Stunning Layers: The distinct contrast between the blush pink base and the bleeding golden pineapple swirl creates a professional, high-end look without needing a culinary degree.
- Textural Harmony: The use of finely crushed ice provides a slushy-like consistency that keeps the drink incredibly cold while holding the garnish in place perfectly.
- Balanced Flavor Profile: By combining the sharp acidity of fresh lemons with the mellow, sugary depth of ripe pineapple, you achieve a complex flavor that is far superior to store-bought mixes.
- Photo-Ready Garnish: The combination of a bright yellow pineapple wedge and a vibrant green mint sprig provides the perfect color contrast against the light-gray concrete aesthetic of modern food photography.
Essential Components for a Vibrant Blush Hue and Tropical Flavor
To achieve the exact visual result described in our blueprint, every ingredient must be selected for both its flavor and its color-contributing properties. We aren’t just making a drink; we are constructing a liquid landscape.
Freshly Squeezed Lemon Juice: 1 cup (240ml) of juice provides the essential tart foundation. Fresh lemons are non-negotiable here, as bottled juice lacks the bright, aromatic oils found in the zest that contribute to the drink’s refreshing scent.
Granulated Sugar: 1 cup (200g) of sugar is used to create a simple syrup. This ensures the sweetness is perfectly dissolved, preventing a gritty texture at the bottom of your ribbed crystal glass.
Red Berry Concentrated Juice or Cranberry Juice: 2 tbsp (30ml) is all you need to achieve that specific “blush pink” color. Unlike heavy food dyes, berry juice provides a natural, transparent pink that lets the light pass through the glass beautifully.
High-Pulp Golden Pineapple Juice: 1/2 cup (120ml) of thick pineapple juice is required for the swirl. The density of the pulp helps the juice “bleed” slowly rather than mixing instantly, creating that sought-after marbled effect.
Crushed Ice: Enough to fill the glass to the brim. Crushed ice has more surface area than cubes, which is the secret to generating that heavy exterior condensation quickly.
Fresh Pineapple Wedges and Mint Sprigs: These are your visual anchors. Ensure the pineapple is ripe and golden-yellow, and the mint is slapped between your hands before garnishing to release its aromatic oils.
If you love the aesthetic of this drink, you might also enjoy our whipped pink lemonade for a creamier, dessert-like twist on the classic.
Must-Have Tools for Professional Drink Styling
Achieving a handheld smartphone photo quality result requires more than just ingredients; it requires the right vessels and preparation tools. The ribbed glass isn’t just for show—it catches the light in a specific way that enhances the drink’s color.
- Tall Ribbed Crystal Glasses: The vertical ridges create shadows and highlights that make the pink lemonade appear more vibrant and textured.
- High-Speed Ice Crusher or Blender: To get that “snowy” crushed ice texture that holds the pineapple juice in a swirl.
- Small Pitcher with a Precision Spout: Essential for pouring the pineapple juice slowly to achieve the bleeding effect.
- Fine Mesh Strainer: To ensure your lemon juice is free of seeds and excess pulp, keeping the liquid translucent.
The Step-by-Step Architecture of a Layered Pineapple Pink Lemonade
Phase 1: Crafting the Translucent Pink Base
In a small saucepan, combine 1 cup (240ml) of water with 1 cup (200g) of sugar. Heat over medium heat, stirring constantly until the sugar is completely dissolved and the liquid is crystal clear.
Remove from heat and stir in the 2 tbsp (30ml) of berry juice to achieve the blush pink tint. Allow this syrup to cool completely before proceeding; adding warm syrup to ice will melt it instantly and ruin the condensation effect.
Once cool, mix the pink syrup with 1 cup (240ml) of fresh lemon juice and 2 cups (480ml) of cold filtered water. This creates your concentrated pink lemonade base.
Phase 2: Preparing the Glass and Ice
Fill your tall ribbed crystal glass to the very top with crushed ice. Pack it down slightly so the ice forms a sturdy structure that can support the liquid layers.
Pour the blush pink lemonade over the ice, filling the glass about 3/4 of the way full. You should see the liquid seep through the ice, creating a beautiful gradient of pink and white.
Phase 3: The Golden Pineapple Swirl Technique
This is the “Forensic Visual” moment. Take your thick, golden pineapple juice and, using a precision spout or the back of a spoon, slowly pour 2 tbsp (30ml) over the top of the ice in a circular motion.
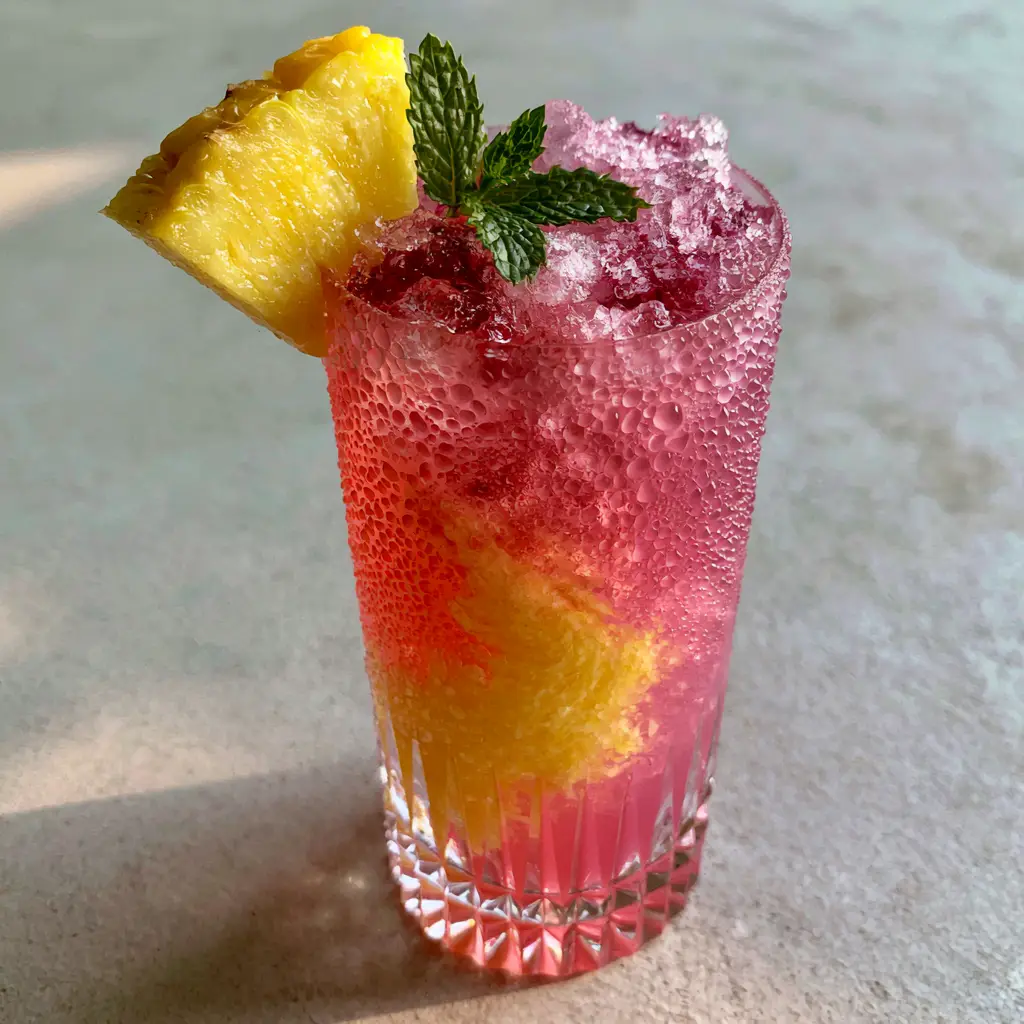
Watch for the visual cue: the thick yellow juice should begin to “bleed” down into the pink lemonade, creating vertical streaks and a marbled swirl. Do not stir! The beauty of this drink lies in the unmixed layers.
Phase 4: Final Garnishing and Styling
Cut a thick wedge of fresh yellow pineapple and slice a small notch into the fruit. Press it firmly onto the rim of the glass so it sits securely.
Tuck a single green mint sprig into the ice right next to the pineapple. The green against the yellow and pink provides the classic tropical color palette described in the Midjourney prompt.
Wait about 60 seconds before serving. This allows the temperature difference between the ice-cold drink and the humid air to create those heavy, glistening condensation beads on the ribbed glass surface.
Expert Tips for a Picture-Perfect Pour
- Temperature Control: Chill your ribbed glasses in the freezer for 10 minutes before assembly to jumpstart the condensation process.
- Density Matters: If your pineapple juice is too thin and mixes instantly, whisk in a teaspoon of honey or agave to increase its viscosity before pouring the swirl.
- The “Slap” Technique: Always slap your mint sprig against your wrist before adding it to the glass; this wakes up the scent and makes the drink smell as good as it looks.
- Background Contrast: For the best photos, place your glass against a neutral light-gray background, like concrete or stone, to make the blush pink and golden yellow colors pop.
Storage and Make-Ahead Instructions
While the assembled Pineapple Pink Lemonade should be enjoyed immediately to appreciate the layers and condensation, you can prepare the components in advance. The blush pink lemonade base will stay fresh in a sealed pitcher in the refrigerator for up to 5 days.
Do not add the pineapple juice swirl or the ice until you are ready to serve. If you have leftover pineapple juice, you can freeze it in ice cube trays and use them later in a strawberry banana smoothie for a tropical kick.
For long-term storage, the pink lemonade syrup can be frozen for up to 3 months. Simply thaw in the fridge overnight and stir well before using to re-incorporate the berry pigments.
Visual Pairings: What to Serve with Tropical Drinks
This drink is a star on its own, but it pairs beautifully with light, summer-themed snacks. Consider serving it alongside a plate of perfect vanilla cake pops for a whimsical afternoon tea aesthetic.
If you are looking for a more indulgent pairing, the tartness of the Pineapple Pink Lemonade cuts through the richness of our strawberry shortcake cake pops beautifully, creating a balanced flavor experience for your guests.
For those who prefer a spiked version, this base works perfectly as a pink lemonade cocktail when mixed with a splash of premium vodka or white rum.
Frequently Asked Questions
Yes! You can mix the pink lemonade base in a large pitcher ahead of time. However, to maintain the visual appeal, only add the crushed ice and the golden pineapple swirl to individual glasses just before serving.
While you can, store-bought versions often use dyes that are too opaque. For the ‘blush’ aesthetic, a homemade translucent base colored with a small amount of berry juice allows more light to pass through the ribbed glass.
The secret is liquid density. Use a high-pulp pineapple juice and pour it very slowly over the back of a spoon onto the crushed ice. The ice acts as a buffer, allowing the thick juice to ‘bleed’ vertically rather than incorporating immediately.
Keep your mint in a glass of water until the very moment you garnish. Gently ‘slap’ the leaves between your palms to release the aromatic oils right before placing it in the ice to ensure it stays vibrant green and fragrant.
Condensation requires a significant temperature difference between the cold drink and the ambient air. Using finely crushed ice and pre-chilling your glasses in the freezer for 10 minutes will guarantee those heavy beads form within seconds of pouring.
Pineapple Pink Lemonade Recipe Card
Pineapple Pink Lemonade: The Ultimate Summer Refreshment Recipe
Ingredients
Equipment
Method
- Combine 1 cup sugar and 1 cup water in a saucepan; heat until dissolved and clear.
- Stir in berry juice until a vibrant blush pink is achieved, then cool completely.
- Combine the pink syrup, fresh lemon juice, and remaining 2 cups of water in a pitcher.
- Fill a tall ribbed glass to the brim with crushed ice.
- Pour the pink lemonade over the ice until the glass is 3/4 full.
- Slowly pour 2 tbsp of thick pineapple juice over the top; watch it bleed into the pink lemonade.
- Add a yellow pineapple wedge and a mint sprig; wait for condensation to form.
Notes
Use high-pulp pineapple juice to ensure the golden swirl bleeds slowly rather than mixing immediately.
Closing & Call to Action
The beauty of the Pineapple Pink Lemonade lies in the intersection of simple ingredients and thoughtful presentation. By focusing on the visual cues—the bleeding golden swirl, the heavy condensation, and the vibrant garnishes—you transform a humble lemonade into a luxury experience. Whether you’re capturing the perfect handheld smartphone photo or just enjoying the sunset, this drink is the ultimate companion.
Did you try this recipe? We want to see your beautiful layers! Tag us in your photos and follow alicecooks_official on Pinterest for more visually-driven culinary inspiration. Don’t forget to leave a comment below with your favorite summer garnish tips!


