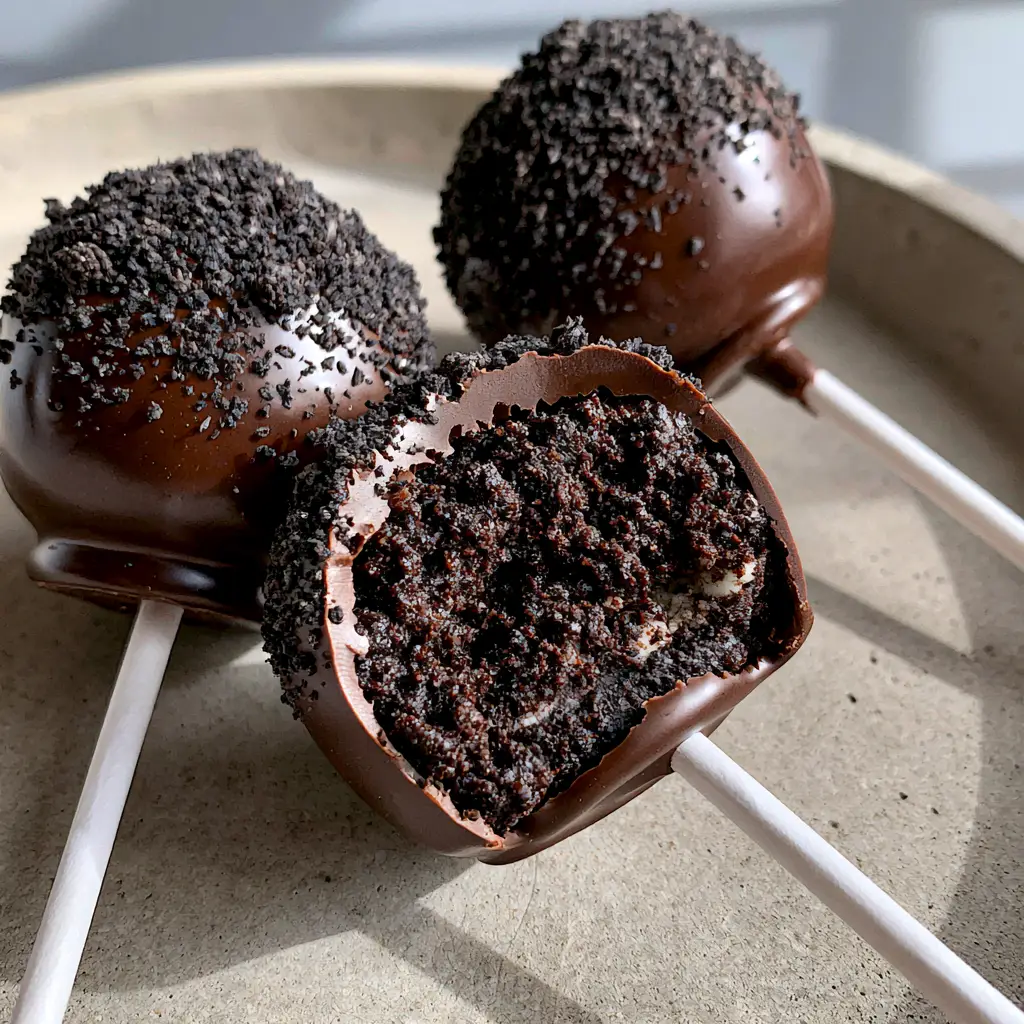
Oreo Cake Pops are the ultimate indulgence for anyone who craves a dense, brownie-like texture wrapped in a crisp, gourmet chocolate coating. If you have ever stared at the glass case of a bakery and wondered how they achieve that perfectly smooth finish, this guide is for you. Unlike traditional cake-based treats, these Oreo Cake Pops utilize the natural moisture of cream cookie fillings to create a center that is incredibly rich and decadent. Whether you are preparing these for a birthday party or a late-night snack, the combination of dark cocoa and creamy filling is an undeniable crowd-pleaser that looks just as good as it tastes.
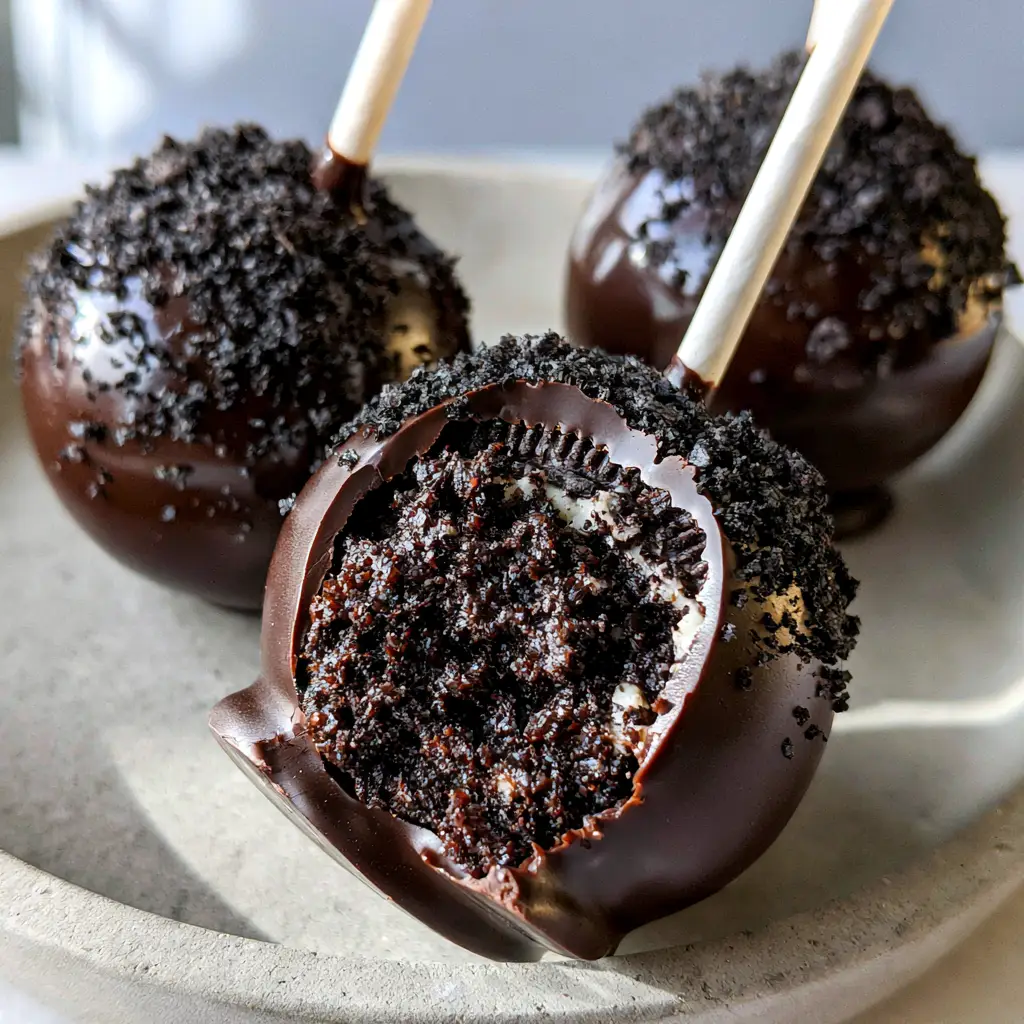
When you take a bite of these Oreo Cake Pops, the first thing you notice is the “snap” of the dark chocolate shell, immediately followed by the melt-in-your-mouth fudginess of the cookie dough interior. It is a sensory experience that balances textures perfectly. By following this professional-grade method, you will avoid common pitfalls like leaking oils or crumbling centers. We are going to walk through every technical nuance to ensure your final product looks exactly like the high-end boutique versions you see on Pinterest.
Why These Fudgy Chocolate Treats Are a Must-Make
- Ultra-Fudgy Texture: By using a specific cookie-to-binder ratio, the center mimics a dense chocolate truffle rather than a dry cake crumb.
- High-Gloss Finish: We use a tempered-style melting technique to ensure the dark chocolate shell stays shiny and professional.
- Gourmet Visuals: The contrast between the matte black cookie crumbs and the reflective chocolate coating creates a stunning aesthetic.
- Make-Ahead Friendly: These Oreo Cake Pops actually improve in texture after a few hours in the fridge, making them perfect for event planning.
The Secret Ingredients for the Ultimate Oreo Cake Pops
To achieve a result that rivals copycat Starbucks cake pops, you must start with high-quality components. Here is what you need and why each ingredient matters for the final result.
Chocolate Sandwich Cookies (Oreos): You will need 36 standard cookies (approximately 14.3 oz / 405g). The wafers provide the structure and the deep cocoa flavor, while the cream filling acts as the initial hydrating agent.
Full-Fat Cream Cheese: 8 ounces (226g) of softened cream cheese is the “glue” that creates the fudgy dough. Always use the block variety, not the whipped tub version, to ensure the Oreo Cake Pops maintain their shape on the stick.
Dark Chocolate Melting Wafers: 12 ounces (340g) of high-quality dark chocolate. Melting wafers are preferred over chocolate chips because they contain a higher ratio of cocoa butter, leading to a smoother, thinner, and glossier shell.
Coconut Oil (Optional): 1 teaspoon (5ml) added to the chocolate can help thin the consistency if your coating is too thick, ensuring it drapes elegantly over the Oreo Cake Pops.
Finely Crushed Cookie Crumbs: Reserve 2-3 cookies to crush into a fine “dust.” This adds a professional textural contrast to the glossy shell, mimicking the look of gourmet truffles.
Step-by-Step Instructions: Mastering the Fudgy Center
Pulverizing the Cookies for Maximum Density
The first step to a perfect Oreo Cake Pop is the grind. Place your cookies (filling and all) into a high-powered food processor. Pulse until you achieve a texture resembling fine, damp sand. If you leave large chunks of cookie wafer, your pops will be prone to falling off the sticks later. You want a uniform powder to ensure the cream cheese can hydrate every single crumb evenly.
If you don’t have a food processor, place the cookies in a heavy-duty freezer bag and use a rolling pin. However, for that “ultra-fudgy” professional interior, the food processor is the superior tool. Aim for a consistency where no white cream filling is visible—just a deep, dark chocolate dust.
The Cream Cheese Integration
Add your softened cream cheese to the cookie crumbs. Using a stand mixer or a sturdy spatula, fold the ingredients together until a stiff, dark dough forms. You will know it is ready when the dough pulls away from the sides of the bowl and feels like chilled brownie batter. If you have previously made easy cake pops tutorial, you will notice this dough is significantly denser and heavier than traditional cake crumbs.
Precision Rolling and Shaping
To ensure all your Oreo Cake Pops cook and set at the same rate, use a small cookie scoop to portion out 1-tablespoon (15g) increments. Roll each portion between your palms until a perfectly smooth, crack-free sphere forms. Place these on a parchment-lined baking sheet. Pro Tip: If your hands are too warm, the oils in the cookies will begin to melt; rinse your hands in cold water periodically to keep the dough firm.
The Essential Chilling Phase
Place the rolled balls in the freezer for exactly 15-20 minutes. You want them firm but not frozen solid. If the centers are frozen, the chocolate shell will crack as the center expands while thawing. This is a critical technical step for Oreo Cake Pops. While they chill, you can prepare your white paper sticks and your dipping station.
Achieving the Perfect Glossy Dark Chocolate Shell
Securing the Paper Sticks
Melt a small amount of dark chocolate. Dip the tip of each white paper stick (about 1/2 inch) into the chocolate, then insert it halfway into the chilled cookie ball. This acts as a “mortar” to fuse the stick to the fudgy center. If you skip this, your Oreo Cake Pops will likely slide down the stick during the final dipping process. Return them to the fridge for 5 minutes to set this seal.
The Dipping Technique
Melt the remaining dark chocolate in a narrow, deep microwave-safe glass. A narrow glass allows for a deeper “plunge,” ensuring the entire pop is covered in one motion. Hold the stick and submerge the cookie ball completely until the chocolate meets the stick. Lift it straight up—do not stir or swirl, as this introduces air bubbles.
Gently tap your wrist (not the stick) to shake off the excess chocolate. You should see a perfectly smooth, glossy dark chocolate coating shell forming. While the chocolate is still “wet,” immediately sprinkle a pinch of the finely crushed Oreo cookie crumbs over the top. The contrast of the matte crumbs against the reflective shell is what creates that high-end Pinterest look.
Expert Tips for Pinterest-Perfect Success
- Room Temperature Ingredients: Ensure your cream cheese is truly at room temperature (around 70°F / 21°C) before mixing to avoid white lumps in your dark chocolate dough.
- Avoid Overheating Chocolate: Melt your chocolate in 30-second intervals. Dark chocolate is temperamental; if it scorches, it will become thick and grainy rather than glossy.
- The Styrofoam Block: To prevent flat sides, stick your finished Oreo Cake Pops into a block of Styrofoam or an egg carton while they dry.
- Crumb Timing: Only sprinkle the crumbs when the chocolate is about 50% set. If it’s too wet, the crumbs sink; if it’s too dry, they won’t stick.
Storage, Reheating & Freezing Guidelines
Refrigeration: These Oreo Cake Pops stay fresh in an airtight container for up to 7 days. The fudgy center actually becomes even more delicious after 24 hours as the flavors meld.
Freezing: You can freeze the undipped cookie balls for up to 3 months. Once dipped, they can still be frozen, but the chocolate may lose some of its gloss due to condensation when thawing. If you are a fan of cookie dough brownie bites, you will find these freeze similarly well.
What to Serve With Your Gourmet Cake Pops
These rich treats pair beautifully with a variety of beverages and desserts. For a sophisticated dessert platter, serve them alongside Oreo cupcakes or a slice of white chocolate raspberry cake.
If you are hosting a summer party, the deep cocoa flavors of the Oreo Cake Pops provide a great balance to refreshing drinks like a pirate punch cocktail or other summer drink recipes. The richness of the dark chocolate also complements the tartness of a key lime cheesecake.
Frequently Asked Questions
It is not recommended. Double Stuf Oreos have too much cream filling, which makes the dough too oily and soft, causing the cake pops to lose their shape or slide off the sticks.
Yes, because they contain cream cheese, they should be stored in an airtight container in the refrigerator. They can stay fresh and delicious for up to one week.
Use high-quality melting wafers instead of chocolate chips, as they contain more cocoa butter. Adding a teaspoon of coconut oil can also thin the chocolate for a smoother, professional drip.
This usually happens if the centers are too soft or if the stick wasn’t ‘glued’ with chocolate. Ensure you chill the balls for 20 minutes before dipping and always dip the stick in melted chocolate before inserting it.
Cracking occurs if there is a large temperature difference between the cake pop and the chocolate. If the centers were frozen solid, they expand as they thaw, causing the rigid chocolate shell to crack.
The Ultimate Oreo Cake Pops Recipe
Oreo Cake Pops with a Fudgy Center and Glossy Dark Chocolate Shell
Ingredients
Equipment
Method
- Pulse 36 Oreo cookies in a food processor until they reach a fine, sandy texture.
- Add softened cream cheese and pulse until a dense, fudgy dough forms and pulls away from the sides.
- Scoop 1-tablespoon portions and roll into smooth spheres. Place on parchment paper.
- Chill the balls in the freezer for 15-20 minutes until firm to the touch.
- Dip the tip of a paper stick in melted chocolate and insert halfway into a chilled ball.
- Submerge the entire pop into the glossy dark chocolate. Tap off excess and immediately sprinkle with fine cookie crumbs.
Notes
Don't over-freeze the balls, or the chocolate shell may crack as they expand.

Save, Share, and Rate!
If you loved these Oreo Cake Pops, make sure to save this recipe to your Dessert Board on Pinterest! We would love to see how yours turned out—upload a photo of your glossy, fudgy creations in the comments below. Don’t forget to follow @alicecooks_official for more gourmet treat inspiration and leave us a 5-star rating if this recipe hit the spot!