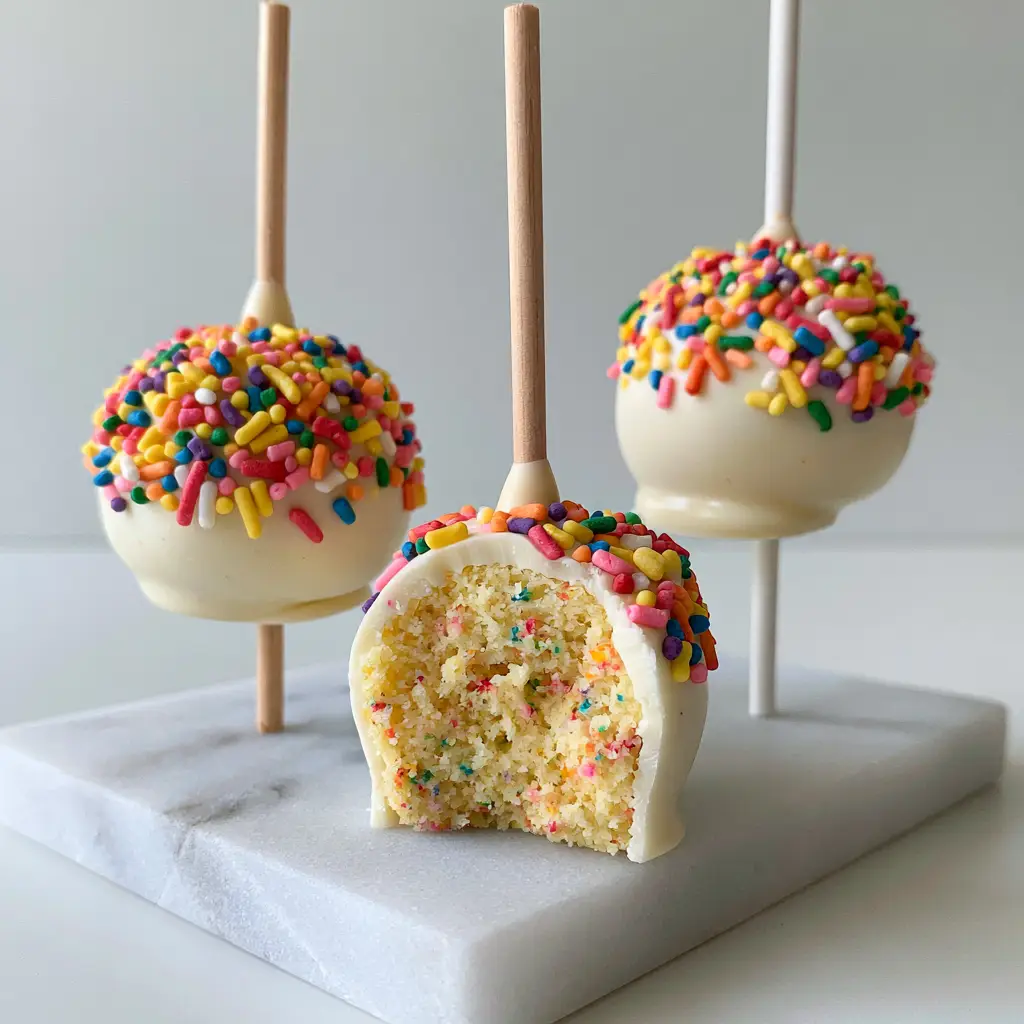
There is a specific, nostalgic joy that only funfetti cake pops can provide. Imagine a thick, glossy white chocolate shell that snaps under your teeth, revealing a dense, ultra-moist yellow cake interior bursting with vibrant rainbow jimmies. It is the ultimate handheld indulgence, combining the classic birthday cake flavor profile with the sophisticated texture of a gourmet truffle.
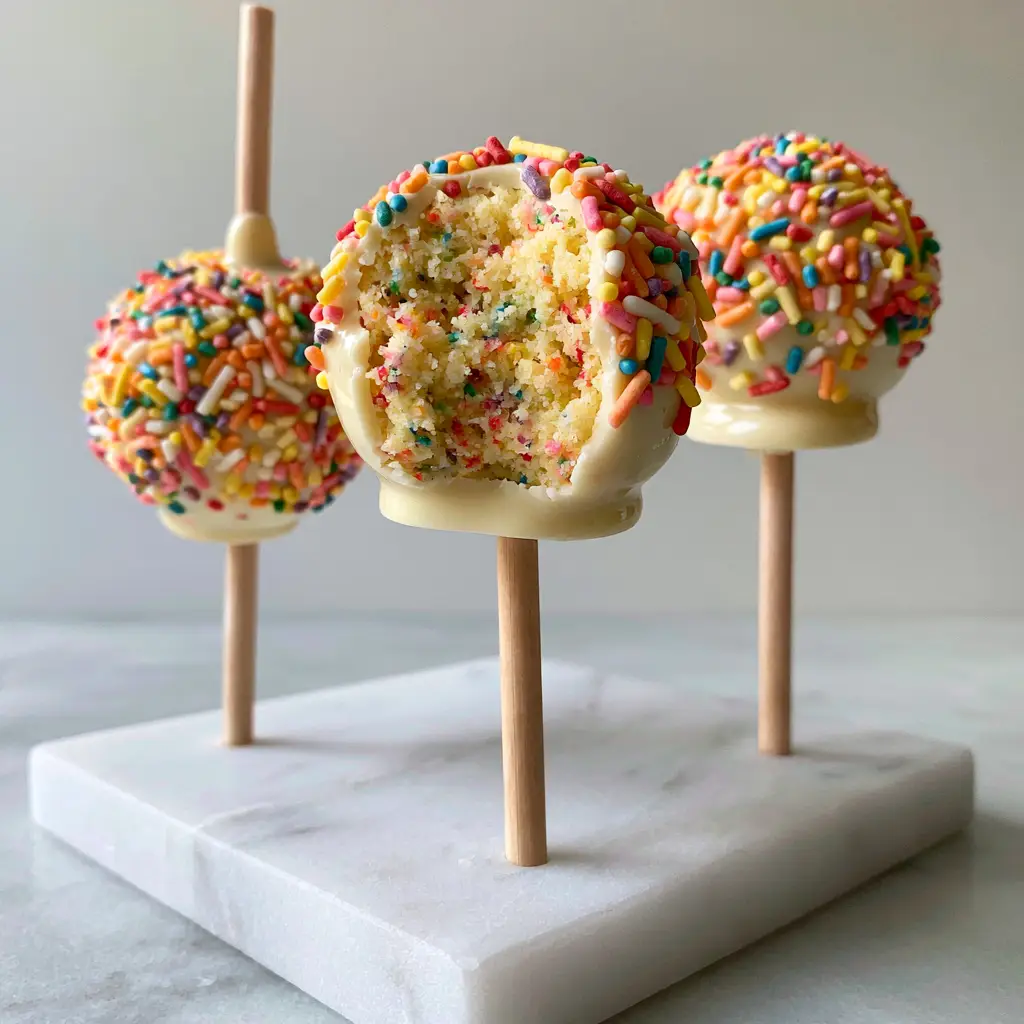
Achieving that perfect handheld smartphone photo aesthetic—like three gourmet pops standing tall on a minimalist white marble slab—requires more than just luck. It requires a deep understanding of cake crumb structure and chocolate tempering. Whether you are a seasoned baker or an enthusiastic home cook, this guide will walk you through every scientific detail to ensure your treats look as good as they taste.
Why These Gourmet Rainbow Treats Stand Out
- Forensic Crumb Texture: By utilizing a specific yellow cake base, we achieve a moist, tight crumb that holds its shape without being overly oily or cloying.
- The Snap Factor: We use a high-quality white chocolate coating formulated to create a thick, smooth glaze that contrasts perfectly with the soft interior.
- Visual Vibrancy: Unlike nonpareils which can bleed color, we use premium rainbow jimmies to ensure distinct flecks of color throughout the cake.
- Proportional Perfection: Every pop is weighed to ensure a uniform look that mirrors the high-end aesthetic of professional patisseries.
Essential Components for the Perfect Funfetti Foundation
To recreate the visual mastery of our homemade cake pops, you need specific ingredients that serve both structural and aesthetic purposes. Every element in this list has been selected to match the visual blueprint of a golden yellow interior and a glossy white exterior.
All-Purpose Flour: 1.5 cups (190g). This provides the essential protein structure needed to create a cake that can be crumbled and reshaped without turning into mush.
Unsalted Butter: 1/2 cup (113g), softened. Butter is the primary flavor carrier, ensuring that the “yellow cake” profile is rich, creamy, and nostalgic.
Granulated Sugar: 1 cup (200g). Beyond sweetness, sugar helps tenderize the crumb, ensuring that once mixed with binder, the interior remains soft and fudge-like.
Large Eggs: 2 units, room temperature. Eggs provide the “yellow” in our yellow cake crumb and act as the emulsifier that binds the fats and liquids together.
Whole Milk: 1/2 cup (120ml). The fat content in whole milk contributes to the “moist yellow cake” description in our visual blueprint.
Baking Powder: 1.5 tsp (7g). This leavening agent ensures the cake isn’t too dense before we crumble it, allowing for better absorption of the frosting binder.
Rainbow Jimmies: 1/2 cup (80g). These are the star of the show. Jimmies are elongated sprinkles that hold their shape and color better than tiny round nonpareils during the baking process.
White Chocolate Melting Wafers: 16 oz (450g). To achieve the “thick, glossy, smooth white chocolate glaze” from our prompt, high-quality melting wafers are superior to standard chocolate chips which can be too viscous.
Vegetable Shortening or Coconut Oil: 1 tbsp (15g). This is our “invisible” ingredient that thins the chocolate just enough to create that perfectly smooth, professional finish.
Vanilla Buttercream: 1/3 cup (75g). This acts as the “glue.” We use just enough to make the crumbs hold together like playdough without making them greasy.
Professional Tools for a Minimalist Aesthetic
To achieve the look of gourmet pops on a marble slab, you need more than just a bowl and spoon. Using the right equipment ensures your funfetti cake pops don’t crack or fall off their sticks.
You will need a 9×9 inch (23x23cm) baking pan for the base cake. A stand mixer or hand mixer is essential for aerating the butter and sugar. For the coating, a deep, narrow microwave-safe glass or silicone cup is preferred over a wide bowl; this allows for a full “submerge” dip which is the secret to a smooth finish.
Finally, ensure you have high-quality 6-inch (15cm) lollipop sticks and a styrofoam block or a dedicated cake pop stand. This keeps the pops upright while the white chocolate sets, preventing the dreaded “flat head” look that occurs when setting them on parchment paper.
The Culinary Science of the Perfect Funfetti Base
Creaming for Structure and Color
Start by creaming your softened butter and sugar for at least 3-5 minutes. You are looking for a pale, fluffy texture. This aeration is what creates the “moist yellow cake crumb” visible when you take a clean bite out of the pop.
Integrating the Rainbow Flecks
Once your batter is smooth, gently fold in the rainbow jimmies by hand. Do not overmix at this stage, or you risk breaking the sprinkles and streaking the yellow batter with artificial dyes. Bake at 350°F (175°C) for 25-30 minutes until a toothpick comes out clean.
The Art of the Gourmet Crumb
After the cake has cooled completely, remove any browned edges with a serrated knife. This ensures the interior of your pop is purely yellow and bright. Crumble the remaining cake into fine, uniform grains. If your crumbs are too large, the interior will look lumpy rather than the “moist, colorful sprinkle-flecked” interior described in our visual prompt.
Mastering the Dip: Achieving the Glossy White Shell
Temperature Control and Thinning
Melt your white chocolate wafers in 30-second intervals. White chocolate is notorious for seizing if overheated. Stir in your shortening or coconut oil until the chocolate flows off the spoon like warm honey. This fluidity is essential for that “smooth white chocolate glaze.”
The Anchoring Technique
Never just stick a lollipop stick into a cake ball. Dip the tip of the stick (about 1/2 inch or 1cm) into the melted chocolate first, then insert it halfway into the chilled cake ball. This creates a “chocolate weld” that prevents the pop from sliding down the stick when you dip the whole thing.
The Vertical Submerge
Dip the pop straight down into the deep cup until the chocolate meets the stick. Do not stir the pop in the chocolate. Pull it straight up and gently tap your wrist—not the stick—to shake off the excess. While the glaze is still wet, shower it with additional rainbow jimmies. The “vibrant rainbow jimmies” must be applied immediately to adhere to the glossy shell.
Expert Tips for Visual and Sensory Success
- Chilling is Critical: If your cake balls are at room temperature, they will fall apart in the warm chocolate. If they are frozen, the chocolate shell will crack as it expands. Aim for “fridge-cold.”
- Avoid Nonpareils: For the interior, always use jimmies. The round nonpareils tend to dissolve and create “grey” spots in your yellow cake.
- The “Bite” Test: To replicate the “clean bite taken out” look from our smartphone photo prompt, use a sharp, room-temperature knife to slice a small wedge out of one pop once it has fully set. This reveals the interior without crushing the shell.
- Lighting for Photography: To match our “natural morning side-light” prompt, place your marble slab near a north-facing window around 9:00 AM. Avoid the camera flash, which creates harsh glares on the glossy white chocolate.
Preserving Your Gourmet Creations
Funfetti cake pops are surprisingly resilient. They can be stored in an airtight container at room temperature for up to 3 days. For longer storage, keep them in the refrigerator for up to a week. If you notice condensation on the white chocolate shell after refrigerating, let them come to room temperature slowly inside their container to preserve the “glossy” finish.
You can also freeze the undipped cake balls for up to 2 months. Simply thaw them in the fridge overnight before proceeding with the dipping and decorating steps.
What to Serve with Funfetti Party Treats
These pops are a hit at summer parties and pair beautifully with refreshing beverages. To balance the sweetness of the white chocolate, serve them alongside a crisp mango lemonade or the whimsical colors of a unicorn lemonade.
If you are building a full dessert table, they complement the textures of funfetti cookies or the creamy layers of a strawberry shortcake poke cake. For those who prefer a bit of tartness to cut through the sugar, a glass of frozen limeade is the perfect palate cleanser.
Frequently Asked Questions
Chocolate chips contain stabilizers that prevent them from melting smoothly. For the glossy, thick glaze shown in the photos, high-quality white chocolate melting wafers are highly recommended.
The secret is adding a small amount of vegetable shortening or coconut oil to the melted white chocolate. This thins the consistency, allowing it to coat the pop evenly without lumps.
Use rainbow ‘jimmies’ (the long sprinkles) rather than ‘nonpareils’ (the tiny round ones). Nonpareils dissolve quickly in the batter, whereas jimmies hold their shape and vibrant color flecks.
Cracking usually happens when the cake balls are too cold (frozen) when dipped into warm chocolate. The temperature difference causes the cake to expand, breaking the shell. Aim for refrigerated, not frozen, cake balls.
This happens if the cake ball is too heavy or if you didn’t ‘weld’ the stick. Always dip the tip of the lollipop stick into melted chocolate before inserting it into the cake ball to act as a secure glue.
The Ultimate Funfetti Cake Pop Recipe
Funfetti Cake Pops: The Ultimate Professional Guide to Moist, Rainbow-Flecked Treats
Ingredients
Equipment
Method
- Cream butter and sugar until pale and fluffy. Add eggs and milk, then fold in dry ingredients and rainbow jimmies.
- Pour into a greased 9x9 pan and bake at 350°F (175°C) for 25-30 minutes. Cool completely.
- Crumble the yellow cake into a bowl. Mix with buttercream until a dough forms. Roll into 20 uniform balls and chill in the fridge for 30 minutes.
- Melt white chocolate with shortening. Dip the stick into chocolate, insert into the cake ball, then submerge the entire ball into the glossy glaze. Top with sprinkles immediately.
Notes
Ensure the cake balls are chilled but not frozen before dipping to prevent the shell from cracking.
Closing & Call to Action
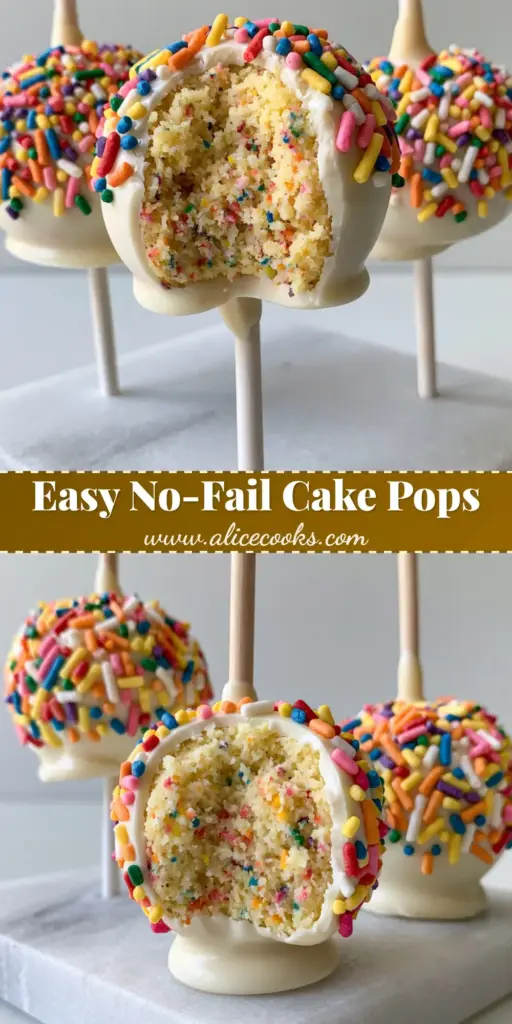
Mastering funfetti cake pops is a rewarding culinary journey that combines the precision of a scientist with the eye of an artist. By focusing on the “snap” of the white chocolate and the moisture of the yellow cake crumb, you create a treat that is truly gourmet. If you enjoyed this recipe, please leave a comment below and share your results with me!
Don’t forget to follow alicecooks_official on Pinterest for more visual recipe blueprints and dessert inspiration. Pin this to your “Party Treats” board so you never lose the secret to the perfect glossy glaze!