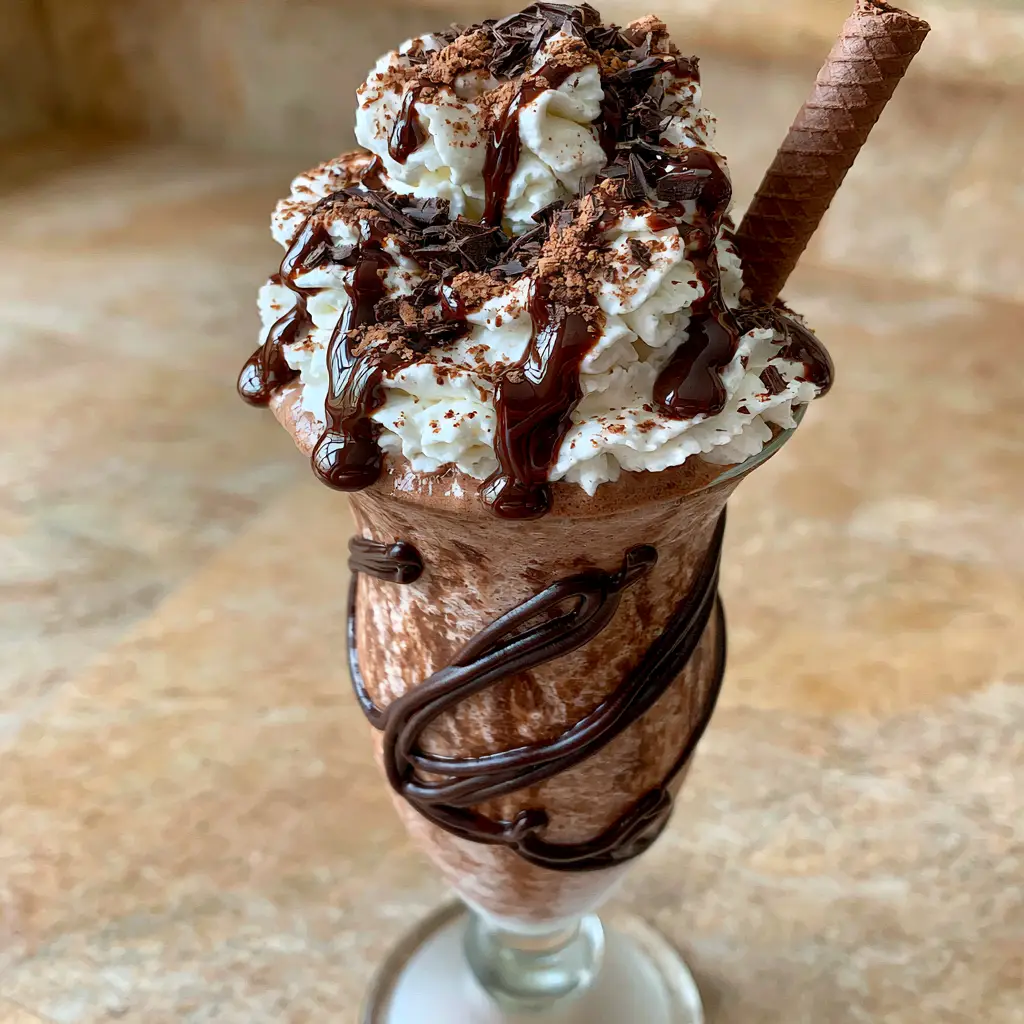
When the temperature rises and your craving for something sweet and sophisticated peaks, nothing hits the spot quite like a frozen mudslide. This isn’t your average blender drink; it is a velvety, high-end dessert cocktail that bridges the gap between a classic milkshake and a professional craft cocktail. Imagine an ultra-creamy vanilla base infused with the deep, roasted notes of coffee liqueur and the silky, caramel-flecked sweetness of Irish cream, all served in a frosted hurricane glass with ribbons of dark chocolate. Based on our latest kitchen trials, the secret to the perfect frozen mudslide lies in the absence of ice—using only premium ice cream to ensure a texture that is thick, smooth, and completely free of gritty ice crystals.
Why This Is the Only Frozen Mudslide You Will Ever Need
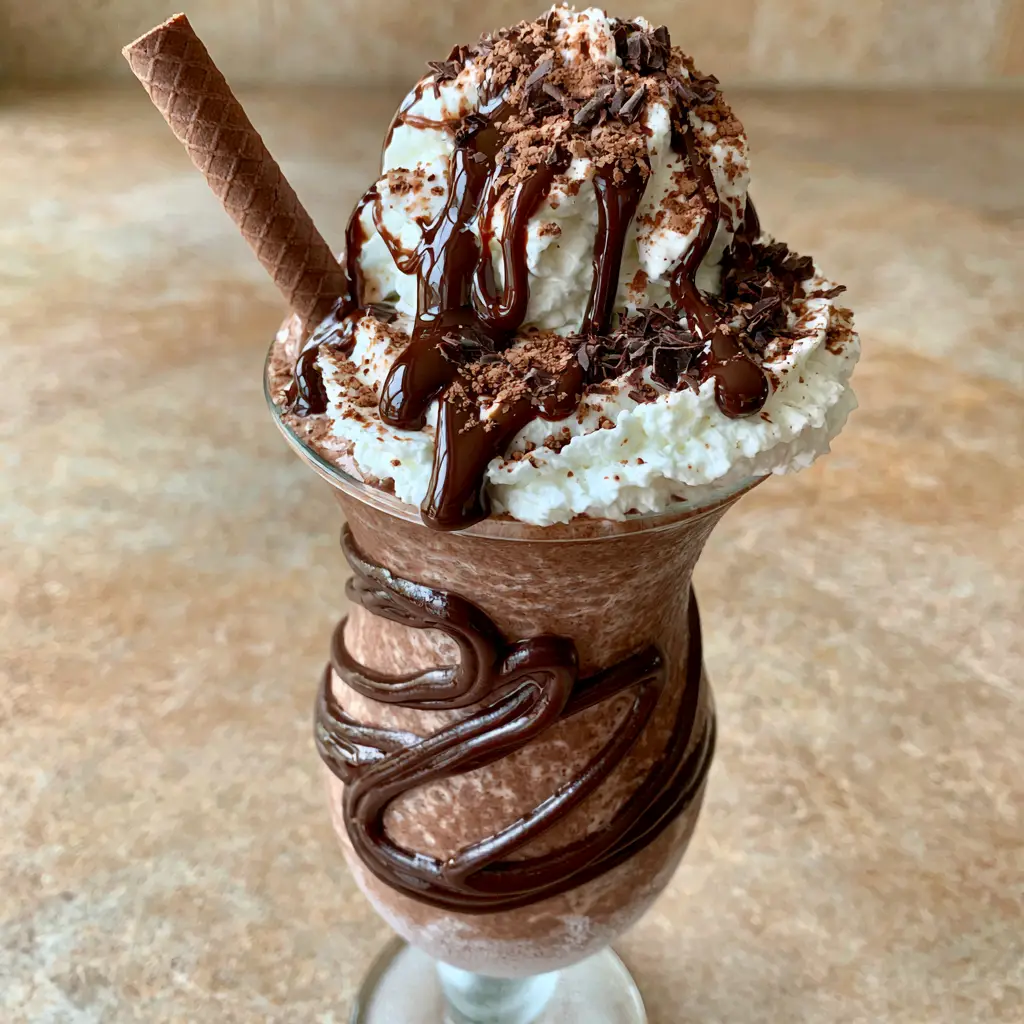
Achieving the visual and textural perfection seen in high-end resort photos requires more than just throwing ingredients in a blender. This recipe is engineered for maximum indulgence and aesthetic appeal, ensuring your drink looks exactly like a professional food photograph. Here is why this version stands above the rest:
- Zero Ice Consistency: By using a blended vanilla ice cream base instead of ice cubes, we eliminate watered-down flavors and create a texture that stays thick until the very last sip.
- The Triple Chocolate Threat: We utilize dark chocolate fudge sauce for the swirls, fine cocoa powder for dusting, and delicate dark chocolate shavings for a multi-layered flavor profile.
- Structural Integrity: Our recipe focuses on “stiff” whipped cream, ensuring that your towering mountain of topping doesn’t collapse into the drink before you take your first photo.
- Professional Aesthetics: From the frosted hurricane glass to the perfectly placed chocolate wafer stick, every element is designed for visual impact.
Essential Components for a High-End Frozen Mudslide
To recreate the decadent frozen mudslide you see in the photos, you need specific ingredients that balance fat, sugar, and alcohol. Here is the culinary breakdown of what you’ll need:
Premium Vanilla Bean Ice Cream: 3 large scoops (approx. 1.5 cups or 350ml). The ice cream acts as the structural foundation; choose a high-fat brand with real vanilla flecks for the best flavor and “milkshake-thick” results.
Kahlúa Coffee Liqueur: 2 oz (60ml). This provides the essential “muddy” color and a deep, roasted coffee backbone that cuts through the sweetness of the cream.
Baileys Irish Cream: 2 oz (60ml). This adds a luxurious, silky mouthfeel and notes of cocoa and Irish whiskey that harmonize perfectly with the vanilla base.
Dark Chocolate Fudge Sauce: 3 tbsp (45ml). Unlike thin chocolate syrup, a thick fudge sauce “clings” to the glass walls, creating those iconic dark chocolate swirls that don’t immediately bleed into the drink.
Heavy Whipping Cream: 1/2 cup (120ml). When whipped to stiff peaks, this creates the “mountain” of topping described in our visual blueprint.
Powdered Sugar: 1 tbsp (15g). A small amount of sugar stabilizes the whipped cream, ensuring it holds its shape under the weight of the chocolate drizzle.
Garnish Essentials: You will need 1 tsp (5g) of unsweetened cocoa powder, 1 tbsp (10g) of dark chocolate shavings, and one long chocolate wafer stick (wafer straw) for the final touch.
Fine Sea Salt: 1 pinch. A tiny, invisible addition that enhances the chocolate and balances the sugar, making the flavors pop.
The Tools for Professional Results
To achieve the “ultra-creamy” result with “zero ice crystals,” your equipment choice matters just as much as your ingredients. You will need a high-power blender to emulsify the liqueurs with the cold ice cream quickly, preventing premature melting. A tall, elegant hurricane glass is non-negotiable for the proper silhouette; be sure to place it in the freezer at least 20 minutes before serving to get that “frosted” look. Additionally, a piping bag with a large star tip will help you achieve the “towering mountain” of whipped cream, and a vegetable peeler is perfect for creating those delicate dark chocolate shavings from a bar.
How to Achieve the Perfect Frozen Mudslide Consistency
Step 1: The Glass Preparation (The Visual Foundation)
Start by placing your hurricane glass in the freezer. Once frosted, take your dark chocolate fudge sauce and slowly rotate the glass while drizzling the sauce inside the rim. Allow the fudge to drip down the inner walls in thick, irregular ribbons. Return the glass to the freezer immediately to “set” the fudge so it doesn’t wash away when you pour the drink.
Step 2: Preparing the Stiff Whipped Topping
In a chilled bowl, combine the heavy whipping cream, powdered sugar, and a tiny drop of vanilla extract. Beat until very stiff peaks form. You want the cream to be firm enough to stand upright. Transfer this to a piping bag and keep it in the refrigerator until the exact moment of assembly. This ensures the frozen mudslide remains cold and structurally sound.
Step 3: Emulsifying the Base
Place the 3 scoops (350ml) of vanilla ice cream, 2 oz (60ml) of Kahlúa, 2 oz (60ml) of Baileys, and a pinch of sea salt into the blender. Blend on high for only 15-20 seconds. Visual Cue: Stop the moment the mixture looks like a thick, velvety ribbon with no visible lumps. Do not over-blend, or the friction of the blades will turn your masterpiece into a liquid soup.
Step 4: The Final Assembly
Retrieve your frosted, fudge-lined glass. Pour the frozen mudslide mixture into the glass, stopping about an inch from the rim. Pipe a towering mountain of the prepared whipped cream on top, starting from the edges and swirling toward the center to build height. Drizzle with more glossy chocolate syrup, then use a fine-mesh sieve to dust with cocoa powder. Finish with a generous sprinkle of dark chocolate shavings and tuck the chocolate wafer straw into the side at a 45-degree angle.
Expert Tips for Success
- Chill Your Spirits: Keep your Baileys and Kahlúa in the refrigerator. Using room-temperature alcohol will melt the ice cream instantly, ruining the “milkshake-thick” texture.
- The “Spoon Test”: If you stick a spoon into the blender and it stands upright for 3 seconds before slowly tilting, you have achieved the perfect viscosity.
- Fudge Choice: Always use “Hot Fudge” style sauce rather than “Chocolate Syrup” for the glass swirls. The higher viscosity is what creates the defined visual lines.
- Avoid Over-Blending: Over-blending incorporates too much air, which will cause the frozen mudslide to collapse and lose its “ultra-creamy” density.
Storage and Preparation in Advance
While a frozen mudslide is best enjoyed immediately, you can prepare elements in advance. The whipped cream can be made up to 4 hours ahead and kept in the piping bag. The glasses can be fudge-swirled and kept in the freezer for up to 24 hours. However, do not blend the drink until you are ready to serve. If you have leftovers, you can pour them into an airtight container and freeze them, but the texture will become hard like traditional ice cream. To consume later, let it sit on the counter for 10 minutes and give it a quick pulse in the blender with a splash of milk.
What to Serve With This Decadent Cocktail
Because the frozen mudslide is essentially a dessert in a glass, it pairs beautifully with other rich treats or serves as a refreshing follow-up to a summer BBQ. If you are hosting a party and want to offer a variety of frozen delights, consider serving this alongside a frozen strawberry lemonade slush for those who prefer something fruit-forward.
For a complete dessert spread, these peanut butter butterscotch marshmallow squares provide a chewy contrast to the creamy drink. If you have guests who love the “adult milkshake” vibe but want a different flavor profile, try our creamy root beer rum cocktail. For the ultimate chocolate lovers’ experience, a slice of white chocolate raspberry poke-cake complements the dark chocolate shavings in the mudslide perfectly.
Frequently Asked Questions
It is difficult to achieve the signature velvety texture without a blender. However, you can soften the ice cream significantly, whisk it vigorously with the liqueurs by hand, and then freeze it for 20 minutes before serving.
Replace the Kahlúa with cold-brew coffee concentrate and the Baileys with an Irish cream-flavored coffee creamer. This maintains the flavor profile without the alcohol content.
A premium, high-fat vanilla bean ice cream is best. Avoid ‘frozen dairy desserts’ or low-fat options, as they contain more air and will result in a watery drink.
A classic Mudslide is shaken with ice and strained into a glass or served on the rocks with cream. A Frozen Mudslide is blended, usually with ice or vanilla ice cream, to create a milkshake-like consistency.
This usually happens if you use room-temperature alcohol, too little ice cream, or over-blend. To fix it, add another scoop of ice cream and pulse briefly until thick.
The Ultimate Frozen Mudslide Recipe Card
Frozen Mudslide Recipe: The Ultimate Ultra-Creamy Boozy Milkshake
Ingredients
Equipment
Method
- Drizzle dark chocolate fudge sauce inside a frosted hurricane glass in a spiral pattern. Return to the freezer.
- Beat heavy cream and powdered sugar until stiff peaks form. Place in a piping bag.
- Combine vanilla ice cream, Kahlúa, Baileys, and salt in a blender. Blend on high for 15-20 seconds until velvety and thick.
- Pour the mixture into the prepared glass. Pipe a mountain of whipped cream on top.
- Drizzle with fudge sauce, dust with cocoa powder, sprinkle dark chocolate shavings, and add the wafer stick.
Notes
Hot fudge sauce works better than thin syrup for the glass swirls.
Closing & Call to Action
The frozen mudslide is more than just a drink; it is a luxurious experience that brings the feel of a tropical resort right into your kitchen. By following these professional techniques—using an ice cream base, frosting your glassware, and creating a stabilized whipped topping—you’ll serve a cocktail that tastes even better than it looks. We would love to see your creations! If you enjoyed this recipe, please leave a comment below and share your photos with us on Pinterest. Don’t forget to sign up for our newsletter for more elite culinary guides and boozy dessert inspiration!


