When the craving for a warm, bakery-style treat strikes at midnight, most of us don’t want to wait 45 minutes for a standard oven to preheat. That is where microwave mug snacks become a culinary lifesaver. This isn’t just another dry, spongy cake in a cup; we are talking about a deeply decadent, soft-baked cookie dough base that rivals any gourmet skillet cookie you have ever tasted.
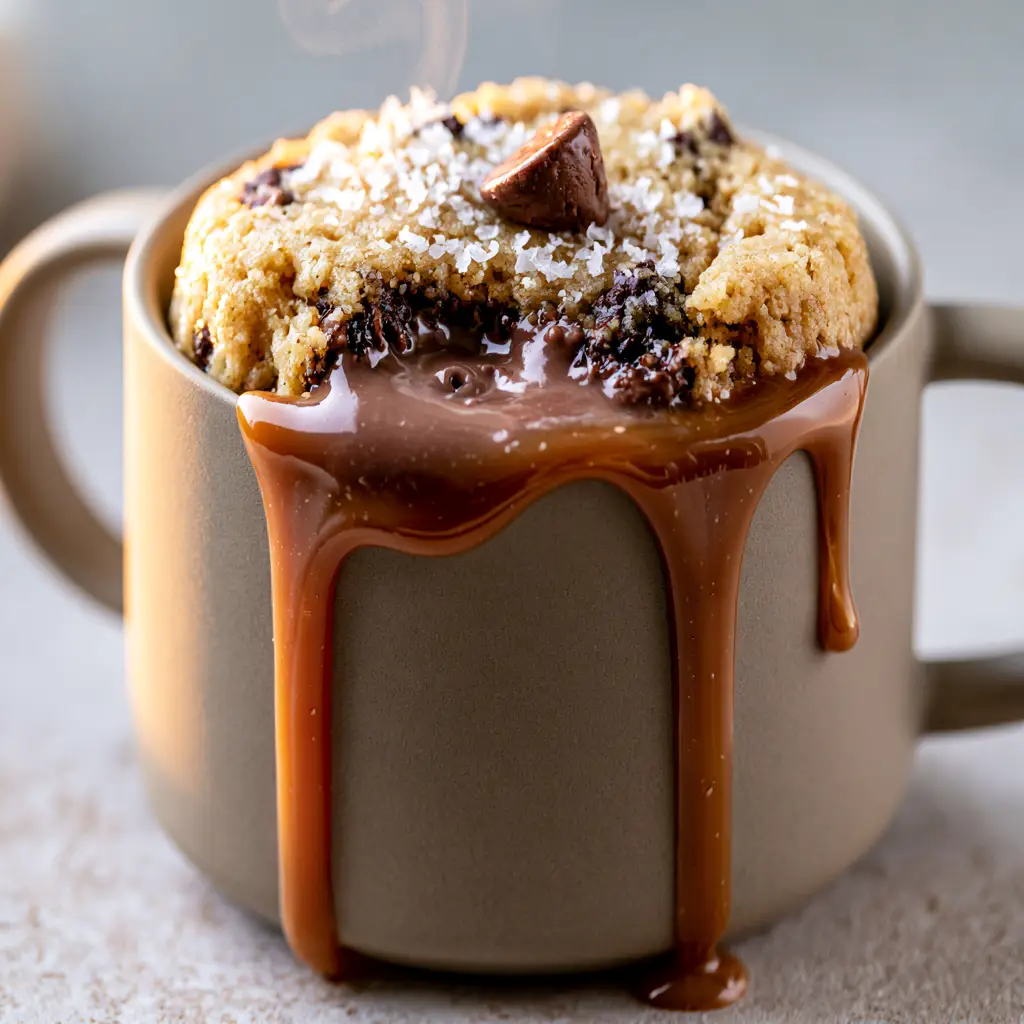
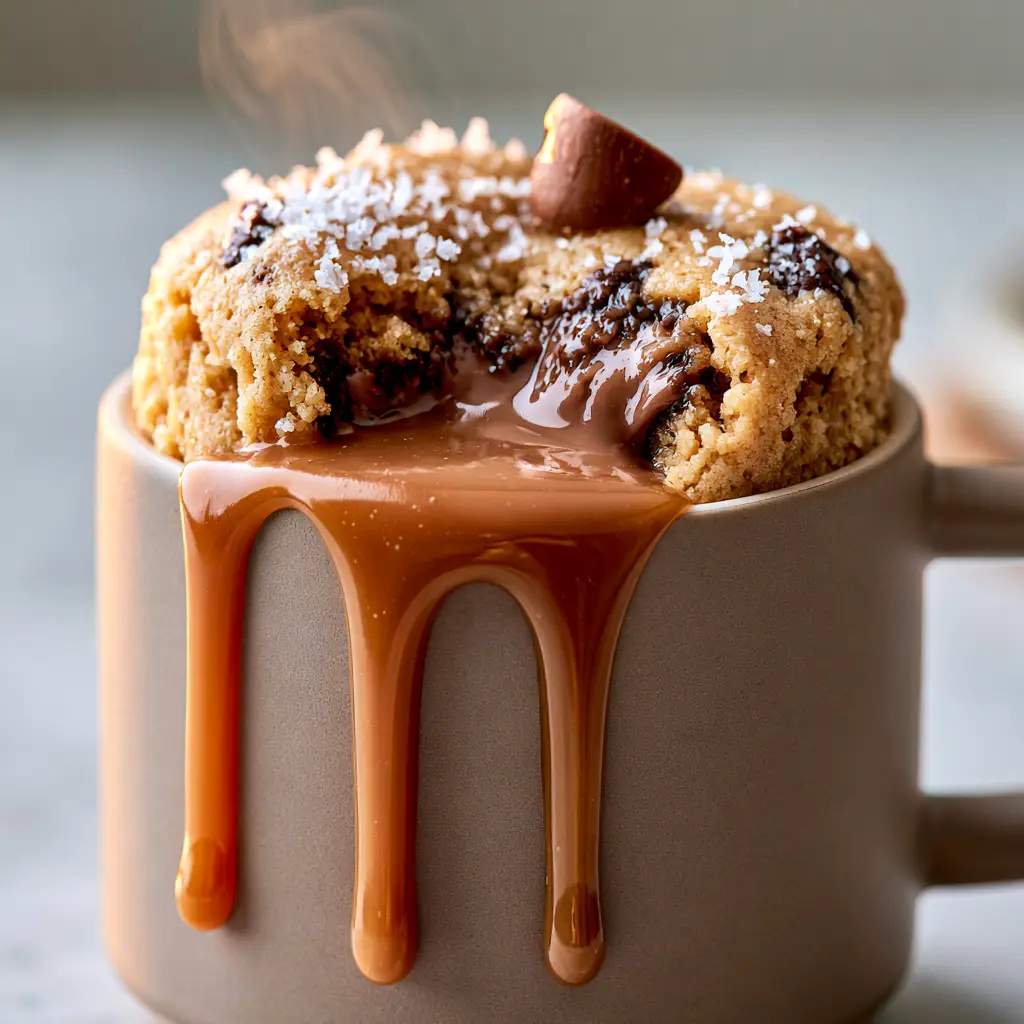
Imagine pulling a matte ceramic mug out of the microwave, a subtle wisp of steam rising into the soft evening light. The top is a perfect golden brown, dotted with pools of melted milk chocolate that shimmer under the kitchen lights. As your spoon breaks the surface, a glossy caramel drizzle mingles with a molten, gooey center that flows like liquid gold. This recipe is designed specifically to replicate that professional, mouth-watering visual of a high-end dessert in under two minutes.
Whether you are settling in after a long day or need a quick win for a sweet tooth, this salted caramel cookie mug cake is the pinnacle of microwave mug snacks. It balances the richness of brown sugar and chocolate with the sharp, sophisticated bite of flaky sea salt, creating a profile that is as complex as it is comforting.
Why This Is the Only Microwave Cookie Recipe You Need
- The Perfect Texture: Unlike many mug cakes that turn rubbery, this recipe uses a specific ratio of fats and sugars to ensure a soft-baked, cookie-dough-like consistency.
- Molten Core Technology: We utilize a “filling plug” method to guarantee a gooey, molten center every single time you microwave it.
- Visual Sophistication: With the glossy caramel drizzle and flaky sea salt crystals, this snack looks like it belongs on a professional food blog, not just a dorm room desk.
- Speed and Simplicity: From the first measurement to the first bite, you are less than five minutes away from pure chocolatey bliss.
Essential Ingredients for Gourmet Microwave Mug Snacks
Unsalted Butter: 2 tbsp (28g)
Butter provides the essential fat that carries the flavor and ensures the cookie base remains moist rather than spongy. Melting it directly in the mug saves time and incorporates into the dry ingredients seamlessly.
Brown Sugar (Packed): 2 tbsp (25g)
Brown sugar is the secret to that deep, golden-brown color and the slight molasses undertone found in world-class cookies. It also adds the necessary moisture for a “soft-baked” feel.
Pure Vanilla Extract: 1/2 tsp (2.5ml)
A foundational “invisible” ingredient, vanilla provides a floral aromatic backbeat that enhances the sweetness of the chocolate. Without it, the dough can taste one-dimensional.
Egg Yolk: 1 Large Yolk
We omit the white to avoid the “rubbery” texture often associated with microwave baking. The yolk provides richness and emulsifies the dough for a dense, decadent crumb.
All-Purpose Flour: 1/4 cup (30g)
This provides the structural integrity of the cookie snacks. Be careful not to over-pack your measuring cup to keep the texture light and tender.
Baking Powder: 1/8 tsp (0.5g)
A tiny amount of leavening is required to give the dough a bit of “lift” and prevent it from becoming a solid brick of sugar. It creates those tiny air pockets that hold the melted chocolate pools.
Milk Chocolate Chips: 2 tbsp (30g)
Milk chocolate offers a creamier, more “molten” melt than dark chocolate in the microwave. These will form the pools of chocolate highlighted in our visual blueprint.
Caramel Sauce: 1 tbsp (15ml)
A generous, glossy drizzle of warm caramel sauce adds a layer of professional flair. It provides that beautiful visual of sauce running down the side of the matte mug.
Flaky Sea Salt: 1 pinch
The finishing touch of sea salt crystals cuts through the sugar and elevates the entire flavor profile. It provides a visual sparkle and a sophisticated savory-sweet balance.
Equipment Required for Perfection
To achieve the look of our decadent microwave mug snacks, you don’t need much, but quality matters. A matte neutral ceramic mug is preferred for its heat retention and modern aesthetic. You will also need a standard microwave (ideally 1100 watts) and a small whisk or fork to ensure the dough is perfectly aerated before cooking.
If you enjoy making these quick treats, you might also want to look into how to make cake pops or even our signature cake pop recipe for your next party. Having the right small tools—like a silicone spatula—makes a world of difference in the kitchen.
The Science of the Microwave: How to Avoid the “Rubber” Effect
The biggest complaint with microwave mug snacks is the texture. Because microwaves cook by vibrating water molecules, they can easily overcook flour-based treats, turning them into something resembling a pencil eraser. The key to our recipe is the high fat-to-flour ratio. By using butter and an egg yolk, we coat the flour particles in fat, which inhibits gluten development.
Furthermore, the “molten” center isn’t just a visual trick. By placing a cluster of chocolate chips in the center of the dough rather than mixing them all in, we create a thermal pocket. The chocolate melts at a lower temperature than the dough “sets,” resulting in that gooey, oozing center that looks so incredible in our handheld photos.
Step-by-Step Instructions for the Perfect Cookie Mug Cake
1. Prepare the Golden Base
Place 2 tbsp (28g) of unsalted butter in your matte ceramic mug. Microwave for 20-30 seconds until completely liquid. Add the 2 tbsp (25g) of packed brown sugar and whisk vigorously with a fork until the mixture looks like wet sand and the sugar has begun to dissolve into the fat.
2. Emulsify and Flavor
Once the butter has cooled slightly (you don’t want to scramble the egg!), stir in the egg yolk and 1/2 tsp (2.5ml) of vanilla extract. Whisk until the mixture is glossy and smooth. This emulsion is what gives the final cookie its rich, uniform golden-brown color.
3. Incorporate the Dry Ingredients
Gently fold in 1/4 cup (30g) of all-purpose flour, 1/8 tsp (0.5g) of baking powder, and a tiny pinch of table salt. Stir until just combined; over-mixing here will lead to a tough snack. The dough should be thick and slightly tacky to the touch.
4. Engineering the Molten Center
Fold in half of your milk chocolate chips. Then, take the remaining chips and press them into the very center of the dough. Smooth a little dough over the top. This ensures that when you break into the cake, you get those deep pools of melted chocolate and a molten, gooey center.
5. The Precision Cook
Microwave on high (1100W) for 50 to 60 seconds. You are looking for a specific sensory cue: the edges should be set and look like a baked cookie, while the center should still look slightly “wet” or underdone. The cake will continue to cook from residual heat (carry-over cooking) once removed. Watch for the subtle wisp of steam as it finishes.
6. The Grand Finale Garnish
While the cake is hot, drizzle 1 tbsp (15ml) of glossy caramel sauce over the top, letting it run beautifully down the side of the mug. Finish with a delicate pinch of flaky sea salt crystals and a single half-melted chocolate chip right on top. This creates the high-contrast, mouth-watering look we desire.
Expert Tips for Success
- Know Your Wattage: If your microwave is 700W, you may need 80-90 seconds. If it is 1200W, 45 seconds might be plenty. Always start low!
- The Resting Period: Let the mug sit for at least 2 minutes after cooking. This allows the starches to set and the chocolate to reach its maximum “molten” state.
- Mug Choice: Use a mug that holds at least 10-12 ounces. If the mug is too small, the dough might overflow, ruining the “glossy drizzle” effect.
- Salt Quality: Use Maldon or another high-quality flaky salt. Table salt is too fine and will simply make the dessert taste salty rather than providing that hit of “salted caramel” brilliance.
Creative Pairings for Your Mug Snack
While this cookie mug cake is a star on its own, it pairs beautifully with other treats. If you’re hosting a casual get-together, consider serving it alongside a creamy peanut-butter milkshake for a full-tilt dessert experience. For something a bit more refreshing to cut through the richness, a strawberry kiwi lemonade provides the perfect acidic balance.
If you’re in the mood for a “boozy” dessert night, this warm cookie snack is incredible when followed by a frozen mudslide. The contrast between the warm, molten cookie and the ice-cold cocktail is a sensory delight that your guests will love.
Frequently Asked Questions
Yes, you can substitute the all-purpose flour for a 1:1 gluten-free baking blend. The texture will be very similar since the recipe relies heavily on fats and sugars.
Absolutely! However, milk chocolate has a lower melting point, which helps achieve those ‘molten pools’ seen in the photos. If using dark, chop it into smaller bits.
Warm the caramel sauce for 5-10 seconds before drizzling. This thins it out so it flows beautifully down the side of the mug rather than clumping.
A standard 10-12 oz ceramic mug is best. Ceramic holds heat well, which helps the cookie finish cooking through carry-over heat once you take it out.
Rubbery texture is usually caused by using a whole egg (the white acts like a sponge) or overcooking. Stick to the yolk only and stop the microwave when the center still looks slightly wet.
Recipe: The Ultimate Gooey Salted Caramel Cookie Mug Cake
Microwave Mug Snacks: The Ultimate Molten Salted Caramel Cookie Mug Cake
Ingredients
Equipment
Method
- Place butter in the mug and microwave for 20-30 seconds until melted.
- Whisk in brown sugar until well combined, then add the egg yolk and vanilla.
- Stir in flour and baking powder until just combined. Fold in half the chocolate chips.
- Press the remaining chocolate chips into the center of the dough and cover slightly.
- Cook on high for 50-60 seconds until the edges are set but the center is still slightly gooey.
- Drizzle with caramel sauce, sprinkle with sea salt, and let rest for 2 minutes before serving.
Notes
Use only the egg yolk to ensure a cookie-like texture rather than a rubbery cake.
Storage, Reheating & Freezing
Because microwave mug snacks are designed for immediate consumption, they do not store as well as traditional cookies. However, if you find yourself unable to finish, you can cover the mug with plastic wrap and keep it at room temperature for up to 12 hours. To reheat, microwave in 10-second bursts until the chocolate pools become glossy again.
We do not recommend freezing the cooked mug cake, as the texture will become dry upon thawing. Instead, you can mix the dry ingredients in advance and store them in small jars for a “ready-to-go” snack kit!
Closing & Call to Action
Mastering microwave mug snacks is about more than just convenience; it’s about bringing a moment of gourmet luxury into your everyday life. This molten salted caramel cookie mug cake proves that you don’t need a pastry kitchen to create something visually stunning and undeniably delicious. The combination of the golden-brown base and the oozing chocolate center is a guaranteed win for any home cook.
If you loved this recipe, please leave a comment below and tell us how yours turned out! Don’t forget to follow us on Pinterest for more decadent inspirations, and share your photos using the hashtag #AliceCooks. Your support helps us keep the kitchen fires (and microwaves) running!