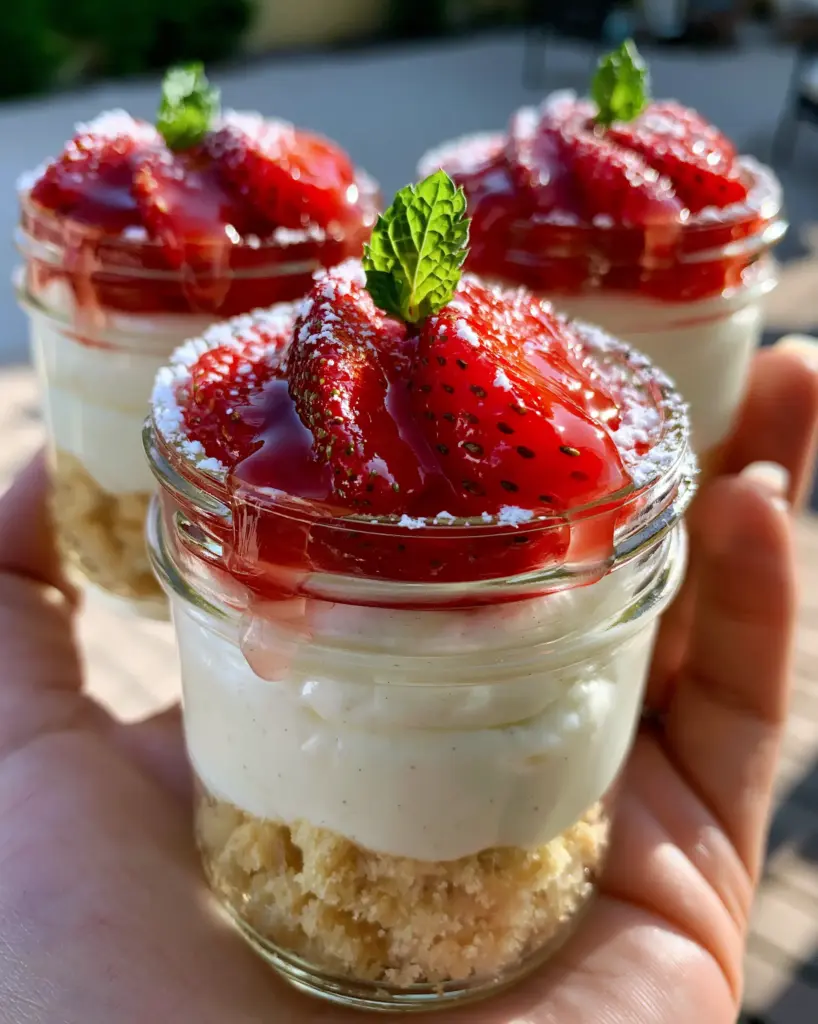
There is something inherently magical about holding a perfectly layered dessert in the palm of your hand, especially when the late afternoon sun hits the glass just right. These strawberry shortcake cups are designed to be that exact moment of bliss, combining the nostalgic flavors of a classic summer treat with a sophisticated, handheld presentation. Whether you are hosting an upscale garden party or looking for the perfect treat to cap off a family barbecue, these mini mason jar delights are the answer.
Every element of this recipe has been architected to provide a specific sensory experience. From the audible crunch of the buttery, coarse shortbread crumbles to the sight of ruby-red strawberries glistening under a clear sugar glaze, this is food designed for both the palate and the lens. It is the kind of dessert that stops a scroll on social media and keeps guests reaching for a second jar.
As we dive into the construction of these strawberry shortcake cups, we aren’t just making a recipe; we are building a multi-textured masterpiece. The dense, velvety vanilla bean whipped cream acts as the structural anchor, while the macerated fruit provides a bright, acidic pop that cuts through the richness of the shortbread. Let’s explore how to achieve this professional result in your own kitchen.
Why These Handheld Strawberry Mason Jars are the Ultimate Crowd-Pleaser
- Textural Contrast: The combination of crunchy, golden-baked shortbread and cloud-like whipped cream creates a professional mouthfeel.
- Visual Sophistication: Distinct, clean layers visible through the glass make these look like they came from a high-end patisserie.
- Make-Ahead Friendly: You can prepare the components in advance and assemble them just before your guests arrive.
- Portion Controlled: Individually sized portions make serving a breeze and ensure every guest gets the perfect ratio of fruit to cream.
- Photogenic Appeal: Perfectly aligned with the “unfiltered” social media aesthetic, these cups are designed to glow in natural sunlight.
Essential Elements for the Perfect Strawberry Layer Dessert
To achieve the visual and structural integrity seen in our visual blueprint, you need high-quality ingredients. We aren’t just using “cookies” and “cream”; we are crafting specific textures from scratch. If you love this flavor profile, you might also enjoy our traditional strawberry shortcake for a more rustic approach.
Unsalted European-Style Butter (226g / 1 cup): High-fat butter is the secret to that coarse, golden shortbread texture. It provides the richness necessary to stand up to the moisture of the strawberries.
All-Purpose Flour (300g / 2.5 cups): This provides the structure for our shortbread base. We bake it as a solid disc first to ensure even browning before breaking it into those signature coarse crumbles.
Fresh Ruby-Red Strawberries (454g / 1 lb): Look for berries that are fragrant and deep red all the way to the stem. The quality of the fruit dictates the quality of the final “glistening” glaze.
Granulated White Sugar (150g / 0.75 cups): Used in both the shortbread and for macerating the berries. The sugar draws the moisture out of the fruit to create that natural, clear syrup glaze.
Heavy Whipping Cream (480ml / 2 cups): It must be very cold to achieve the “dense and velvety” texture described. We recommend at least 36% milkfat for the best stability.
Vanilla Bean Paste (1 tbsp / 15ml): This is non-negotiable for the visual “speckled” look. Unlike extract, the paste provides those beautiful black flecks and a more intense floral aroma.
Fresh Mint Sprigs: These provide the “vibrant green” contrast that makes the red of the strawberries pop. It adds a subtle herbal note that refreshes the palate between bites.
Powdered Sugar (30g / 0.25 cups): A final delicate dusting provides the “snowy” finish that catches the light. It also helps stabilize the whipped cream slightly if you are serving outdoors.
Must-Have Tools for Professional Dessert Layering
Achieving the look of these strawberry shortcake cups requires more than just a spoon. You will need 4-ounce (120ml) or 8-ounce (240ml) mini mason jars to showcase the layers. A clear glass is essential for the “mouth-watering” visual effect described in our prompt.
A piping bag fitted with a large round tip is also highly recommended. This allows you to place the vanilla bean whipped cream into the jars without smearing the sides of the glass, keeping your layers distinct and professional. Finally, a sharp paring knife is needed to create uniform, thin slices of strawberries that will macerate evenly and look elegant on top.
The Culinary Science of the Golden Shortbread Base
Crafting the Buttery Shortbread Disc
Preheat your oven to 350°F (175°C). In a large bowl, cream together the softened butter and granulated sugar until pale and fluffy. This aeration is the first step toward a crumbly rather than a hard texture. Gradually fold in the flour and a pinch of salt until a dough forms.
Press the dough into a parchment-lined baking sheet, forming a flat disc about 1/2 inch (1.25cm) thick. Bake for 18-22 minutes until the edges are a deep golden brown. This “over-baking” slightly is what gives us the “coarse golden” visual cue we are looking for.
Creating the Coarse Crumbles
Once the shortbread has cooled completely, break it apart by hand. You are looking for irregular, coarse crumbles rather than a fine sand. These larger pieces provide a satisfying crunch that mimics the texture of our buttery scones. Set these aside in a dry place to maintain their crispness.
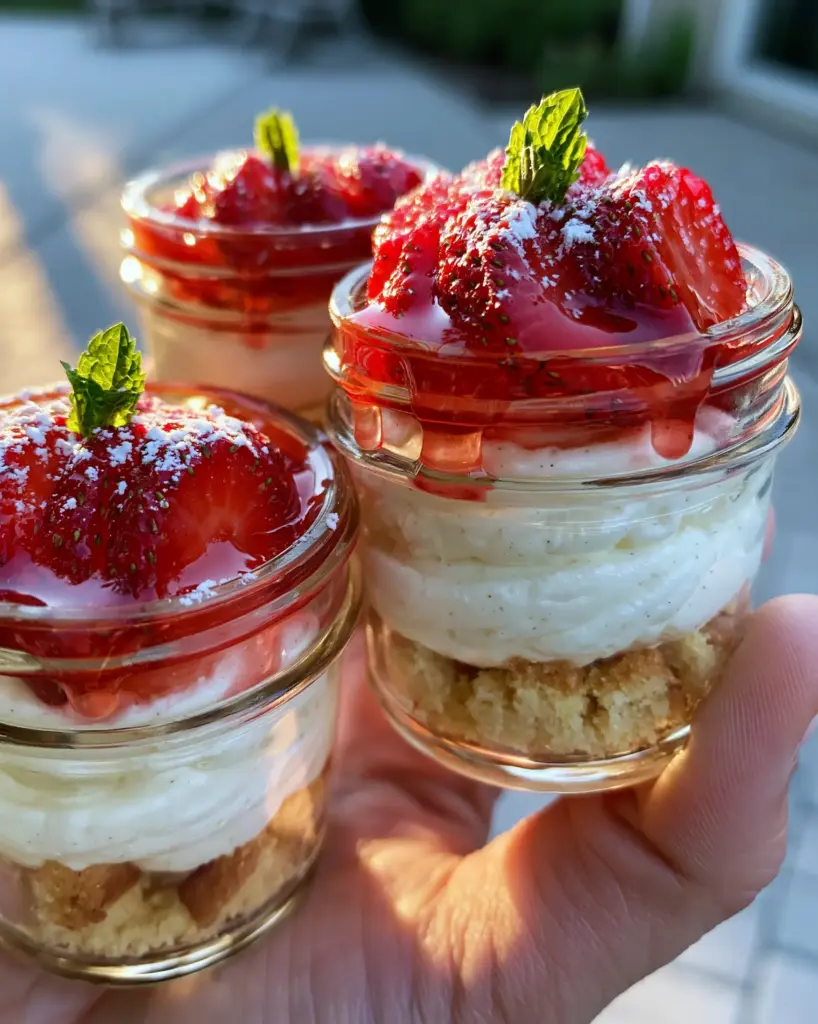
The Art of the Glistening Macerated Strawberry
Slicing for Maximum Surface Area
Wash and hull your strawberries, then slice them vertically into thin, uniform pieces. Thinner slices release their juices faster and create a more elegant “dripping” effect when layered in the mason jars. Aim for slices about 1/8 inch (3mm) thick.
The Maceration Process
Toss the sliced strawberries with 2 tablespoons (30g) of granulated sugar and a teaspoon of lemon juice. Let them sit at room temperature for at least 30 minutes. You will see a clear, ruby-red syrup begin to form—this is the “clear sugar glaze” mentioned in the visual blueprint. This syrup is as flavorful as a concentrated berry sauce and shouldn’t be discarded.
Whisking the Velvety Vanilla Bean Cream
Achieving the Dense Texture
Pour your chilled heavy cream into a cold metal bowl. Cold equipment is the secret to a stable, velvety foam. Begin whisking on medium speed. As the cream begins to thicken, add the vanilla bean paste and powdered sugar. The paste will transform the cream with tiny black specks that signal high-quality ingredients.
Watching for Sensory Cues
Whisk until you reach “stiff peaks.” This means when you lift the whisk, the cream stands straight up without drooping. This density is required to support the weight of the macerated strawberries on top. If it’s too soft, the fruit will sink into the cream, ruining the distinct layering. For more creamy inspiration, check out our pudding-based treats.
Mastering the Mason Jar Assembly
Layer One: The Foundation
Spoon approximately 2 tablespoons (30g) of the coarse shortbread crumbles into the bottom of each mini mason jar. Lightly press them down to create an even base, but don’t pack them so tightly that they lose their “crumbled” look. This layer should take up about one-third of the jar.
Layer Two: The Velvety Middle
Using your piping bag, pipe a thick, generous layer of the vanilla bean whipped cream over the shortbread. Start from the outside edge of the jar and work your way in to ensure there are no air gaps visible through the glass. This middle layer should be the thickest component of your strawberry shortcake cups.
Layer Three: The Crown of Fruit
Carefully spoon the macerated strawberry slices on top of the cream. Ensure you include a spoonful of the clear syrup so it “drips” down the inner sides of the glass. This creates the “glistening” look that is hallmark of a professional dessert. If you’re planning a larger event, these look great alongside other festive party snacks.
Expert Tips for the Most Photogenic Results
- Temperature Control: Never assemble the jars while the shortbread is still warm. The heat will melt the whipped cream instantly, turning your elegant layers into a soup.
- The “Golden Hour” Glow: To capture the moisture and glow seen in the prompt, photograph these in natural, side-lit sunlight. The light will catch the clear glaze on the berries and the condensation on the glass.
- Mint Placement: Place the mint leaf at a 45-degree angle tucked slightly into the cream. This ensures it stays upright and vibrant for your guests or your camera.
- Sugar Dusting Strategy: Use a fine-mesh sieve for the powdered sugar. Hold it at least 12 inches (30cm) above the jars to ensure a “delicate dusting” rather than a heavy clump.
Shelf Life and Storage Solutions
These strawberry shortcake cups are best enjoyed within 2 to 4 hours of assembly to ensure the shortbread remains crunchy. If you need to store them longer, keep them in the refrigerator. The shortbread will naturally soften over time, taking on a texture similar to the cake in an easy shortcake bake.
The individual components can be stored separately for up to 2 days. Keep the shortbread in an airtight container at room temperature, and the macerated strawberries and whipped cream in the fridge. This makes them an excellent option for busy hostesses.
What to Serve With Your Handheld Desserts
These cups are quite rich, so they pair beautifully with light, refreshing beverages. A sparkling lemonade provides a great citrus contrast, while a festive margarita can turn this into a sophisticated adult dessert course.
If you are creating a full dessert spread, consider adding some chocolate elements to balance the fruit. Our no-bake chocolate bars or a tray of espresso brownies offer a deep, cocoa-rich counterpoint to the bright strawberries.
Frequently Asked Questions
While fresh berries are best for the ‘glistening’ visual, you can use frozen. Thaw them completely and drain some excess liquid, but keep the syrup that forms during thawing to mimic the clear glaze.
Yes, you can use high-quality store-bought shortbread cookies. Just crush them into coarse pieces rather than a fine powder to maintain the textural contrast required for this recipe.
For the best texture, assemble them 2-4 hours before serving. If they sit longer, the moisture from the berries and cream will begin to soften the crunchy shortbread crumbles.
You can substitute with an equal amount of vanilla extract, but you will lose the signature black specks in the cream. For the same visual effect, you can scrape the seeds from one whole vanilla bean.
Ensure your cream has a high fat content (at least 36%) and whip it to stiff peaks. Keeping your bowl and whisk attachment in the freezer for 10 minutes before whipping also helps create a denser, more stable velvety cream.
The Ultimate Strawberry Shortcake Cups Recipe
[Image-Pin]
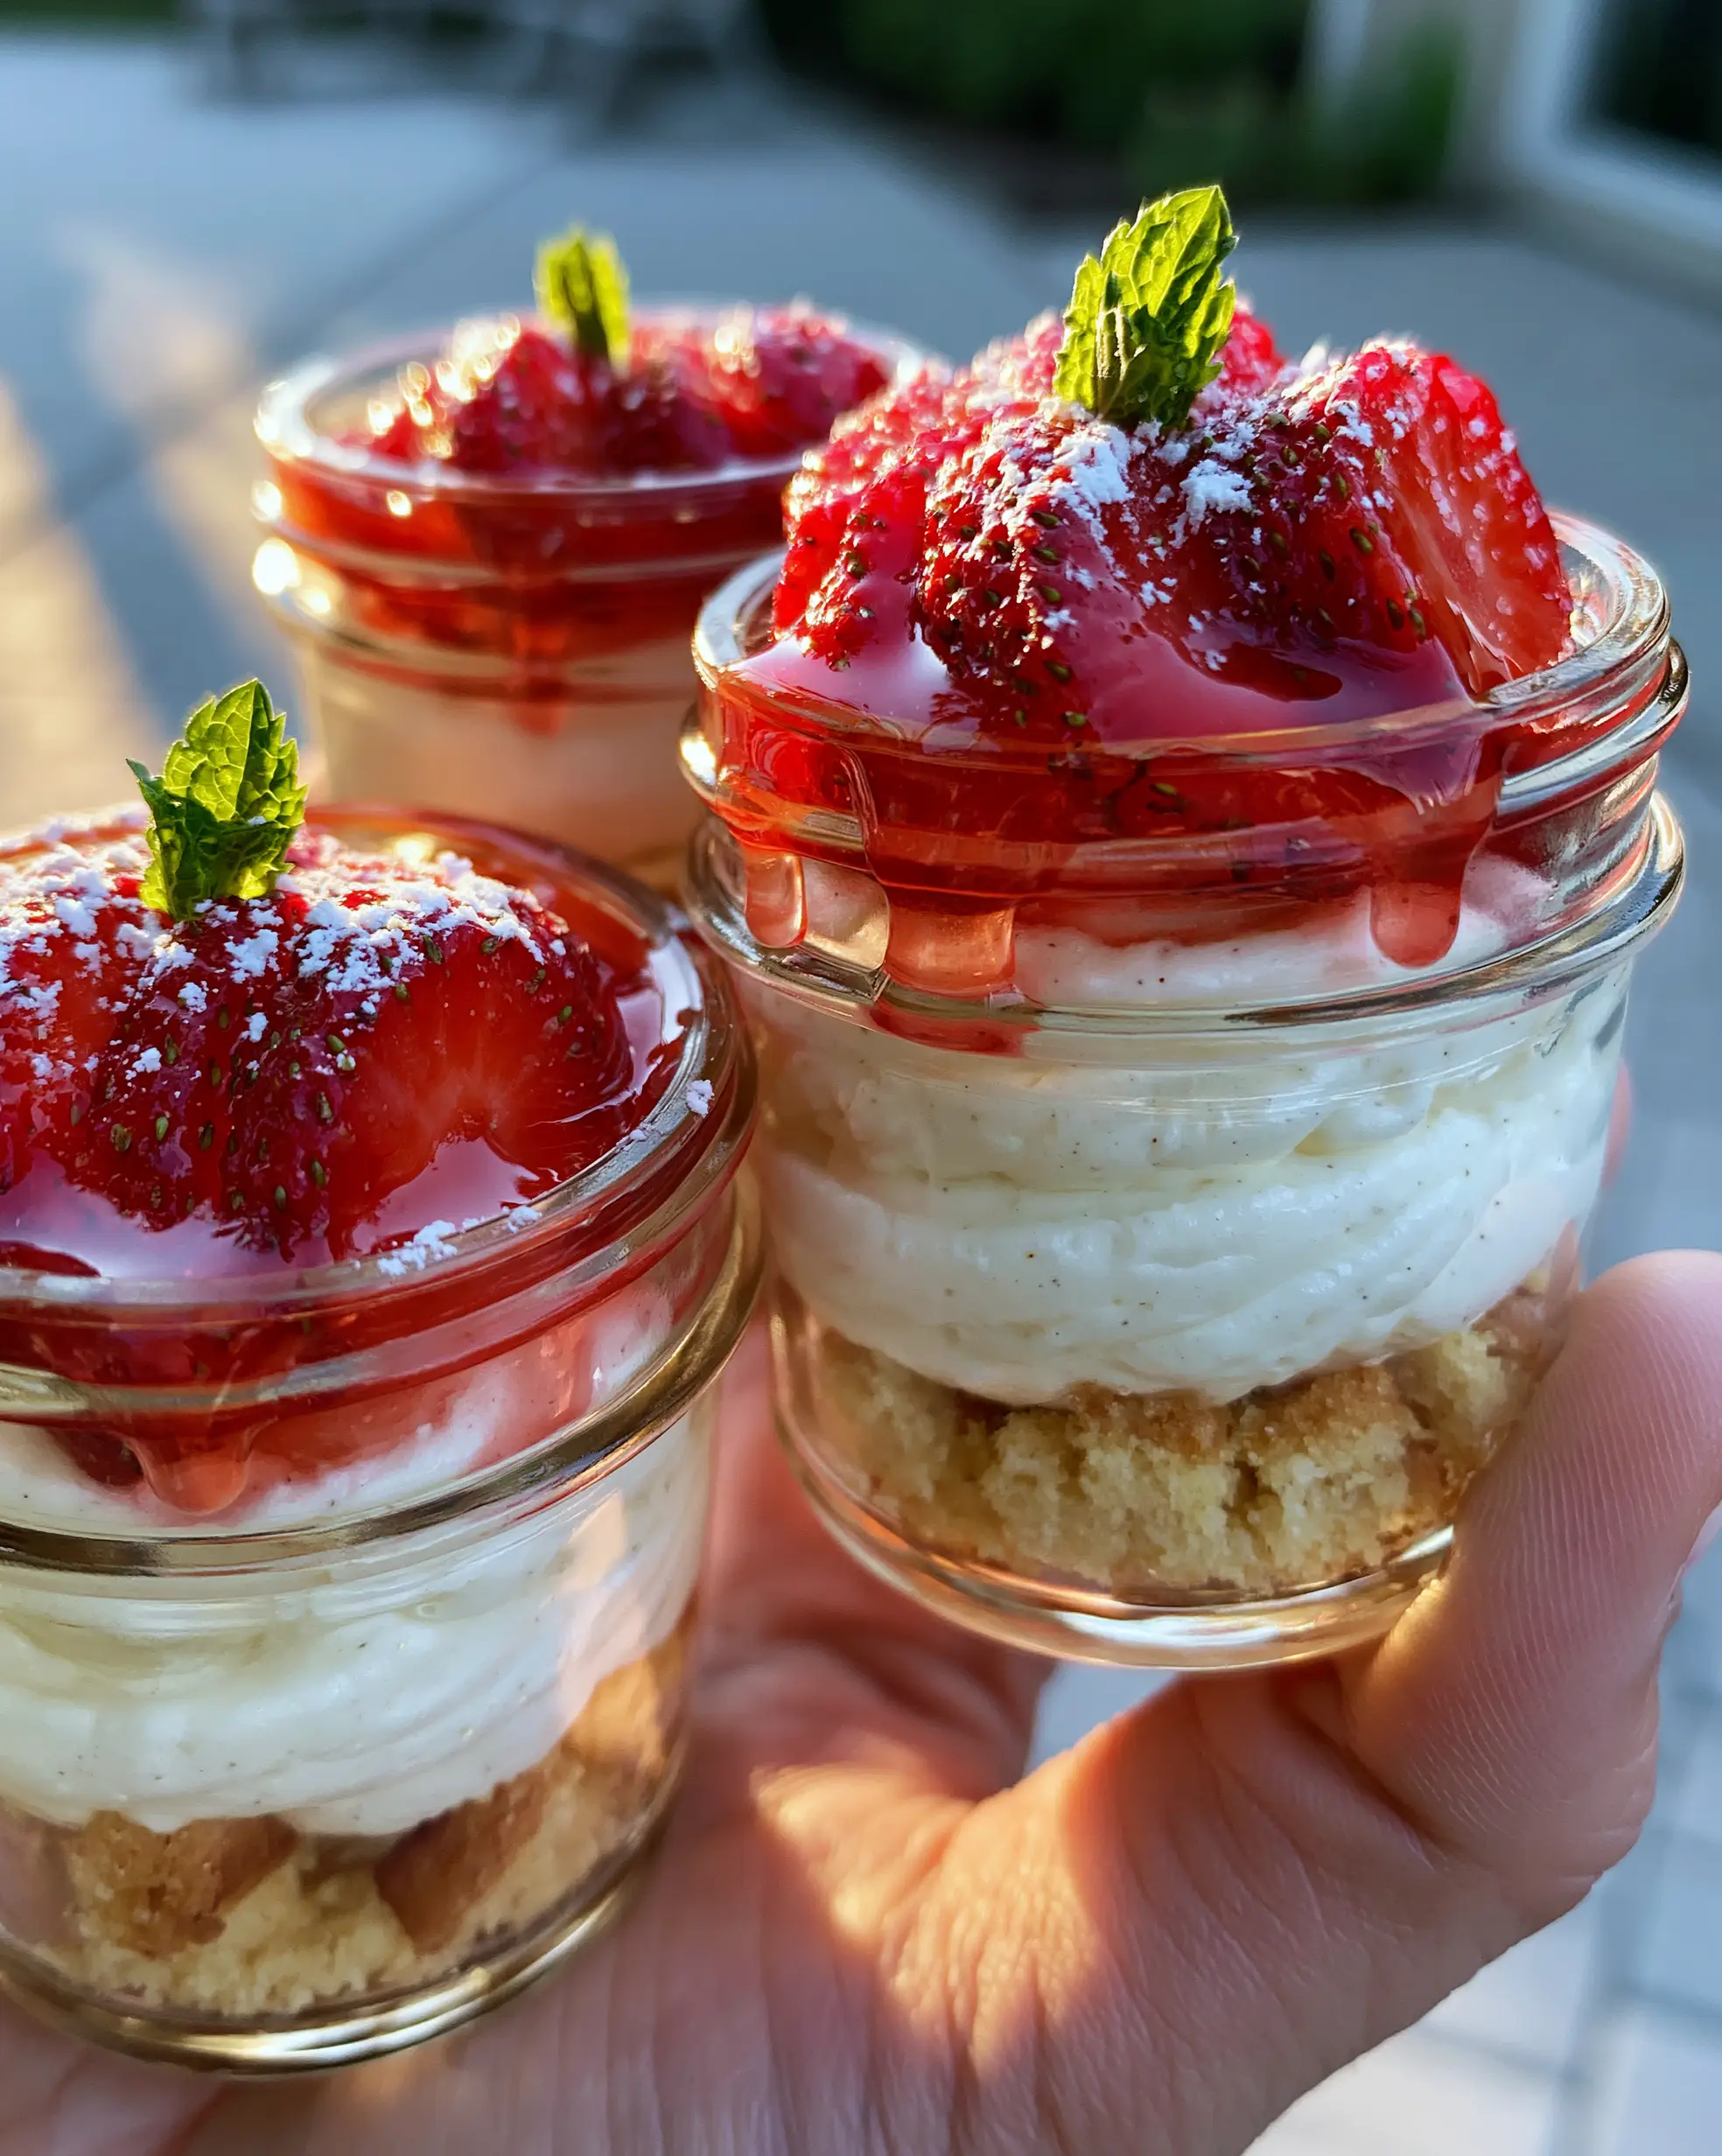
Strawberry Shortcake Cups: The Ultimate Mini Mason Jar Dessert
Ingredients
Equipment
Method
- Cream butter and sugar until light and fluffy. Mix in flour and salt. Press into a 1/2-inch thick disc on a parchment-lined sheet. Bake at 350°F (175°C) for 20 minutes until deep golden brown.
- Allow to cool completely, then break by hand into coarse, irregular crumbles.
- Combine sliced strawberries, sugar, and lemon juice. Let sit for 30 minutes until a glistening clear syrup forms.
- Whisk cold heavy cream, powdered sugar, and vanilla bean paste until dense, velvety stiff peaks form.
- Place shortbread crumbles in the base of each jar. Pipe the cream layer over the crumbles. Top with macerated strawberries, dripping the clear syrup down the sides. Garnish with mint and a dusting of sugar.
Notes
Use vanilla bean paste instead of extract for the best visual appearance and flavor.
[Image-Pin-2]
Sharing the Joy of Summer in a Jar
Creating these strawberry shortcake cups is about more than just satisfying a sweet tooth; it’s about the craft of assembly and the joy of presentation. The way the golden-hour light hits the glistening fruit is a reminder of why we love to cook—to create moments that are as beautiful as they are delicious. We hope this recipe becomes a staple in your summer entertaining rotation.
If you made these, we would love to see your results! Tag us in your photos and let us know how the “velvety” cream turned out. Don’t forget to follow our Pinterest for more visually stunning recipe inspiration and summer hosting tips. Happy layering!
[Image-Pin-3]