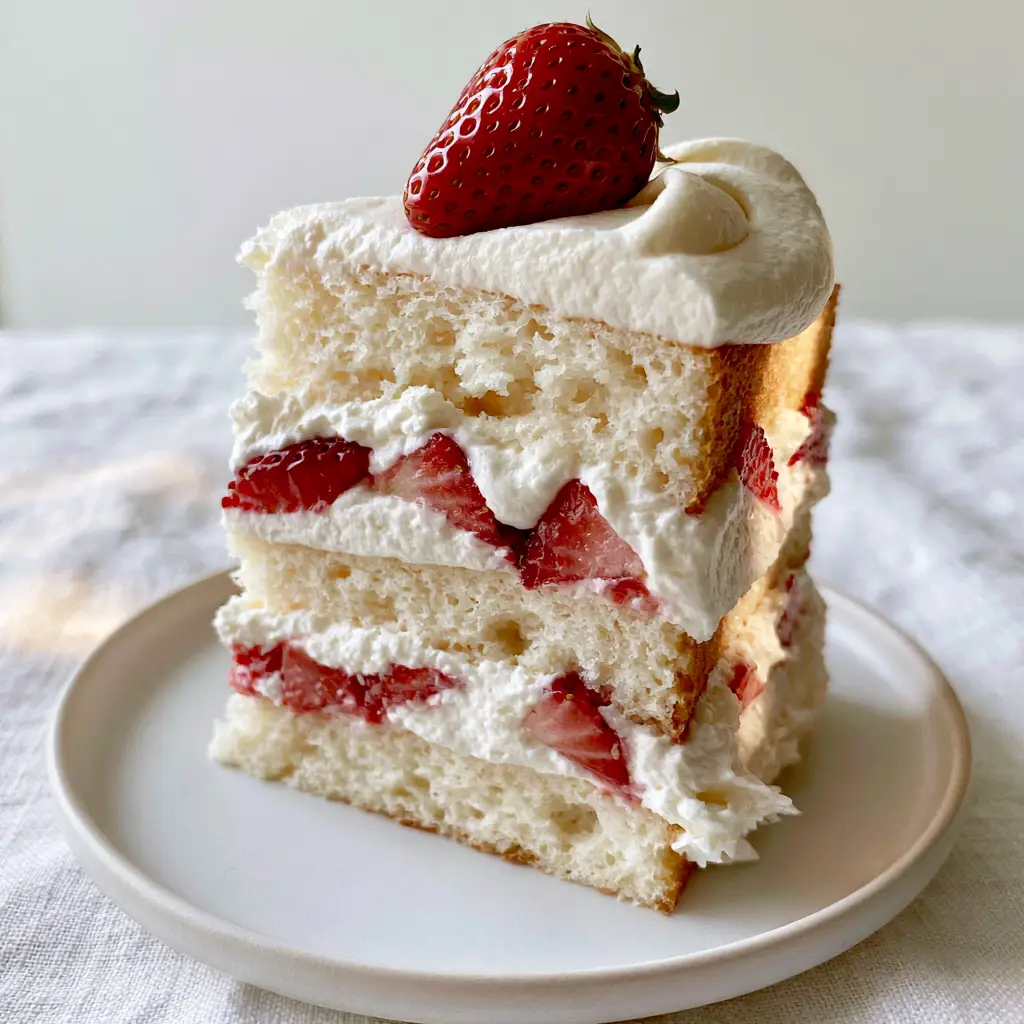
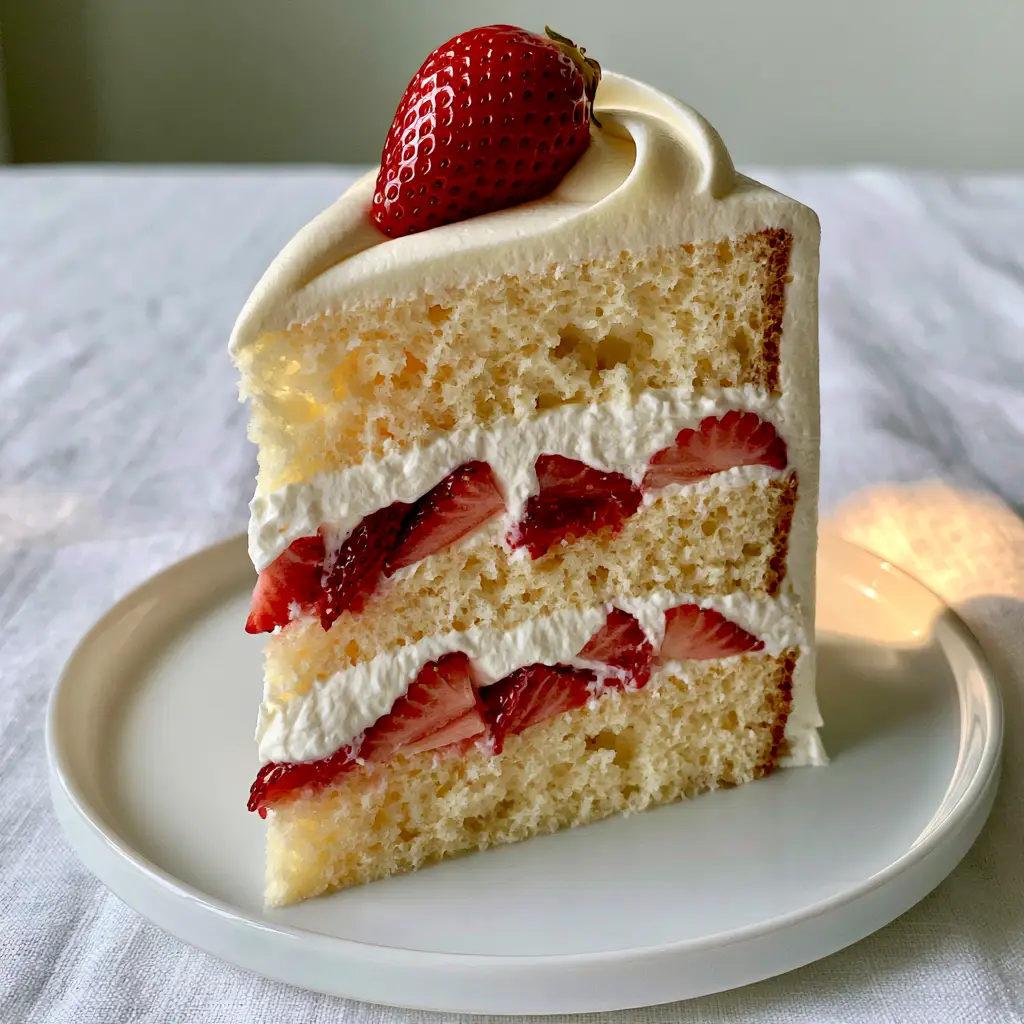
The Japanese strawberry shortcake is more than just a dessert; it is a culinary icon of elegance, precision, and ethereal texture. Unlike its denser Western counterparts, this cake features a majestic tall slice standing proudly on a minimalist white ceramic plate, showcasing three layers of ultra-fluffy, pale-golden genoise sponge. The visible airy ‘cloud’ crumb is the hallmark of a master baker, offering a melt-in-your-mouth experience that feels light as air yet deeply satisfying.
In this comprehensive guide, we are going to bridge the gap between amateur baking and professional patisserie. We will achieve the precise bands of pristine snow-white stabilized whipped cream and vibrant, juicy red strawberry halves seen in high-end Tokyo boutiques. Whether you are preparing this for a special occasion or simply craving the perfect balance of cream and fruit, this recipe delivers a high-resolution result that looks exactly like a professional smartphone photo—clean, appetizing, and structurally sound.
What Makes This Majestic Slice Truly Exceptional?
- The Signature “Cloud” Crumb: A meticulously aerated genoise sponge that retains a pale golden hue and a soft, springy texture.
- Structural Integrity: Stabilized Chantilly cream ensures those thick, precise bands between layers stay perfectly aligned without bulging.
- Visual Brilliance: A single, perfect whole strawberry with a glossy natural glaze serves as the crowning jewel atop smooth, velvety cream swirls.
- Flavor Balance: The natural sweetness of organic strawberries is heightened by a subtle dusting of fine powdered sugar, avoiding the cloying sweetness of buttercream-based cakes.
The Essential Components for a Professional Genoise Sponge
To achieve the height and fluffiness required for this Japanese strawberry shortcake, each ingredient must be selected for its chemical properties. We aren’t just mixing batter; we are building a structural foam.
Cake Flour (1 ½ cups / 180g): The low protein content is vital for creating that delicate, airy crumb without the toughness found in all-purpose flour. Sift this twice to ensure no clumps weigh down your foam.
Large Organic Eggs (4 units / 200g): These provide the primary leavening power. Ensure they are at room temperature to achieve maximum volume during the whisking process.
Granulated Sugar (¾ cup / 150g): Sugar doesn’t just sweeten; it stabilizes the egg protein network, allowing the sponge to rise majestically in the oven.
Unsalted Butter (3 tbsp / 45g): Melted butter adds a rich, silken mouthfeel to the sponge. It should be combined with Whole Milk (2 tbsp / 30ml) to create a liquid fat that incorporates easily into the delicate batter.
Pure Vanilla Extract (1 tsp / 5ml): A foundational aromatic that bridges the flavors of the creamy Chantilly and the tart strawberries.
The Secrets to Pristine Stabilized Chantilly Cream
A common mistake in making Japanese strawberry shortcake is using standard whipped cream, which can deflate and weep. To get those “thick, precise bands” seen in our visual blueprint, stabilization is non-negotiable.
Heavy Whipping Cream (3 cups / 720ml): Use cream with at least 35% milkfat. It must be bone-cold, straight from the refrigerator, to hold its peaks.
Powdered Sugar (6 tbsp / 60g): This dissolves instantly and contains a small amount of cornstarch, which aids in slight stabilization.
Mascarpone Cheese or Gelatin (2 tbsp / 30g): This is the professional “invisible” ingredient. Adding a small amount of mascarpone provides a velvety finish and structural strength that lasts for hours at room temperature.
If you enjoy the profile of fruit-forward desserts, you might also find inspiration in our strawberry shortcake trifle or perhaps a lighter strawberry cream cake for your next gathering.
Professional Equipment for the Perfect Bake
Achieving the “majestic height” mentioned in our Midjourney prompt requires the right tools. You cannot get these precise layers with suboptimal equipment.
- Two 6-inch (15cm) Deep Cake Pans: Using smaller, deeper pans encourages the genoise to climb higher, resulting in a taller slice.
- Fine-Mesh Sieve: Essential for aerating the flour and ensuring a “cloud” crumb.
- Stand Mixer or Electric Hand Mixer: Necessary for the 10-12 minutes of continuous high-speed whisking required for the “ribbon stage.”
- Offset Spatula: To achieve that “smooth, velvety cream swirl” on top and the precise bands on the sides.
- Kitchen Scale: For the most accurate results, use the metric measurements provided.
Mastering the Genoise Sponge: Step-by-Step
Creating the Aerated Egg Base
Preheat your oven to 340°F (170°C). In a large heat-proof bowl, combine your eggs and sugar. Place the bowl over a pot of simmering water (bain-marie) and whisk constantly until the mixture reaches 104°F (40°C). This heat relaxes the egg proteins, allowing them to stretch and trap more air.
The Ribbon Stage: Building the Volume
Remove from heat and use your mixer on high speed. You are looking for a visual cue: the batter should triple in volume and turn a very pale cream color. When you lift the whisk, the batter should fall in a thick “ribbon” that holds its shape for at least 3 seconds before disappearing. This is the foundation of your airy crumb.
Folding with Precision
Sift your cake flour over the egg mixture in three stages. Use a large rubber spatula to fold the flour in using a “J-cut” motion. Be gentle; the goal is to incorporate the flour without popping the millions of tiny air bubbles you just created. Finally, take a small scoop of batter and mix it into your melted butter/milk mixture before folding that back into the main bowl—this prevents the heavy fat from sinking to the bottom.
The Golden Bake
Divide the batter evenly into your lined pans. Bake for 20-25 minutes. You will know they are ready when the tops are a pale golden brown and the sponge springs back when lightly pressed. Cool upside down on a wire rack to prevent the delicate structure from collapsing.
Assembling the Majestic Three-Layer Slice
Preparing the Vibrant Strawberry Filling
Wash and pat dry your organic strawberries. Slice them into halves for the internal layers. To ensure they look vibrant and juicy, do not slice them until you are ready to assemble. For the garnish, select the most “perfect whole strawberry” and brush it with a bit of warmed apricot jam to achieve that “glossy natural glaze.”
Whipping the Stabilized Cream
In a chilled bowl, whisk the heavy cream, powdered sugar, and mascarpone. Start on low to incorporate air, then increase to medium-high. Watch for the sensory cue: the cream should transition from liquid to soft billows, finally reaching stiff, velvety peaks that hold their shape on the whisk.
Constructing the Layers
Slice each sponge horizontally to create three even layers. Place the first layer on your minimalist white ceramic plate. Spread a thick, precise band of cream, then embed the strawberry halves in a circular pattern. Cover with another layer of cream, smoothing it with your offset spatula to ensure there are no air gaps. Repeat for the second layer. If you have leftovers, they are perfect for strawberry shortcake trifles.
Expert Tips for a Picture-Perfect Finish
- The Crumb Coat: Apply a very thin layer of cream to the entire cake and refrigerate for 30 minutes before the final frosting. This traps loose crumbs and ensures the final exterior is pristine snow-white.
- The Hot Knife Trick: For the cleanest “majestic slice,” dip a long thin knife in hot water and wipe it dry between every single cut. This melts the fat in the cream just enough to create a razor-sharp edge.
- The Syrup Soak: Lightly brush the sponge layers with a simple syrup (1 part sugar, 1 part water) before adding cream. This ensures the cake stays moist and adds a professional “melt-away” texture.
- Temperature Control: If your kitchen is warm, place your mixing bowl inside a larger bowl filled with ice water while whipping the cream to maintain its velvety texture.
Storage and Serving Suggestions
The Japanese strawberry shortcake is best enjoyed the day it is made, as the cream is at its most stable and the strawberries are freshest. However, it can be stored in an airtight container in the refrigerator for up to 48 hours. The moisture from the cream will actually soften the sponge further over the first 12 hours, a process many enthusiasts prefer.
Do not freeze this cake. The cellular structure of the strawberries will break down upon thawing, leading to a watery mess that ruins the pristine cream layers.
Perfect Pairings for an Elegant Afternoon Tea
To complement the light acidity of the strawberries and the richness of the Chantilly cream, consider serving this cake with a sophisticated beverage. A strawberry green tea offers a clean, grassy counterpoint, while a banana pudding latte provides a creamy, whimsical pairing for a more indulgent snack.
For outdoor events or summer gatherings, these outdoor wedding drinks provide refreshing alternatives that won’t overshadow the delicate flavors of the genoise sponge.
Frequently Asked Questions
It is not recommended. Cake flour has lower protein, which is essential for the soft, ‘cloud’ crumb characteristic of a Japanese strawberry shortcake.
Use stabilized Chantilly cream by adding a small amount of mascarpone or gelatin, and ensure your sponge layers are completely cool before frosting.
Heat a teaspoon of apricot jam or light corn syrup and lightly brush it onto the whole strawberry just before serving.
Density usually occurs if the eggs weren’t whisked to a full ribbon stage or if the flour was folded in too aggressively, popping the air bubbles.
The Ultimate Recipe: Majestic Japanese Strawberry Shortcake
Japanese Strawberry Shortcake: The Ultimate Guide to a Majestic, Cloud-Like Layer Cake
Ingredients
Equipment
Method
- Whisk eggs and sugar over a bain-marie until 104°F (40°C), then beat on high speed until the ribbon stage (approx. 10 mins).
- Sift cake flour into the eggs in three stages, folding gently with a spatula. Incorporate melted butter and milk.
- Pour into pans and bake at 340°F (170°C) for 20-25 minutes until pale golden.
- Whip heavy cream, powdered sugar, and mascarpone to stiff, velvety peaks.
- Place sponge layer, apply a thick band of cream, and embed strawberry halves. Repeat for three layers.
- Frost the exterior, add cream swirls, a glazed whole strawberry, and a dusting of powdered sugar.
Notes
Always wipe your knife with a hot, damp cloth between slices for the cleanest cut.
Bringing the Tokyo Patisserie Experience Home
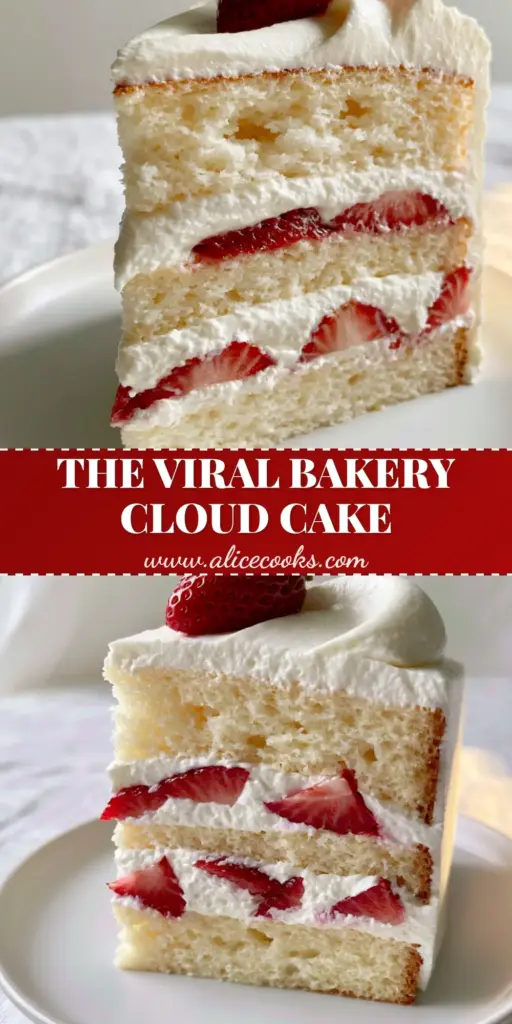
Creating a Japanese strawberry shortcake is a rewarding journey into the heart of technical baking. By focusing on the “cloud” crumb and the “pristine snow-white” aesthetics, you transform simple ingredients like flour, eggs, and cream into a majestic centerpiece. This cake represents the pinnacle of balance—not too sweet, remarkably light, and visually stunning.
We invite you to share your baking results! Tag us in your photos and follow alicecooks_official on Pinterest for more visual recipe blueprints. Don’t forget to leave a comment below if you have any questions about mastering the genoise sponge or stabilizing your cream!