Strawberry crunch cheesecake cones are the ultimate handheld dessert, blending the nostalgic flavors of a classic ice cream truck bar with the sophisticated creaminess of a gourmet cheesecake. If you are looking for a show-stopping, no-bake treat that looks like it stepped off a professional photo shoot, these vibrant cones are your answer.
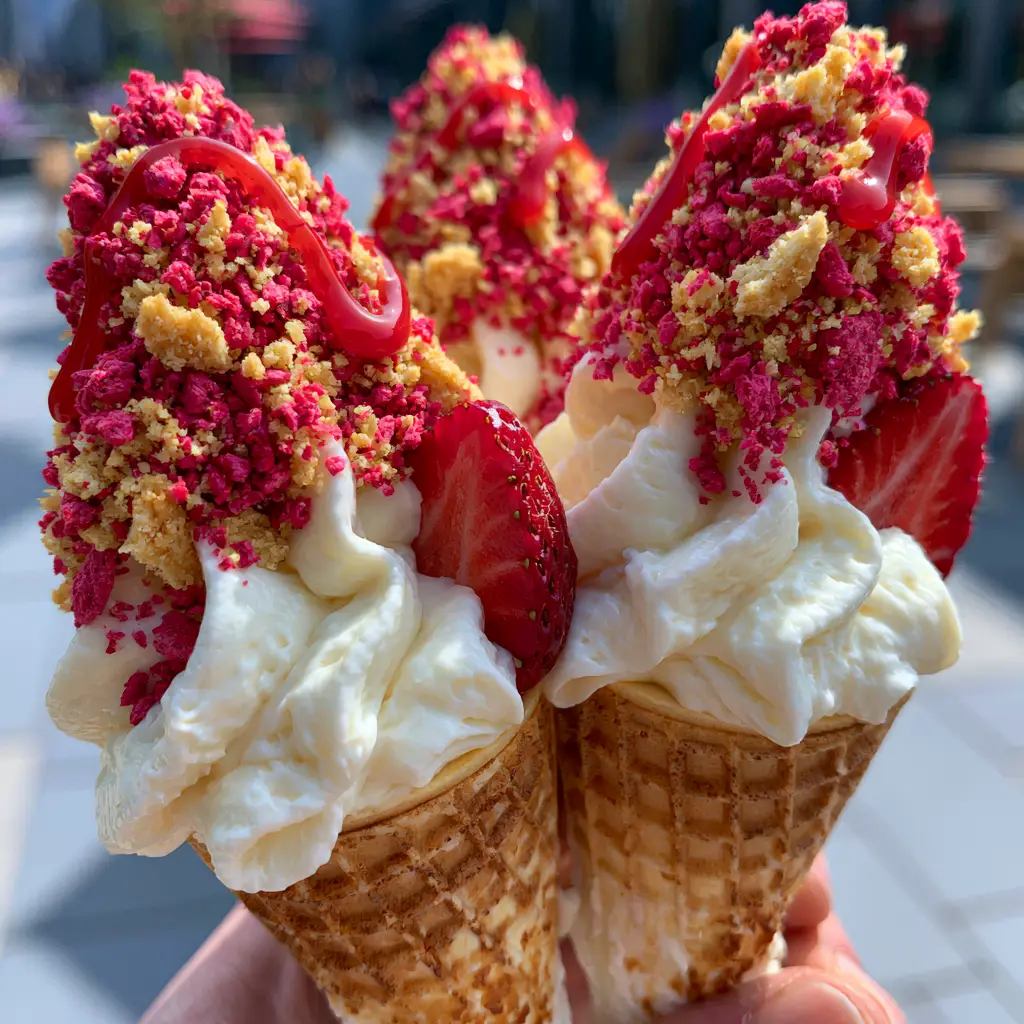
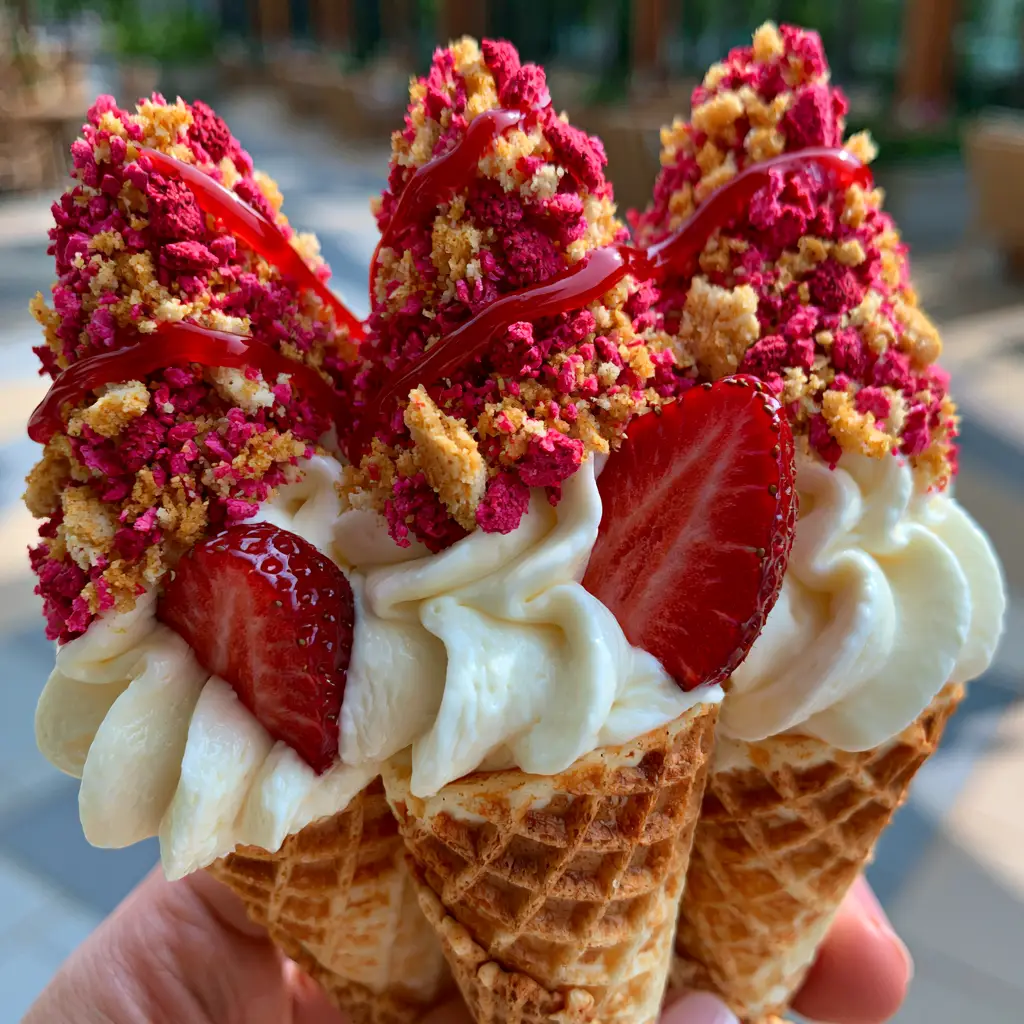
Imagine a crisp, golden-brown waffle cone filled to the brim with a velvety, bright white cream cheese mousse. The experience is elevated by a glossy strawberry fruit reduction and a signature “crunch” made from pulverized freeze-dried strawberries and vanilla wafers. Every bite offers a symphony of textures that will have your followers begging for the recipe.
Why You Will Obsess Over These Handheld Cheesecake Cones
- Textural Perfection: The contrast between the toasted golden waffle cones and the cloud-like whipped filling is unmatched.
- Viral Visual Appeal: With vibrant pink strawberry crunch and a glossy red drizzle, these are designed to explode on Pinterest.
- No-Bake Convenience: Skip the oven and the water bath typical of a New York Cheesecake recipe while keeping all the flavor.
- Portable & Party-Ready: No plates or forks required, making them the perfect addition to a summer patio gathering.
The Anatomy of a Perfect Strawberry Crunch Component
To achieve that iconic “crunch” layer, we use a specific blend of ingredients that mimic the classic shortcake bars. Unlike a standard strawberry crunch topping, this version uses high-quality freeze-dried fruit for an intense, natural flavor explosion.
Vanilla Wafer Crumbs: 1.5 cups (150g). These provide the buttery, golden-tan base and a satisfying snap. Pulverized Freeze-Dried Strawberries: 1 cup (20g). This is the secret to that vibrant pink color and concentrated tartness. Melted Unsalted Butter: 4 tablespoons (56g). This acts as the glue, ensuring the crunch sticks to your cheesecake filling and doesn’t just fall off.
Essential Ingredients for the Creamy Filling & Glaze
Full-Fat Cream Cheese: 16 oz (450g). Ensure it is softened to room temperature to avoid lumps in your thick whipped cream cheese filling. Heavy Whipping Cream: 1 cup (240ml). We fold this in to create those signature soft peaks seen in the visual blueprint. Powdered Sugar: 3/4 cup (90g). Provides sweetness without the graininess of granulated sugar.
Fresh Organic Strawberries: 2 cups (300g). Half will be used for the glossy strawberry fruit reduction, and the rest will be sliced for a fresh garnish. Waffle Cones: 6-8 large cones. Look for cones with a deep, visible grid texture for the most authentic look. Lemon Juice: 1 teaspoon (5ml). A splash of acidity brightens the fruit reduction and balances the richness of the cheese.
Step-by-Step: Crafting the Ultimate Strawberry Crunch Cheesecake Cones
Preparing the Signature Strawberry Fruit Reduction
Start by making the glossy strawberry fruit reduction. In a small saucepan, combine 1 cup of chopped strawberries with 2 tablespoons of sugar and the lemon juice. Simmer over medium-low heat for 10-12 minutes.
Use a fork to mash the berries until the mixture is thick and syrupy. Strain through a fine-mesh sieve if you want a perfectly smooth ribbon of glaze. Let this cool completely; it will thicken significantly as it reaches room temperature, becoming that artful drizzle we need.
Mastering the Strawberry Shortcake Crunch
Place your vanilla wafers in a food processor and pulse until you have coarse crumbs. Add the freeze-dried strawberries and pulse again until you see a beautiful mix of vibrant pink bits and golden-tan crumbs. Transfer to a bowl and stir in the melted butter until the mixture resembles wet sand.
Whipping the Velvety Cream Cheese Filling
In a large bowl, beat the softened cream cheese and powdered sugar until smooth. In a separate chilled bowl, whip the heavy cream until stiff peaks form. Gently fold the whipped cream into the cheese mixture.
The goal is a thick, velvety smooth, bright white filling that holds its shape. If you want to get fancy, you can even incorporate small pieces of strawberry cake truffles for a hidden surprise inside the cone.
The Assembly: Piling It High
Take your toasted golden waffle cones. Spoon a teaspoon of the strawberry reduction into the very bottom of each cone to prevent a “dry” finish. Pipe the cream cheese filling high into the cone, allowing it to swirl above the rim in soft peaks.
Carefully press the strawberry crunch crumble onto the top third of the cream cheese filling. You want a heavy encrustation that covers the edges. Drizzle the glossy red glaze artfully over the crumble in thin ribbons.
Finish the look by tucking a single, perfectly sliced fresh red strawberry into the side of the cream. The final result should look exactly like a professional social media capture on a sunny patio.
Expert Tips for Pinterest-Worthy Success
- Temperature Control: Never add warm strawberry reduction to the whipped filling, or it will deflate and run down the sides of the cone.
- Soggy-Proofing: If you aren’t serving them immediately, brush the inside of the waffle cones with a thin layer of melted white chocolate. This creates a moisture barrier against the cheesecake.
- The Crumble Texture: Don’t pulverize the vanilla wafers into dust. You want some small chunks to provide that “crunch” that gives the strawberry crunch cheesecake cones their name.
- Pipe, Don’t Spoon: For those professional soft peaks, use a piping bag with a large open star tip. It makes the filling look much more voluminous.
How to Store Your Handheld Creations
These strawberry crunch cheesecake cones are best enjoyed within 2-3 hours of assembly to ensure the cone stays crisp. However, you can prepare the components (the filling, the crunch, and the reduction) up to 3 days in advance and store them in the refrigerator.
Freezing: You can actually freeze these! Wrap them tightly in plastic wrap and freeze for up to 2 weeks. The texture will be similar to a cheesecake ice cream cone. Just add the fresh strawberry garnish right before serving.
What to Serve With This Summer Treat
Pair these cones with a refreshing strawberry lemon mocktail to lean into the seasonal berry theme. If you’re hosting a dessert bar, they look stunning next to a tray of strawberry cupcakes or even a chilled bowl of pink strawberry fluff.
Frequently Asked Questions
Yes, you can use a high-quality store-bought strawberry glaze, but a homemade reduction allows for a more intense fruit flavor and better control over the thickness of the drizzle.
No, store-bought waffle cones are ready to use. However, warming them in a 300°F (150°C) oven for 3-5 minutes can enhance their crispness and provide a ‘toasted’ aroma before filling.
To prevent sogginess, brush a thin layer of melted white chocolate or dark chocolate inside the cone and let it harden before adding the cheesecake filling. This creates a moisture barrier.
If you can’t find freeze-dried strawberries, you can use strawberry-flavored gelatin powder (Jell-O) mixed with the vanilla wafer crumbs, though the flavor will be more artificial than the fruit-based version.
The Official Strawberry Crunch Cheesecake Cones Recipe

Strawberry Crunch Cheesecake Cones with Fresh Berries
Ingredients
Equipment
Method
- Pulse vanilla wafers and freeze-dried strawberries in a food processor. Stir in melted butter until the mixture looks like wet sand.
- Simmer fresh strawberries, sugar, and lemon juice in a saucepan until thickened. Strain and cool completely.
- Beat cream cheese and sugar until smooth. In a separate bowl, whip heavy cream to stiff peaks, then fold into the cream cheese mixture.
- Pipe filling into cones. Press the crunch onto the top third of the filling. Drizzle with reduction and garnish with a fresh strawberry slice.
Notes
Store filling and crunch separately for best results if making ahead.
Save, Share, and Rate!
If you love these strawberry crunch cheesecake cones, don’t forget to save this recipe to your “Summer Desserts” or “No-Bake Treats” board on Pinterest! Following alicecooks_official helps us keep the kitchen running and the recipes coming.
Did you make these? I would love to see your results! Upload a photo of your cones in the comments below and give this recipe a 5-star rating if it satisfied your sweet tooth. Happy no-baking!