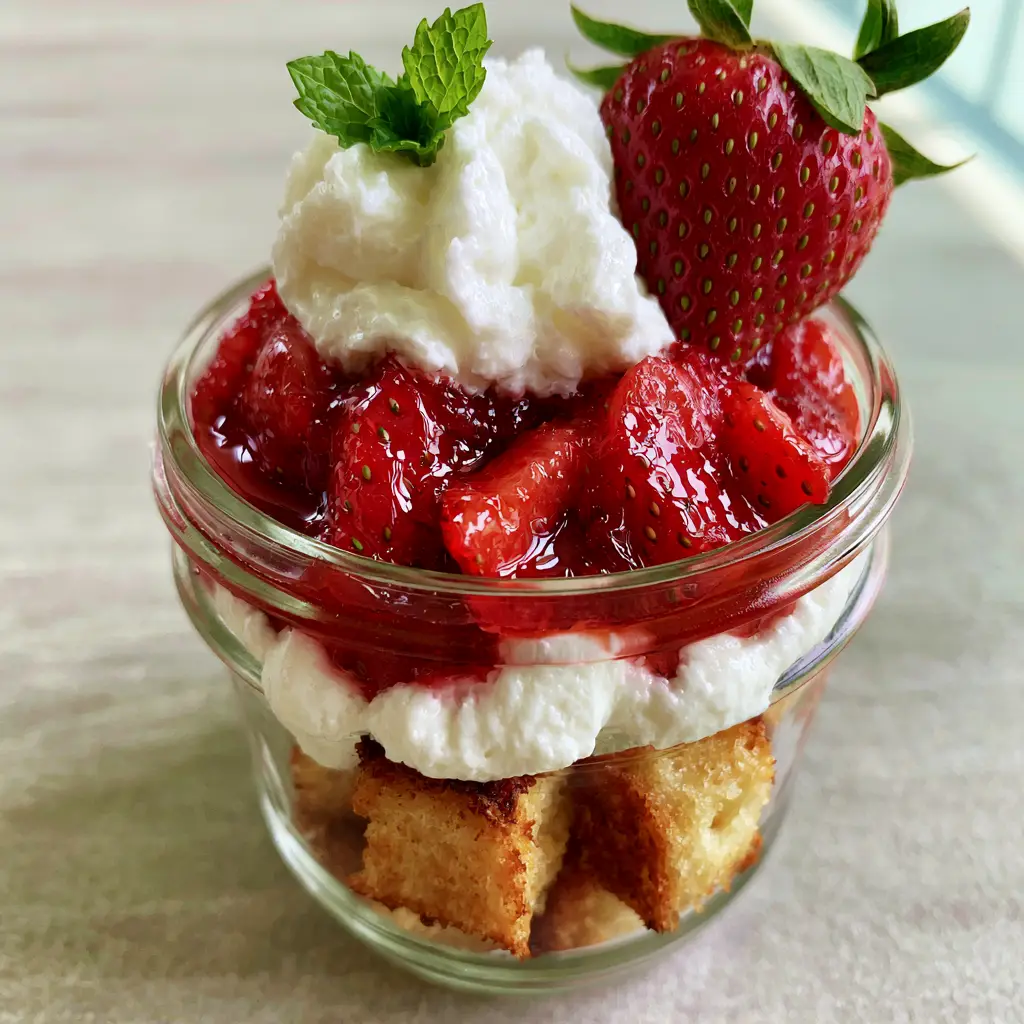
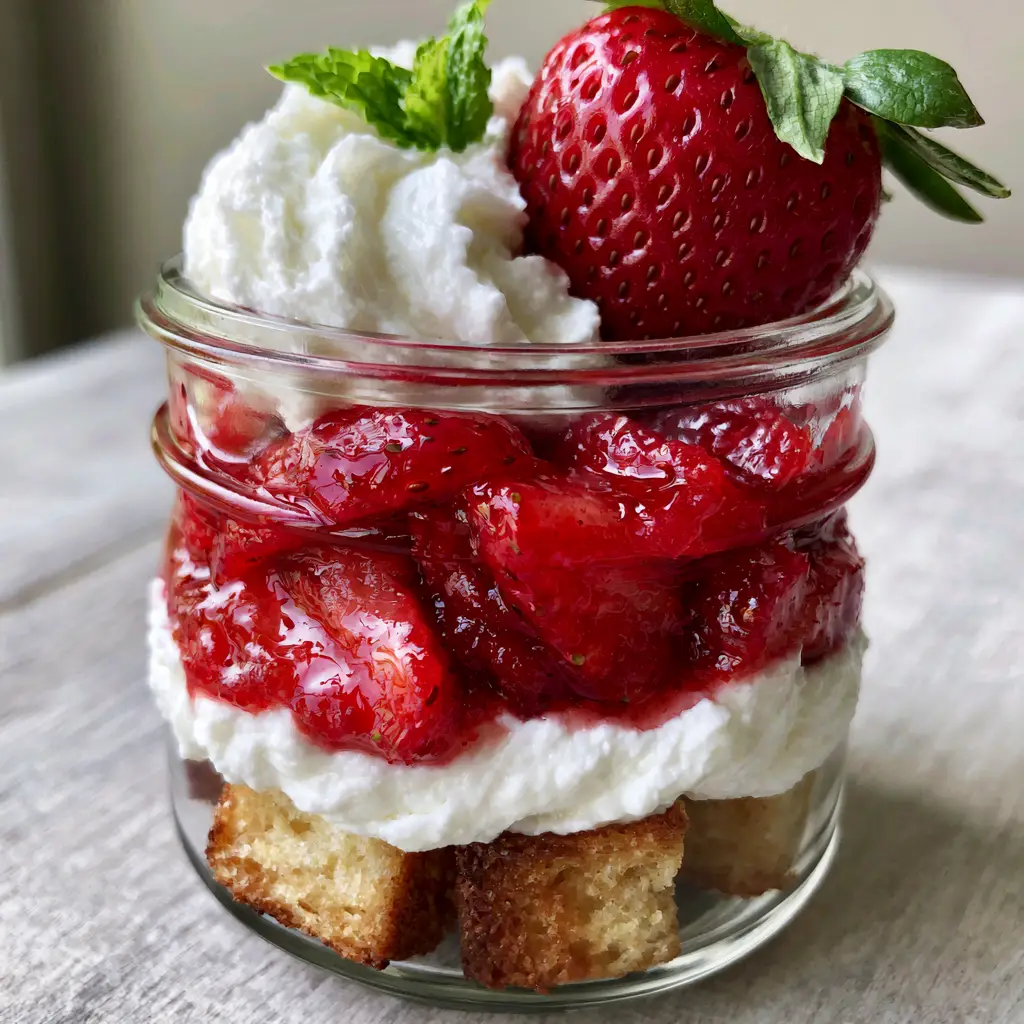
There is nothing quite like the sight of a perfectly layered dessert peering through the glass of a crystal-clear mason jar. These Strawberry Shortcake Trifles represent the pinnacle of summer indulgence, combining the rustic charm of toasted pound cake with the sophisticated elegance of a glistening strawberry glaze and velvety stabilized whipped cream. When you hold one of these individual portions, the soft natural light catches the glistening ruby-red fruit seeds and the airy, golden-brown texture of the cake, making it almost too beautiful to eat.
Unlike a traditional large-scale trifle that can become a messy heap once served, these individual Strawberry Shortcake Trifles offer a clean, controlled, and visually stunning experience for every guest. Each component is engineered to provide a specific sensory cue, from the audible crunch of the toasted cake cubes to the stiff, protective barrier of the cream that prevents the layers from bleeding into one another. This is more than just a recipe; it is a masterclass in textural balance and vibrant seasonal flavors.
Whether you are hosting an elegant garden party or a casual backyard barbecue, these trifles are the answer to “what’s for dessert?” The combination of warm-toned, buttery cake and cool, stiff cream creates a mouthfeel that is both comforting and refreshing. By following this guide, you will learn how to transform simple ingredients into a professional-grade dessert that looks like it stepped right out of a high-end culinary magazine.
Why You Will Obsess Over These Layered Berry Jars
- Structural Integrity: By using a stabilized whipped cream, we create a visible white barrier that holds its shape for hours, ensuring your Strawberry Shortcake Trifles look as good at the end of the party as they did at the beginning.
- Textural Depth: We move beyond basic sponge by toasting our pound cake cubes until they are golden-brown and buttery, providing a necessary crunch that contrasts the macerated fruit.
- Glistening Visual Appeal: The thin ruby-red glaze coats the sliced berries, giving them a professional “pastry shop” sheen that highlights the natural beauty of the fruit.
- Perfect Portions: Individual mason jars not only make for an “extremely appetizing and crisp” presentation but also allow for easy transport and serving at outdoor events.
Essential Elements for the Perfect Fruit Parfait
To achieve the specific visual and flavor profile required for elite Strawberry Shortcake Trifles, every ingredient must serve a dual purpose of taste and structure. We aren’t just looking for sweetness; we are looking for a symphony of textures.
Buttery Pound Cake: You will need 1 loaf (approx. 16oz/450g) of high-quality pound cake. The density of pound cake is vital here; it needs to stand up to the strawberry juices without turning into mush, and it toasts much better than a light sponge classic shortcake biscuits.
Fresh Strawberries: 2 lbs (900g) of ripe, vibrant red strawberries are the star of the show. We will divide these: some will be sliced for macerating, and a few choice berries will be kept whole with the green leaves intact for that iconic garnish.
Granulated Sugar: 1/2 cup (100g) is used to draw the moisture out of the berries. This process, known as maceration, creates the natural syrup that forms the base of our glistening glaze.
Heavy Whipping Cream: 2 cups (480ml) of chilled heavy cream (at least 36% fat) is required for the volume and richness needed for the “thick, protective middle layer.”
Unflavored Gelatin: 1 tsp (5g) acts as our “invisible” structural engineer. When dissolved in 1 tbsp (15ml) of water, it stabilizes the cream, allowing it to stay stiff and velvety even in warmer temperatures.
Powdered Sugar: 1/2 cup (60g) sweetens the cream while the cornstarch typically found in commercial powdered sugar helps further with stabilization.
Pure Vanilla Extract: 1 tsp (5ml) provides the floral, aromatic backbone that bridges the gap between the buttery cake and the tart berries.
Unsalted Butter: 2 tbsp (30g), melted, is used to coat the cake cubes before toasting. This ensures a uniform golden-brown crust and a rich, toasted aroma.
Fresh Mint Sprigs: These are not just for color; the vibrant green sprig provides a refreshing aromatic lift that cuts through the richness of the cream.
Cornstarch: 1 tsp (5g) mixed with a little water will be used to slightly thicken the strawberry juices into a thin, glistening ruby-red glaze that clings to the fruit.
Tools for Assembling Professional Individual Desserts
To replicate the “handheld smartphone photo” aesthetic, you need the right vessels and tools. Precision in assembly is what separates a home cook from a culinary forensic expert.
- Clean Mason Jars: 8oz (240ml) clear glass jars are the ideal size. Ensure they are polished and free of fingerprints to allow the layers to be clearly visible.
- Large Serrated Knife: This is essential for cutting the pound cake into uniform 1-inch (2.5cm) cubes without squishing the airy interior.
- Baking Sheet: A large rimmed baking sheet allows the cake cubes to spread out, ensuring even toasting and preventing steaming.
- Stand Mixer or Hand Mixer: You need high power to whip the cream to the “stiff, velvety” stage without over-mixing it into butter.
- Pastry Bag and Large Star Tip: While you can spoon the cream, a piping bag gives you that “large dollop of fluffy whipped cream” look with professional precision.
- Fine Mesh Strainer: Use this if you want an ultra-smooth glaze, though for this recipe, the natural seeds add to the rustic appeal.
Mastering the Art of the Strawberry Shortcake Trifle
The secret to a world-class Strawberry Shortcake Trifles is in the preparation of the layers. We will treat each component as its own mini-recipe to ensure maximum flavor and visual impact.
How to Toast Buttery Pound Cake for Maximum Crunch
Start by preheating your oven to 375°F (190°C). Take your pound cake and carefully slice it into uniform 1-inch (2.5cm) cubes. In a large bowl, toss the cubes gently with 2 tbsp (30g) of melted butter until they are lightly coated.
Spread the cubes in a single layer on your baking sheet. Toast for 8-12 minutes, tossing halfway through. You are looking for a specific sensory cue: the edges should be a deep golden-brown, and the cake should feel slightly firm to the touch. The aroma of toasted butter should fill your kitchen. Remove from the oven and let them cool completely; adding warm cake to the jars will melt your “protective barrier” of cream.
Macerating Berries for a Glistening Ruby Glaze
Wash and hull 1.5 lbs (675g) of the strawberries, then slice them into 1/4 inch (6mm) thick rounds. Place them in a bowl and toss with 1/2 cup (100g) of granulated sugar and a squeeze of fresh lemon juice. Let them sit for at least 30 minutes at room temperature.
You will notice the sugar drawing out the bright red juice. To create the “thin ruby-red glaze” mentioned in the blueprint, drain the accumulated juice into a small saucepan. Whisk in 1 tsp (5g) of cornstarch slurry and simmer over medium heat for 2 minutes until it thickens slightly and becomes translucent. Pour this glaze back over the sliced berries and toss. The result should be glistening, bright red slices that look like jewels.
The Secret to Velvet-Soft Stabilized Whipped Cream
To achieve that thick, protective middle layer, we must stabilize the cream. Place 1 tbsp (15ml) of cold water in a small microwave-safe bowl and sprinkle 1 tsp (5g) of unflavored gelatin over the top. Let it bloom for 5 minutes, then microwave for 10 seconds until fully liquid.
In a chilled bowl, begin whipping your 2 cups (480ml) of heavy cream, 1/2 cup (60g) of powdered sugar, and 1 tsp (5ml) of vanilla. As the cream begins to thicken to soft peaks, slowly drizzle in the liquid gelatin while the mixer is running. Continue whipping until you reach stiff peaks. The cream should be velvety, white, and hold its shape perfectly when the whisk is lifted.
Assembling the Mason Jar Layers Like a Pro
Now comes the forensic assembly. Begin by placing a handful of the toasted, golden-brown pound cake cubes at the bottom of each mason jar. This creates a sturdy, textured base. Next, pipe or spoon a thick layer of the stabilized whipped cream over the cake. Press it slightly against the sides of the glass to ensure a visible, solid white barrier.
Above the cream, add a generous layer of the macerated strawberry slices. Ensure you get plenty of that ruby-red glaze in there; it will slowly seep down, creating beautiful visual streaks against the white cream. Crown the top with another large dollop of the fluffy whipped cream. Finally, place a whole fresh strawberry (leaves intact) and a tiny sprig of vibrant green mint on top. The contrast of the red, white, and green against the light wooden background is the hallmark of a professional Strawberry Shortcake Trifles brownie trifle alternative.
Professional Secrets for Culinary Success
- Temperature Control: Always ensure your heavy cream and your mixing bowl are ice-cold. This allows the fat globules to emulsify more effectively, resulting in a fluffier, more stable foam.
- The “Dry” Toast: If your pound cake is particularly moist, you may need an extra 2-3 minutes in the oven. You want the outside crisp so it provides a structural counterpoint to the soft berries.
- Glaze Consistency: If your glaze becomes too thick, whisk in a teaspoon of water. It should be fluid enough to coat the berries but thick enough to stay glistening.
- Avoid Over-Macerating: Don’t let the berries sit in sugar for more than 2 hours before assembly, or they may lose their vibrant red color and become overly soft.
Keeping Your Desserts Fresh and Vibrant
While these Strawberry Shortcake Trifles are best enjoyed within 4 hours of assembly to maintain the cake’s crunch, the stabilized cream allows them to last longer than traditional whipped cream desserts. You can store the assembled jars in the refrigerator for up to 24 hours. The toasted cake will eventually soften as it absorbs the strawberry glaze, turning into a delicious, pudding-like consistency similar to Japanese-style cakes.
For the best results, if making ahead, prepare the individual components and store them separately. Toast the cake and store in an airtight container at room temperature. The macerated berries and whipped cream should stay in the fridge. Assemble just before your guests arrive to ensure the “extremely appetizing and crisp” look from the visual blueprint is maintained.
Creating the Perfect Summer Spread
These trifles are a standout on their own, but they also pair beautifully with other seasonal treats. If you are hosting a large gathering, consider offering a variety of “dessert cups” to cater to different palates more dessert cup ideas.
For a complete beverage pairing, serve these alongside a refreshing hibiscus strawberry lemonade or a crisp sparkling raspberry lemonade. The tartness of the lemonades cuts through the buttery richness of the pound cake and the sweetness of the cream. If you are looking for more strawberry-forward inspirations, our strawberry banana bread makes for a fantastic brunch accompaniment to these evening trifles.
Expert Answers to Your Trifle Questions
Absolutely! A high-quality store-bought pound cake works perfectly. The key is to cube it and toast it with butter as directed to give it the necessary crunch and homemade flavor.
The glistening look comes from macerating the berries in sugar and then briefly thickening the resulting juices with a cornstarch slurry. This creates a ruby-red glaze that clings to the fruit seeds and slices.
We use a small amount of unflavored gelatin dissolved in water, which is whipped into the cream. This creates a structural network that allows the cream to stay stiff and velvety for hours without weeping or melting.
Leaving the green calyx (leaves) on the whole strawberry provides a beautiful color contrast against the red fruit and white cream, emphasizing the ‘fresh-from-the-garden’ aesthetic of the dish.
If left for more than 4-6 hours, the cake will begin to soften as it absorbs the strawberry juices. While it remains delicious (like a trifle pudding), for maximum crunch, assemble the jars shortly before serving.
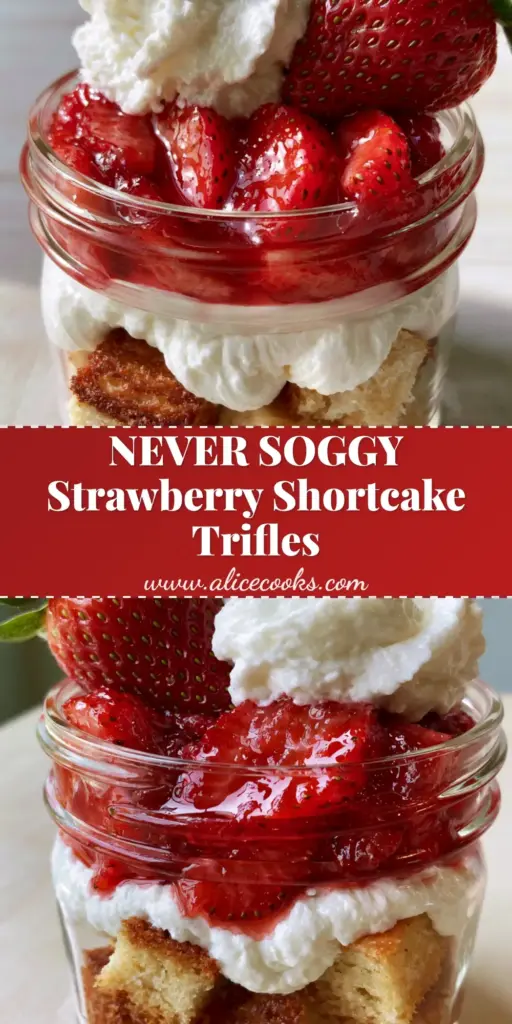
The Ultimate Strawberry Shortcake Trifles Recipe
Strawberry Shortcake Trifles: The Ultimate Individual Summer Dessert
Ingredients
Equipment
Method
- Toss pound cake cubes with melted butter and bake at 375°F (190°C) for 10 minutes until golden-brown and crisp.
- Mix sliced strawberries with sugar; let sit for 30 minutes. Simmer the juice with cornstarch to create a thick glaze, then recombine with fruit.
- Whip heavy cream, sugar, and vanilla to soft peaks. Drizzle in melted gelatin and continue whipping to stiff peaks.
- In mason jars, layer toasted cake, a thick barrier of cream, and macerated strawberries. Top with more cream, a whole strawberry, and mint.
Notes
Use a piping bag for the whipped cream to achieve clean, defined layers.
Closing & Call to Action
Mastering the Strawberry Shortcake Trifles is a rite of passage for any home cook looking to elevate their summer dessert game. The combination of forensic visual accuracy—those glistening seeds and golden cake cubes—with professional culinary techniques ensures a result that is as delicious as it is beautiful. Don’t forget to capture your own “handheld smartphone photo” of these beauties before they disappear!
If you loved this recipe, please leave a comment below and let us know how your layers turned out! For more visual inspiration and daily recipe updates, follow us on Pinterest and share your creations with the community.