There is something inherently nostalgic about a strawberry shortcake dessert, yet the classic bowl of soggy biscuits and weeping cream often leaves much to be desired in terms of presentation. If you have ever scrolled through social media and wondered how professional pastry chefs achieve those razor-sharp layers in a glass, you are in the right place. We are elevating this quintessential summer treat into a modern, sophisticated masterpiece that looks as if it were plucked straight from a high-end bistro menu.
The beauty of this strawberry shortcake dessert lies in its structural integrity. By utilizing a stabilized whipped cream and a dense, golden pound cake foundation, we ensure that every bite maintains its distinct texture from the first spoonful to the last. This is not just a recipe; it is a lesson in culinary architecture designed for the home cook who values both flavor and visual precision.
Imagine a clear glass vessel where the vibrant crimson of fresh berries meets the stark, architectural white of velvety cream. The soft, natural daylight catching the glistening glaze on the sliced strawberries creates a sensory experience that begins long before the first taste. This is the ultimate “no-bake” solution for those who want a gourmet result without turning on the oven.
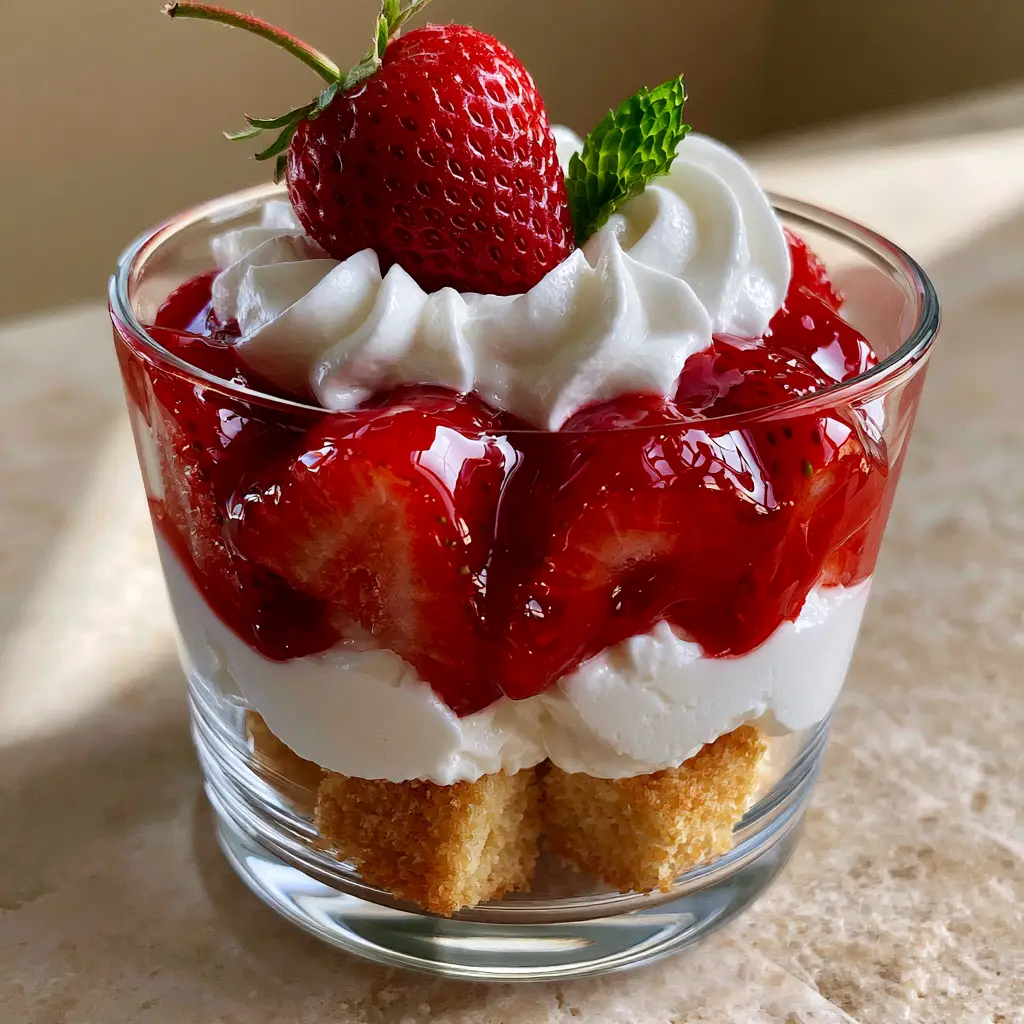
The Visual Blueprint: Why This Layered Masterpiece Works
- Structural Stability: Unlike traditional whipped cream that collapses within minutes, our stabilized version holds sharp, piped peaks that remain firm for hours.
- Textural Contrast: The “dry” golden pound cake provides a sturdy, buttery base that resists the moisture of the fruit, ensuring zero sogginess.
- Glossy Crimson Finish: A homemade strawberry glaze provides a deep, translucent red hue that highlights the fresh slices and adds a luxurious mouthfeel.
- High-Definition Layers: Clear, distinct boundaries between the cake, cream, and fruit provide that “pro-level” aesthetic found in professional food photography.
- Minimalist Garnish: A single whole berry with a vibrant green stem and a crisp mint leaf provides the final touch of organic elegance.
Essential Components for This Gourmet Berry Creation
Every ingredient in this strawberry shortcake dessert serves a dual purpose: delivering exceptional flavor and maintaining the visual “hold” required for a layered presentation. We do not use “fluff” ingredients; every element is scientifically chosen for its role in the final architecture.
Dry Golden Pound Cake: 1 lb (450g). You need a dense, tight-crumbed loaf cake that can be cubed into clean, sharp 1-inch (2.5cm) pieces. Using a dry pound cake ensures it acts as a structural foundation rather than a sponge that turns to mush.
Fresh Strawberries: 2 lbs (900g). Choose deep red, ripe berries for the best flavor, but ensure they are firm to the touch. You will need a mix of sliced berries for the layers and prime whole specimens for the top garnish.
Heavy Whipping Cream: 2 cups (480ml). High-fat content (at least 36%) is non-negotiable for achieving the velvety, thick texture seen in our visual guide. It provides the richness that balances the tartness of the fruit.
Unflavored Gelatin: 1 tsp (5g). This is our “secret” stabilizer. It allows the cream to hold its shape indefinitely without changing the flavor or making it feel like “fake” topping.
Granulated Sugar: 1/2 cup (100g). Used sparingly to macerate the berries and sweeten the cream, sugar also helps draw out the natural juices to form the base of our thick glaze.
Cornstarch: 1 tbsp (8g). When simmered with a portion of the strawberry juice, cornstarch creates that “glossy, thick crimson strawberry glaze” that coats the slices perfectly.
Pure Vanilla Bean Paste: 1 tsp (5ml). This adds those beautiful black specks to the cream and provides a deeper, more sophisticated aromatic profile than liquid extract.
Fresh Mint: 1 small bunch. Only the smallest, crispest leaves are used for the garnish to provide a pop of contrasting green against the red glaze.
Pro-Level Tools for Sharp Dessert Layers
To achieve the “modern clear glass dessert cup” look, you cannot simply spoon ingredients into a jar. You need tools that allow for precision and cleanliness to prevent “bleeding” or smearing the glass sides.
High-Quality Clear Glass Tumblers: Use straight-sided glasses or wine glasses with a wide enough opening to accommodate your piping tip. Clarity is key to showing off those distinct layers.
Large Piping Bag with a Star Tip: This is essential for the “highly structured, velvety layer of piped white stabilized whipped cream.” A large open star tip (like a Wilton 1M) creates those sharp peaks.
Small Offset Spatula: This helps in tucking the pound cake cubes into the corners of the glass without leaving crumbs on the sides where the cream needs to sit.
Small Saucepan: For reducing the strawberry juices and cornstarch into that thick, glistening glaze that defines the fruit layer.
Step-by-Step Construction: Building the Ultimate Berry Parfait
Phase 1: Preparing the Glossy Crimson Strawberry Glaze
Clean and hull 1 lb (450g) of the strawberries, then slice them into even 1/4 inch (6mm) vertical pieces. Place them in a bowl with 2 tablespoons (25g) of sugar and let them sit for 15 minutes until they release their bright red juice.
Drain the juice (about 1/4 cup or 60ml) into a small saucepan and whisk in the cornstarch. Bring to a gentle simmer over medium heat, stirring constantly until the liquid transforms from cloudy pink to a translucent, thick crimson syrup. Remove from heat and let it cool completely; it must be cold before folding back into the sliced berries to prevent them from softening too much.
Phase 2: Mastering the Stabilized Whipped Cream
Place 2 tablespoons (30ml) of cold water in a small heatproof bowl and sprinkle the gelatin over the top. Let it “bloom” for 5 minutes until it looks like a thick paste, then microwave for 10 seconds until fully liquid and clear.
In a chilled metal bowl, begin whipping the heavy cream, remaining sugar, and vanilla paste. Once it reaches soft peaks, slowly drizzle in the melted (but not hot) gelatin while the mixer is running. Continue whipping until you achieve stiff, sharp peaks. You will know it is ready when the cream clings to the whisk and holds its shape perfectly without drooping.
Phase 3: The Art of Layering
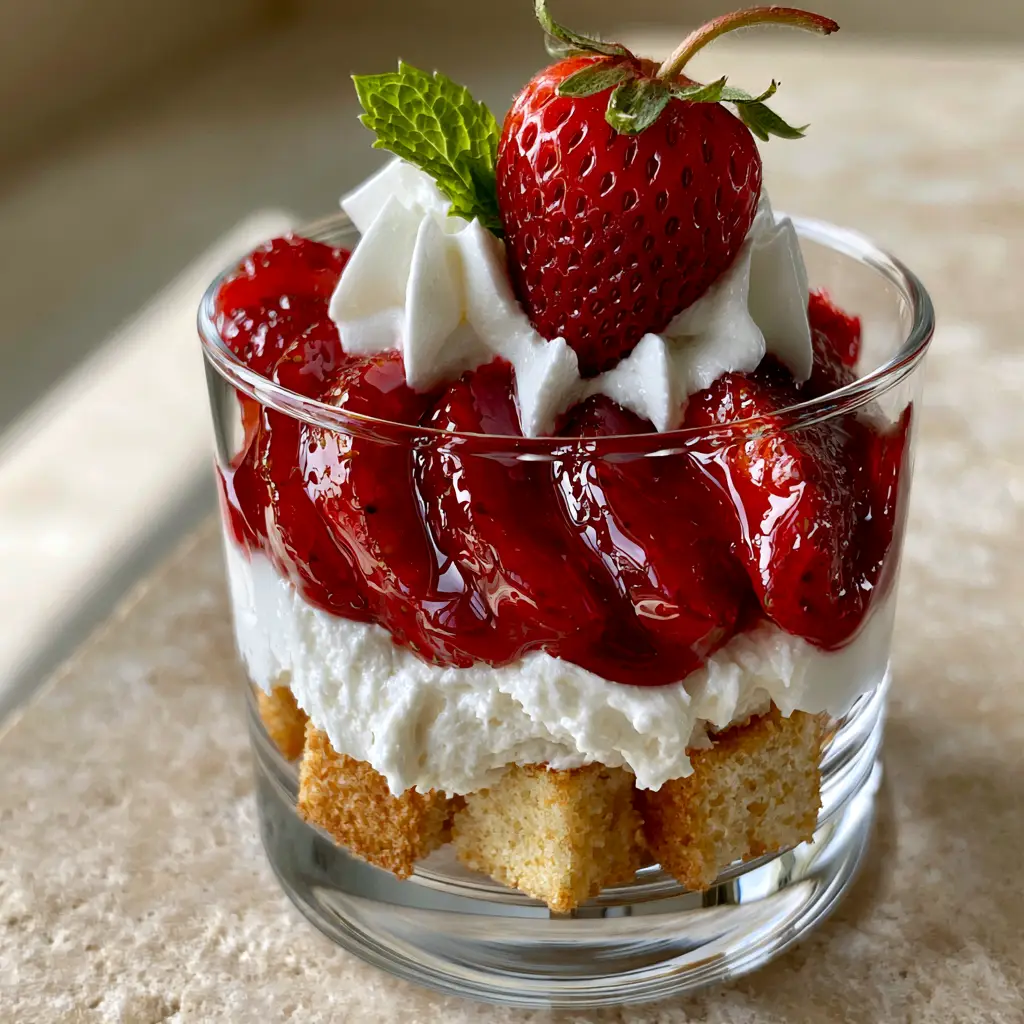
Cut your pound cake into uniform cubes. Place a generous layer of these “dry golden cubed pound cake” pieces at the bottom of each glass. Press them down slightly to create a level foundation that can support the weight of the cream.
Fill your piping bag with the stabilized cream and pipe a thick, circular layer over the cake. Ensure the cream touches the glass all the way around to create a “seal” that prevents the strawberry glaze from leaking down into the cake. This is the secret to “zero sogginess.”
Fold your sliced berries into the cooled glaze and spoon them gently over the cream. The glaze should be thick enough that it coats the berries but does not run. Finish the dessert with a final decorative star of whipped cream, a single whole berry (stem-on), and a crisp mint leaf.
Expert Tips for Visual and Flavor Success
- The Temperature Rule: Ensure your glaze is completely chilled before it touches the cream. If it is even slightly warm, the cream will melt, destroying those sharp, distinct layers.
- The Cake Choice: Avoid using “light” or airy sponge cakes. While delicious, they collapse under the weight of the glaze. If you enjoy making your own cake, consider this strawberry-infused cake base for a different flavor profile.
- Berry Selection: Look for berries with vibrant, fresh green stems. If the stems are brown, the garnish will look tired rather than “fresh and modern.”
- Whipping Caution: Do not over-whip the cream once the gelatin is in. It can go from “velvety” to “grainy” very quickly. Watch for the moment the whisk leaves clear trails in the bowl.
Storage, Shelf Life, and Make-Ahead Advice
This strawberry shortcake dessert is unique because the stabilized cream allows it to be prepared in advance. Unlike standard whipped cream which might last an hour, these parfaits can be stored in the refrigerator for up to 24 hours without losing their structure.
Keep the glasses uncovered for the first hour to prevent condensation from forming on the inside of the glass, then loosely wrap them with plastic wrap. For the absolute best visual results, add the mint leaf garnish just before serving, as mint tends to wilt in the humidity of the fridge.
We do not recommend freezing this dessert. The fresh strawberries will release their water upon thawing, and the pound cake will lose that specific “dry golden” texture that makes the mouthfeel so satisfying. If you are looking for a frozen strawberry treat, try our refreshing strawberry slushie instead.
What to Serve With This Modern Parfait
This dessert is a standout on its own, but it pairs beautifully with light, summery beverages. For a family-friendly gathering, a tall glass of strawberry-kiwi-lemonade complements the berry notes perfectly.
If you are hosting an adult dinner party, the acidity and sweetness of this strawberry shortcake dessert are enhanced by sophisticated cocktails. Consider serving it alongside vibrant strawberry rum drinks or even a chilled peach moscato sangria for a truly elevated summer experience.
For those who love the strawberry and cream combination but want something even richer, you might also enjoy our decadent strawberry cream cheese pie, which uses similar flavor profiles in a more traditional format.
Frequently Asked Questions
Fresh strawberries are strongly recommended for the layers and garnish to maintain the firm texture and vibrant color. Frozen berries can be used for the glaze if necessary.
We use a small amount of unflavored gelatin to ‘stabilize’ the cream. This allows the cream to maintain stiff, sharp peaks for up to 24 hours in the refrigerator.
Thanks to the stabilized cream, these can be made up to 24 hours in advance. For the best visual appeal, add the mint leaf garnish just before serving.
A dense, dry pound cake is best. It provides a sturdy foundation that holds its shape and resists moisture, preventing the layers from becoming soggy.
The glaze must be simmered with cornstarch until it turns translucent and thick. It also needs to be completely cooled before mixing with the fruit slices.
The Ultimate Strawberry Shortcake Dessert Recipe
Strawberry Shortcake Dessert: The Ultimate Modern No-Bake Layered Parfait
Ingredients
Equipment
Method
- Toss sliced strawberries with 2 tbsp sugar; let sit 15 mins until juices release.
- Simmer the berry juice with cornstarch until thick and translucent. Cool completely before mixing with sliced berries.
- Bloom gelatin in 2 tbsp water, melt until clear, then slowly whisk into whipping cream as it reaches soft peaks.
- Continue whipping until sharp, structured peaks form that hold their shape on the whisk.
- Place dry pound cake cubes in the bottom of the glass cups.
- Pipe a thick layer of stabilized cream over the cake, sealing the edges against the glass.
- Top with glazed strawberries, a whole berry garnish, and a mint leaf.
Notes
Use a high-fat heavy cream (36%+) for the best structural results.
Closing Thoughts on This Modern Classic
Creating a strawberry shortcake dessert that commands attention is all about the details. By moving away from the “mushy” traditional style and toward this structured, layered approach, you are offering your guests a dessert that feels intentional and professional. The combination of the buttery cake, the velvety stabilized cream, and the glistening crimson glaze is a masterclass in balanced textures.
We invite you to share your creations with us! If you found this guide helpful, please leave a comment below and let us know how your layers turned out. Don’t forget to follow alicecooks_official on Pinterest for more visual recipe blueprints and culinary inspiration. Happy layering!


