There is no culinary combination more iconic or universally adored than the marriage of salty, roasted legumes and rich, velvety cocoa. This no-bake chocolate peanut butter dessert represents the absolute pinnacle of that pairing, designed for those who demand a professional, high-end aesthetic without ever having to preheat an oven.
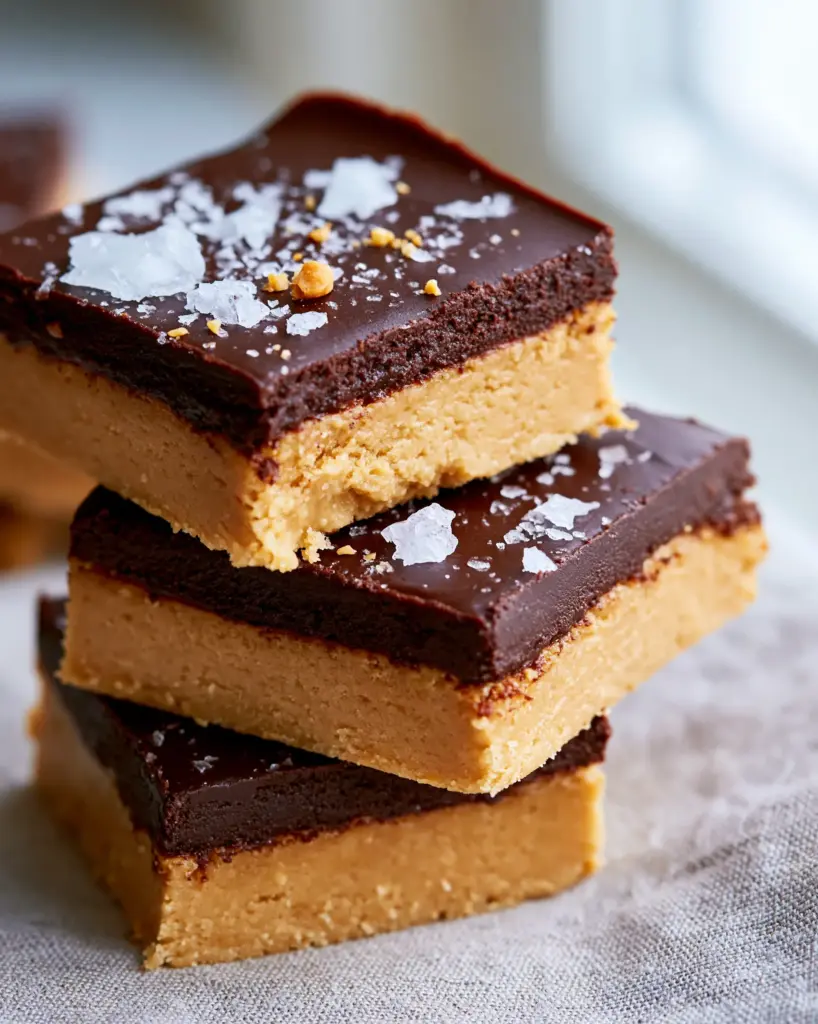
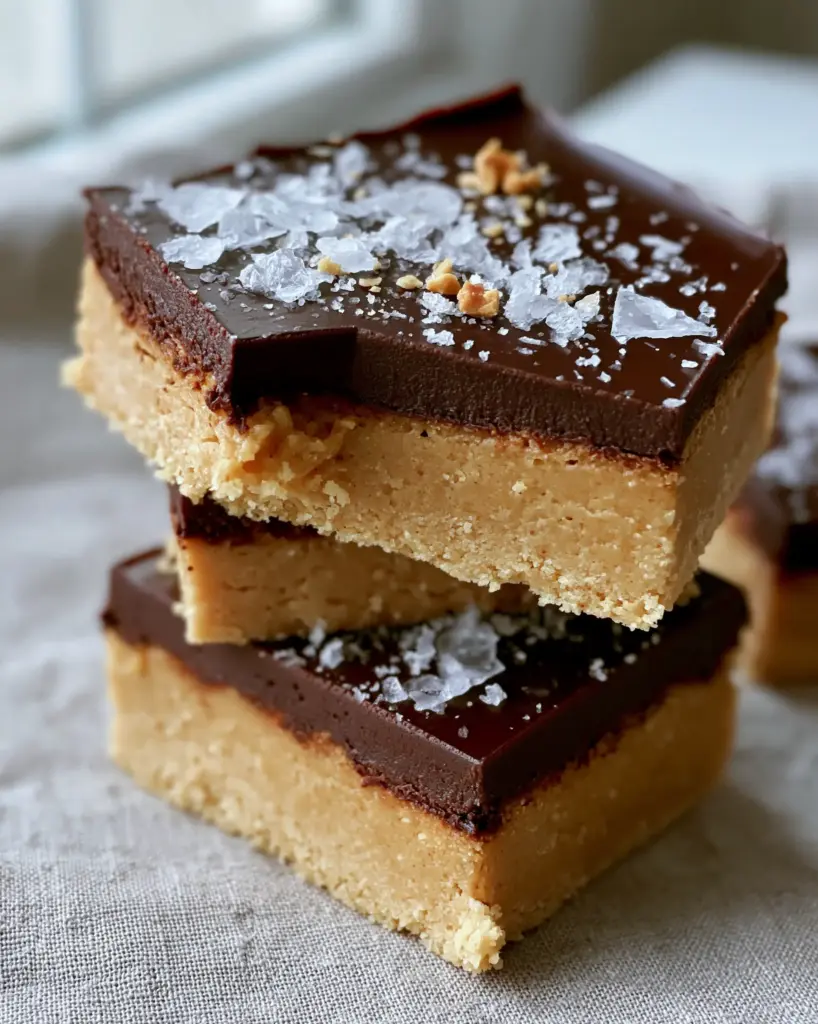
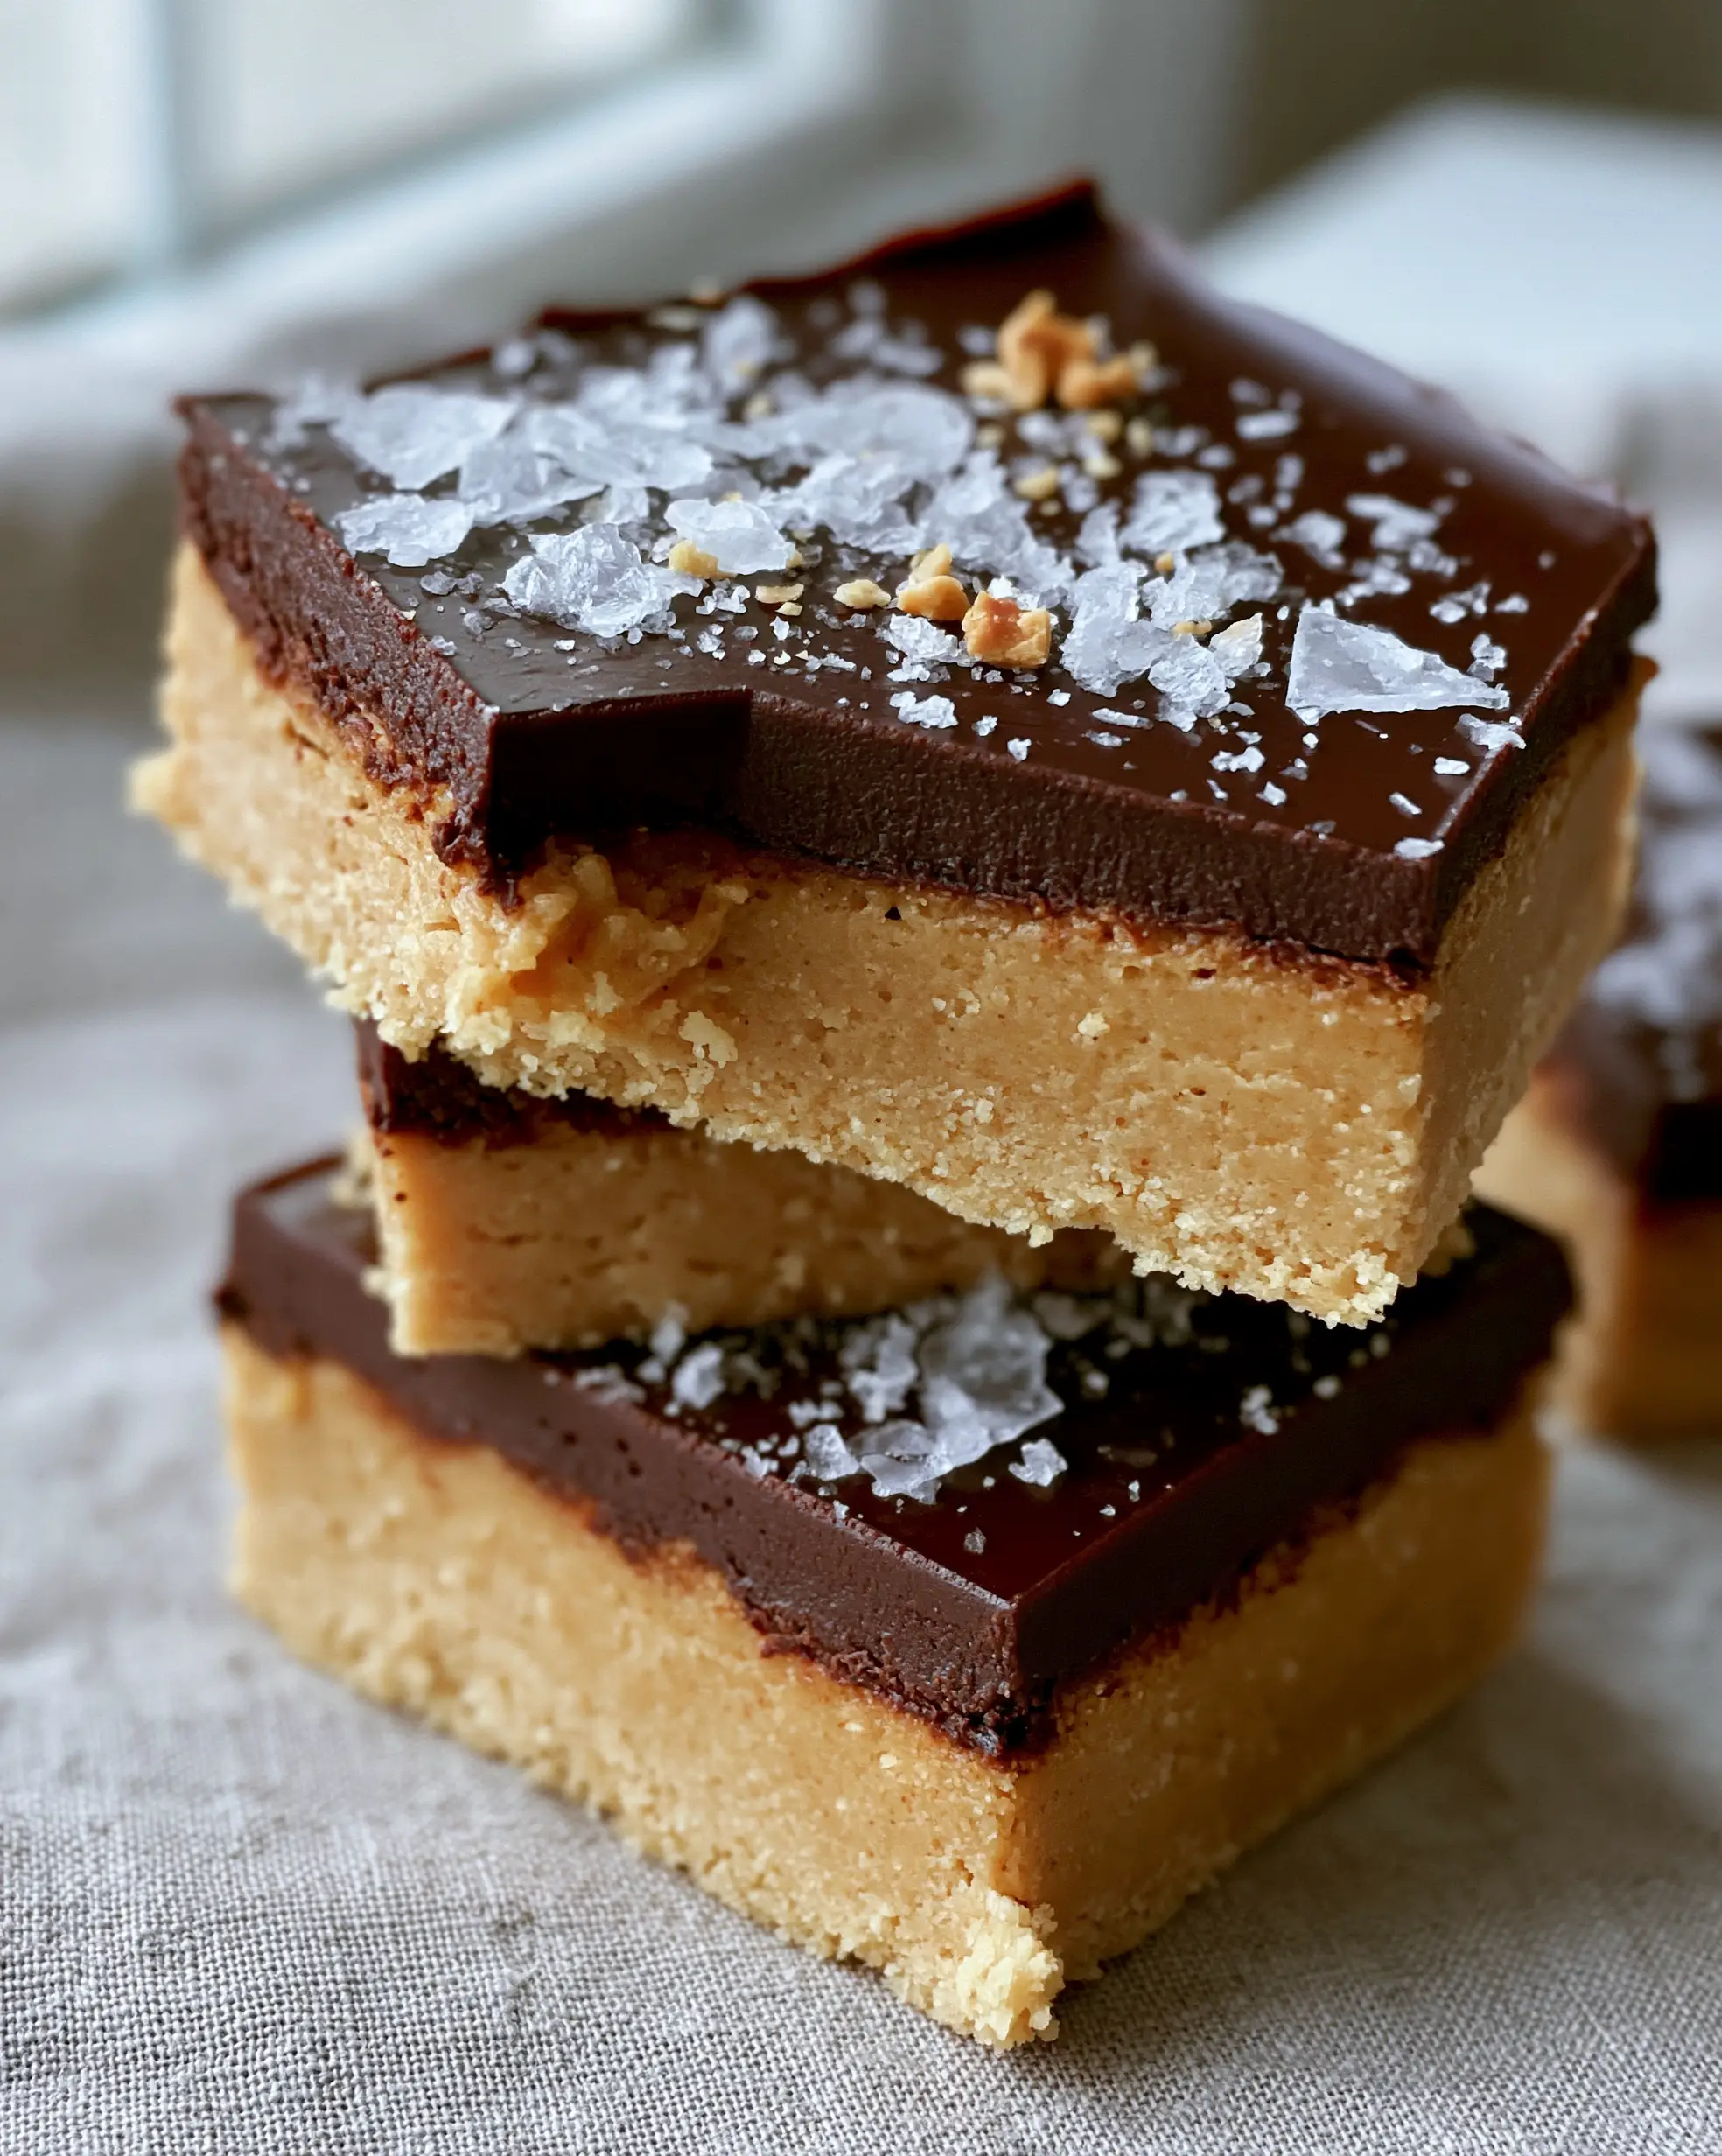
Every bite of these bars offers a sophisticated interplay of textures. You first encounter the crunch of large flaky sea salt, followed immediately by a glossy dark chocolate ganache that provides a satisfying, audible snap. Below that lies the star of the show: a dense, matte, sandy-textured light golden peanut butter fudge that melts away on the palate.
Whether you are preparing for a summer gathering or simply need a decadent treat that looks like it came from a boutique patisserie, this recipe is your secret weapon. By following a few key scientific principles regarding chocolate tempering and fat-to-crumb ratios, you will achieve results that mirror the stunning macro photography seen in professional cookbooks.
Why This Salted Peanut Butter Masterpiece Works
- Structural Integrity: The combination of graham cracker crumbs and powdered sugar creates a sandy, stable base that holds its shape even at room temperature.
- The Perfect Snap: By adding a precise amount of fat to high-quality dark chocolate, we achieve a glossy finish that breaks cleanly rather than crumbling.
- Visual Contrast: The light golden fudge layer creates a striking visual horizon against the deep, midnight hues of the dark chocolate topping.
- Balanced Flavor Profile: The inclusion of vanilla extract and flaky sea salt cuts through the richness, preventing the dessert from feeling overly cloying.
If you find yourself constantly craving this specific flavor profile, you might also fall in love with our rich peanut butter brownie recipe which offers a similar decadence in a baked format. However, for sheer ease and visual impact, these no-bake bars remain unbeaten.
The Essential Component Anatomy for No-Bake Success
To achieve the specific “macro-shot” quality described in our blueprint, every ingredient serves a dual purpose: flavor and architecture. We aren’t just making a snack; we are building a multi-layered textural experience.
The Golden Peanut Butter Fudge Foundation
1 cup (250g) Creamy Peanut Butter: Avoid “natural” varieties that separate, as the excess oil will prevent the base from achieving that signature matte, sandy texture. Use a stabilized commercial brand for the most consistent structural results.
1/2 cup (115g) Unsalted Butter, melted: This provides the necessary saturated fat to bind the crumbs. As it cools, the butter solidifies, turning a soft mixture into a dense, sliceable fudge.
1 1/2 cups (150g) Graham Cracker Crumbs: These provide the “sandy” texture visible in the cross-section. They act as the dry particulate that absorbs moisture and gives the bar its characteristic “bite.”
2 cups (240g) Powdered Sugar: Beyond sweetness, the fine mesh of the sugar provides the “matte” finish. It integrates seamlessly into the peanut butter without the grittiness of granulated sugar.
1 tsp (5ml) Pure Vanilla Extract: Vanilla acts as a flavor enhancer for the roasted peanuts, adding a floral aromatic note that lingers on the back of the tongue.
The Glossy Dark Chocolate Snap Layer
1 1/2 cups (255g) Dark Chocolate Chips or Chopped Bar: Aim for at least 60% cacao. The higher fat content in dark chocolate ensures a “clean snap edge” when sliced cold.
2 tbsp (30g) Creamy Peanut Butter (for the ganache): Adding a small amount of peanut butter to the melting chocolate lowers the melting point slightly, ensuring the chocolate doesn’t become too brittle to bite through comfortably.
The Finishing Textural Accents
1 tbsp (10g) Large Flaky Sea Salt: This is not just a garnish; it is a functional contrast. The large crystals provide a sensory “pop” that cuts through the dense fats of the peanut butter.
2 tbsp (20g) Crushed Roasted Peanuts: These provide a visual cue to the flavor within and add a needed crunch to the otherwise smooth top layer.
Precision Tools for Professional Results
Achieving a “perfectly smooth” surface and “clean snap edges” requires more than just good ingredients; you need the right methodology. While this no-bake chocolate peanut butter dessert is simple, these tools elevate the final product.
An 8×8 inch (20×20 cm) square baking pan is the standard for achieving that “thick” bar height. Using a larger pan will result in thin, flimsy layers that lose their visual impact. I highly recommend lining your pan with parchment paper, leaving an overhang on the sides. This allows you to lift the entire block out for those perfectly clean, straight-edged cuts.
A heavy-bottomed offset spatula is also your best friend here. It is the only way to get the top chocolate layer “perfectly smooth” across the entire surface. If you enjoy the process of layering desserts, you might also want to try our layered chocolate oreo cake for your next project.
Step-By-Step: Constructing Your No-Bake Masterpiece
Step 1: Engineering the Sandy Fudge Base
In a large mixing bowl, combine your melted butter and creamy peanut butter. Use a sturdy whisk to emulsify the two until the mixture is a singular, glossy golden liquid. Stir in the vanilla extract.
Slowly fold in the powdered sugar and graham cracker crumbs. At first, it will look like there isn’t enough liquid, but continue folding. You are looking for a “matte” finish that resembles wet sand but holds together firmly when pressed between your fingers.
Transfer the mixture to your prepared pan. Use the back of a flat measuring cup to press the base down firmly. It must be a dense, even layer to support the weight of the chocolate. Chill this in the refrigerator for at least 30 minutes before moving to the next step.
Step 2: Melting for Maximum Gloss
In a microwave-safe bowl, combine your dark chocolate and the remaining 2 tablespoons of peanut butter. Heat in 30-second intervals, stirring vigorously between each. This stirring is crucial—it’s essentially a “cheat’s temper” that helps align the cocoa butter crystals for a glossy finish.
Once the mixture is completely liquid and shows no lumps, pour it over the chilled peanut butter base. Use your offset spatula to spread it to the corners in one smooth motion. Avoid over-working the chocolate, as this can create air bubbles or a dull finish.
Step 3: The Art of the Garnish
While the chocolate is still wet and glossy, sprinkle your large flaky sea salt crystals and crushed roasted peanuts across the top. To match the “macro shot” aesthetic, try to keep the distribution organic rather than perfectly symmetrical.
Let the bars sit at room temperature for 10 minutes to allow the garnish to settle, then transfer to the refrigerator. For that “clean snap edge,” the chocolate needs at least 2 hours to fully set and crystallize.
Expert Tips for the Perfect Professional Slice
Getting a clean cut on a no-bake chocolate peanut butter dessert can be tricky because the chocolate top is harder than the fudge base. If you press down with a cold knife, the chocolate will shatter or crush the base.
- The Hot Knife Method: Run your sharpest chef’s knife under hot water for 30 seconds. Wipe it completely dry, then make one long, vertical cut. The heat will “melt” through the chocolate layer like butter, ensuring a perfectly smooth edge.
- Wipe Between Cuts: For the cleanest visual results, wipe the knife clean and re-heat it after every single slice. This prevents peanut butter residue from smearing onto the dark chocolate layer.
- The Snap Factor: If you find the chocolate is too hard to cut even with a warm knife, let the pan sit at room temperature for 10-15 minutes before slicing. This softens the chocolate just enough to maintain its snap without being brittle.
If you love the textural contrast of a soft base and a firm topping, you should also check out our brown butter brookies, which offer a similar play on density and mouthfeel.
How to Store and Preserve Freshness
Because of the high fat content in the peanut butter and chocolate, these bars are incredibly shelf-stable, but they do have a preferred environment. To maintain the “matte” look of the base and the “gloss” of the top, keep them in an airtight container in the refrigerator.
In the fridge, they will stay perfectly fresh for up to 2 weeks. For longer storage, you can freeze them for up to 3 months. When freezing, place a piece of parchment paper between layers to prevent the glossy tops from getting scuffed. Thaw them in the refrigerator for best results.
Ideal Pairings for a Decadent Dessert Spread
This dessert is extremely rich, meaning it pairs best with beverages that provide high acidity or bitterness to cleanse the palate. A cold brew coffee or a stiff espresso is the classic choice.
If you are serving these at a party, consider a fruit-forward contrast. A platter of fresh strawberries or even a small serving of strawberry rhubarb pie can provide a tart counterpoint to the heavy nuttiness of the bars. For a summer gathering, these bars also pair beautifully with a refreshing dragon fruit lemonade.
Frequently Asked Questions
Yes, but be aware that milk chocolate has a lower melting point and more sugar. It will be softer and won’t have the same clean ‘snap’ edge as dark chocolate.
Yes, to maintain the structural integrity and the glossy finish of the ganache, it should be stored in the refrigerator. It can sit out for 30-60 minutes for serving.
Use the hot knife method: dip your knife in hot water and wipe it dry before each slice. The heat melts the chocolate edge slightly, preventing the brittle ‘snap’ from turning into a messy crack.
For the most consistent sandy texture, use a food processor to pulse the crackers into a fine, uniform meal. Large chunks will make the bars difficult to slice cleanly.
This usually happens if you use ‘natural’ peanut butter which lacks stabilizers. For the best sandy, matte texture, use a standard commercial brand. Also, ensure your butter is fully emulsified before adding the crumbs.
The Ultimate No-Bake Chocolate Peanut Butter Dessert Recipe Card
No-Bake Chocolate Peanut Butter Dessert: The Ultimate Glossy Ganache Fudge Bars
Ingredients
Equipment
Method
- In a large bowl, whisk together the melted butter and creamy peanut butter until completely smooth and emulsified.
- Stir in the vanilla extract, graham cracker crumbs, and powdered sugar. Fold with a spatula until a thick, matte, sandy-textured dough forms.
- Press the mixture firmly into a parchment-lined 8x8 inch pan. Chill for 30 minutes until firm to the touch.
- Melt the dark chocolate and 2 tbsp of peanut butter in 30-second bursts in the microwave, stirring until glossy and perfectly smooth.
- Pour the chocolate over the chilled base. Smooth with an offset spatula. Immediately sprinkle with flaky sea salt and crushed peanuts.
- Refrigerate for at least 2 hours. Slice with a hot, dry knife to achieve a clean snap edge.
Notes
Stabilized peanut butter works better than natural varieties for this specific texture.
Conclusion: Your New Signature Sweet
Mastering this no-bake chocolate peanut butter dessert is a rite of passage for any home cook who values the intersection of ease and elegance. With its dense, sandy fudge base and its mirror-gloss chocolate topping, it is a recipe that commands attention on any dessert table.
We would love to see your results! If you manage to capture that perfect “macro-shot” of your stack of bars, be sure to tag us. Don’t forget to follow alicecooks_official on Pinterest for more visual recipe inspiration and decadent treats.
Have a question about the chocolate snap or the base texture? Drop a comment below—we respond to every culinary query!


