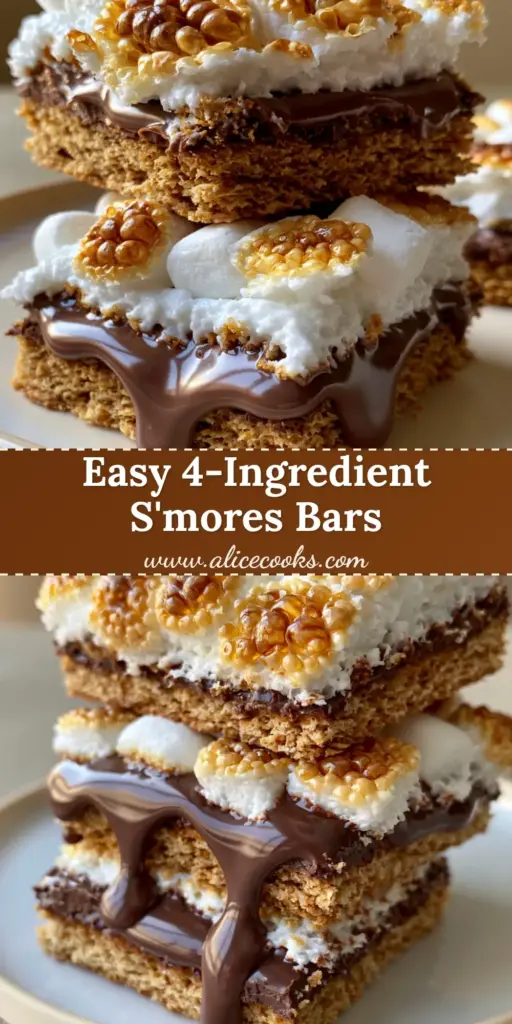
There is something undeniably nostalgic about the combination of toasted marshmallows, melted chocolate, and crunchy graham crackers. These s’mores bars capture that exact campfire magic but elevate it into a sophisticated, shareable dessert that looks just as good as it tastes. Imagine a thick, buttery base, a glossy layer of slow-dripping milk chocolate, and a crown of mini marshmallows blistered to golden-brown perfection.
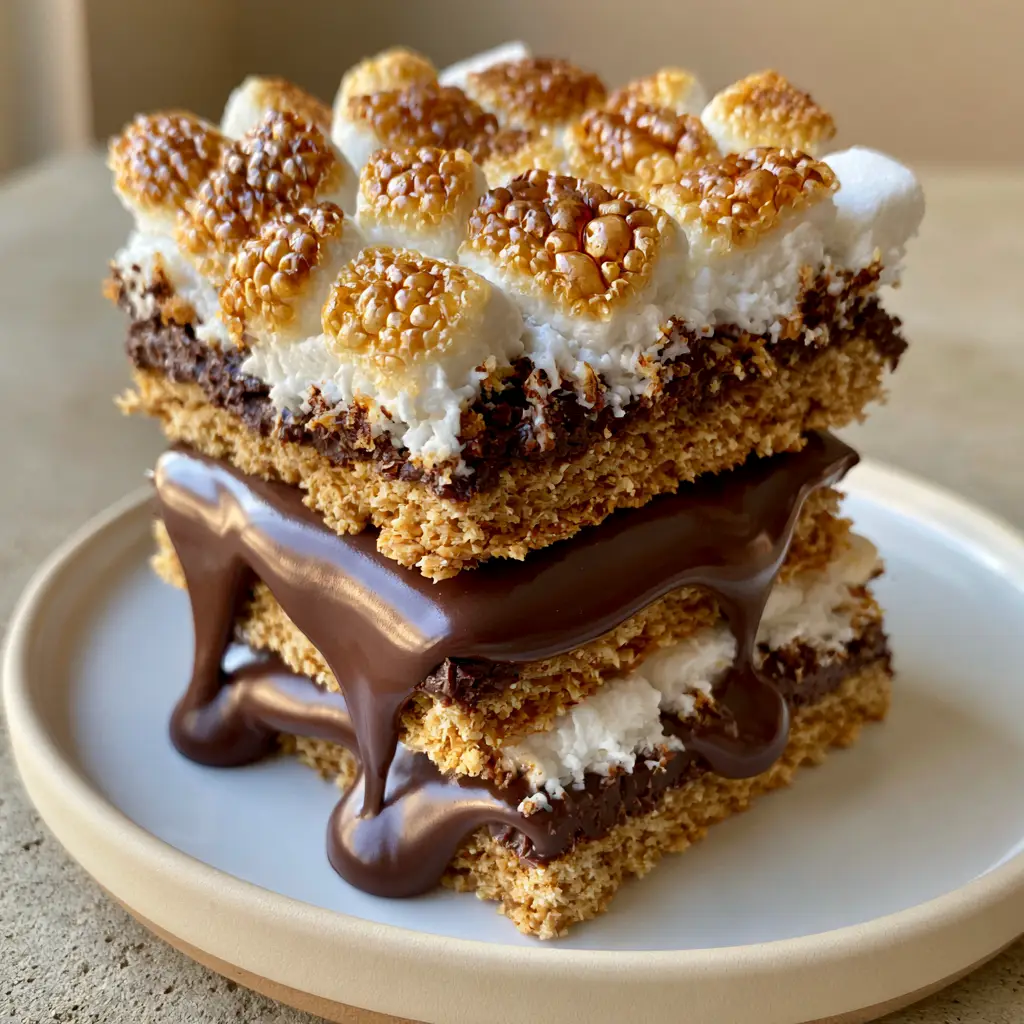
When you snap a handheld smartphone photo of these bars stacked high on a modern cream ceramic plate, the visual appeal is immediate. The soft, warm side daylight catches the glistening chocolate and the caramelized peaks of the marshmallows, making them look irresistible. Whether you are hosting a summer cookout or just craving a cozy treat, these s’mores bars are the definitive answer to your dessert cravings.
Forget the mess of an open flame; this oven-baked version ensures every single bite has the perfect ratio of crust to chocolate to fluff. We have engineered this recipe to provide that “slow-drip” chocolate texture seen in professional food photography while maintaining the structural integrity of a handheld bar. Let’s dive into how to achieve these bakery-style results in your own kitchen.
Why You Will Obsess Over These Gooey s’mores bars
- Textural Harmony: A thick, golden-brown graham cracker crust provides a sturdy, buttery crunch that perfectly offsets the soft, gooey toppings.
- The Perfect Drip: By using a specific chocolate-to-cream ratio, we achieve a thick, glossy milk chocolate layer that stays soft and slow-dripping even at room temperature.
- Blistered Perfection: These bars feature mini marshmallows that are toasted under high heat to create beautifully caramelized, golden-brown blistered tops.
- No Campfire Required: Enjoy the iconic flavor of a summer night any time of year, with a method that is far more consistent than a temperamental bonfire.
The Foundation: Crafting a Buttery Graham Cracker Crust That Doesn’t Crumble
The secret to world-class s’mores bars starts with the base. Many recipes produce a crust that is either too dry and sandy or so hard it’s difficult to bite through. To achieve the thick, golden, buttery pressed graham cracker crust seen in our visuals, we use a precise ratio of crumbs to fat.
Graham Cracker Crumbs (2 cups / 200g): You can use pre-packaged crumbs or pulse whole sheets in a food processor. The goal is a fine, sandy texture that absorbs the butter evenly for a uniform golden hue.
Unsalted Butter (3/4 cup / 170g): We use melted butter to bind the crumbs. This provides the “buttery” flavor profile and ensures the crust sets firmly in the pan without becoming greasy.
Granulated Sugar (1/4 cup / 50g): A small amount of sugar helps the crust caramelize and provides “structural insurance,” acting as a glue as it melts and cools during the blind-baking process.
Kosher Salt (1/2 tsp / 3g): This is a foundational “invisible” ingredient. It cuts through the intense sweetness of the chocolate and marshmallow, making the flavor profile more complex and professional.
The Liquid Gold: Achieving That Signature Slow-Dripping Milk Chocolate Layer
To get that thick, glossy, slow-dripping melted milk chocolate layer, you cannot simply melt chocolate chips and hope for the best. Pure chocolate often sets too hard in the fridge, making the bars difficult to cut and losing that “gooey” appeal. We use a modified ganache technique to ensure the chocolate stays luscious.
High-Quality Milk Chocolate (12 oz / 340g): Look for chocolate with a high cocoa butter content. Chopped chocolate bars generally melt more smoothly than standard chips, which contain stabilizers that can make the texture grainy.
Heavy Cream (2 tbsp / 30ml): This is the secret to the “slow drip.” Adding just a touch of cream lowers the melting point of the chocolate, ensuring it stays soft and glossy at room temperature.
Pure Vanilla Extract (1 tsp / 5ml): Vanilla acts as a flavor enhancer for the chocolate, bridging the gap between the nutty graham crackers and the sugary marshmallows.
The Crowning Glory: Fluffy Mini Marshmallows with Caramelized Tops
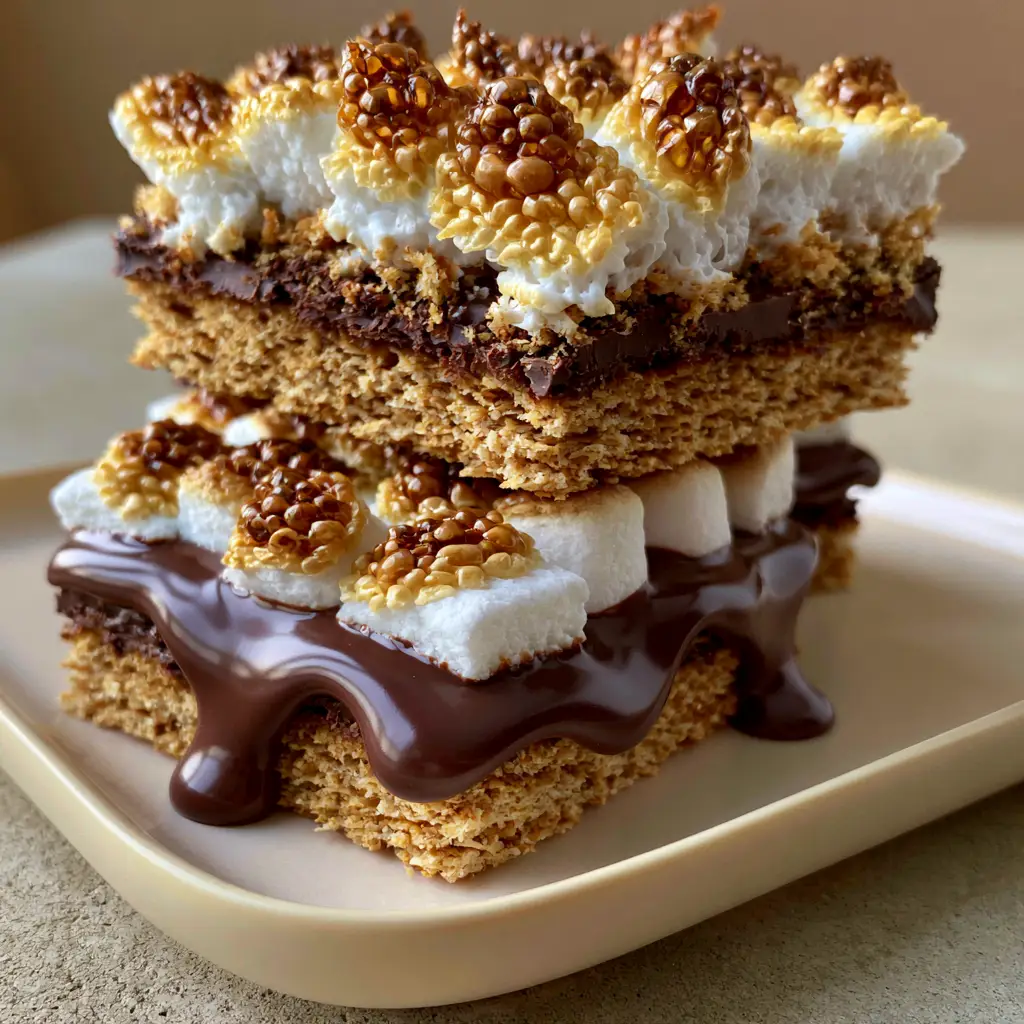
The top layer of our s’mores bars is where the “Culinary Forensics” really come into play. To match the visual of beautifully caramelized golden-brown blistered tops, we use mini marshmallows rather than large ones. Mini marshmallows provide more surface area for the heat to hit, resulting in more “blisters” and a more even char.
Mini Marshmallows (10 oz / 283g): You want enough to completely cover the chocolate layer. As they heat, they puff up and fuse together, creating a fluffy cloud-like blanket over the bars.
Visual Cues for Toasting: During the final broil, do not walk away. You are looking for the peaks of the marshmallows to transition from bright white to a deep amber. The “blistering” happens in the final 10 seconds, where small dark spots form, indicating the sugars have reached peak caramelization.
Essential Kitchen Tools for Success
To achieve the precise layers shown on the modern cream ceramic plate, you will need a few specific tools. Precision in equipment leads to precision in the final result.
- 8×8 inch (20x20cm) Square Baking Pan: A metal pan is preferred for sharper edges and better heat conduction for the crust.
- Parchment Paper: Crucial for lifting the entire block of s’mores bars out of the pan for clean slicing.
- Offset Spatula: This helps spread the glossy chocolate layer evenly from edge to edge.
- Kitchen Torch (Optional): If your oven broiler is uneven, a torch allows you to specifically target “blistered” spots for that perfect handheld photo aesthetic.
Step-by-Step Instructions: Mastering the s’mores bars
Phase 1: Preparing the Sturdy Graham Base
Preheat your oven to 350°F (175°C). Line your baking pan with parchment paper, leaving an overhang on the sides. In a medium bowl, combine the 2 cups (200g) of graham cracker crumbs, 1/4 cup (50g) sugar, and 1/2 tsp (3g) salt.
Pour the melted butter over the mixture and stir with a fork until it resembles wet sand. Press the mixture firmly into the bottom of the pan. Use the bottom of a measuring cup to ensure the crust is level and packed tight. Bake for 10-12 minutes until the edges are just beginning to brown and the kitchen smells like toasted honey.
Phase 2: Layering the Glossy Milk Chocolate
While the crust is hot, prepare your chocolate layer. Place the 12 oz (340g) of milk chocolate and 2 tbsp (30ml) of heavy cream in a microwave-safe bowl. Heat in 30-second intervals, stirring in between, until the mixture is thick, glossy, and completely smooth.
Stir in the vanilla extract. Pour the chocolate over the warm graham cracker crust, using your offset spatula to spread it into an even, thick layer. The warmth from the crust will help the chocolate “settle” into a perfectly flat, slow-dripping surface.
Phase 3: The Marshmallow Topping and The Char
Immediately sprinkle the 10 oz (283g) of mini marshmallows over the melted chocolate. Press them down very gently so they adhere to the chocolate. Turn your oven to the broiler setting (high).
Place the pan on the middle rack. Watch closely—this takes only 1-2 minutes. The marshmallows will puff up and begin to brown. Remove the pan when you see those signature caramelized, golden-brown blistered tops. The smell should be reminiscent of a campfire—sweet, slightly smoky, and toasted.
Expert Tips for the Best s’mores bars Results
- The Clean Cut: For those perfect stacked layers, allow the bars to cool completely at room temperature, then refrigerate for 30 minutes. Use a hot, wet knife to slice through the sticky marshmallow layer.
- Don’t Over-Bake the Crust: A crust baked too long will become brittle. It should be “golden,” not “dark brown,” before you add the chocolate.
- Quality Matters: Since there are so few ingredients, the quality of your milk chocolate is paramount. Avoid “imitation” chocolate coating wafers.
- Marshmallow Spacing: Pack the mini marshmallows tightly. Any gaps in the marshmallows will allow the chocolate to scorch under the broiler.
What to Serve with Your s’mores bars
These bars are rich and decadent, so they pair beautifully with refreshing drinks or other party favorites. If you are serving these at a summer bash, consider a cold strawberry lemonade recipe to balance the sweetness. For a truly nostalgic experience, serve them alongside a homemade Wendy's Frosty slushie.
If you’re planning a holiday dessert spread, these bars fit right in next to Christmas chocolate chip cookies or as a standout option among other no-bake Fourth of July desserts. For a grown-up twist, pair a bar with a summer pie or a glass of cold milk.
Frequently Asked Questions
Yes, you can swap the milk chocolate for dark chocolate (60% cacao or higher). However, the classic s’mores flavor is best achieved with milk chocolate. If using dark, you may want to increase the heavy cream to 3 tbsp for a similar drip.
You can, but mini marshmallows are preferred. Large marshmallows don’t toast as evenly and can create large gaps where the chocolate might burn under the broiler.
Store them at room temperature in an airtight container for up to 3 days to keep them soft. Only refrigerate them if you prefer a firmer chocolate layer or if your kitchen is very warm.
Place your oven rack in the middle position rather than the top. This gives you more control. Watch the pan constantly; the transition from golden to blistered takes only seconds. A kitchen torch can also be used for precision.
A crumbling crust usually means the crumbs weren’t pressed firmly enough into the pan or there wasn’t enough butter. Use the bottom of a heavy glass to pack the crust down tightly before baking.
The Ultimate s’mores bars Recipe Card
s'mores bars: The Ultimate Gooey Toasted Marshmallow Dessert
Ingredients
Equipment
Method
- In a medium bowl, combine graham cracker crumbs, sugar, and salt. Stir in the melted butter until the mixture looks like wet sand.
- Press firmly into a lined 8x8 pan. Bake at 350°F (175°C) for 10-12 minutes until golden and fragrant.
- Melt chocolate and heavy cream together in 30-second bursts in the microwave until glossy. Stir in vanilla.
- Pour glossy chocolate over the warm crust. Top with a dense layer of mini marshmallows.
- Place under the broiler for 1-2 minutes. Watch for the marshmallows to puff and the tops to become beautifully caramelized and blistered.
Notes
Store at room temperature for up to 3 days in an airtight container.
Closing & Call to Action
These s’mores bars are more than just a dessert; they are a nostalgic experience captured in a single, gooey bite. With their thick graham base, slow-dripping chocolate, and blistered marshmallow tops, they are guaranteed to be the star of your next gathering. If you enjoyed this recipe, please leave a comment below and share your photos with us!
Don’t forget to save this recipe to your “Dessert Goals” board on Pinterest so you can find it whenever the s’mores craving strikes. Happy baking!