The Malibu Sunrise is more than just a drink; it is a tropical vacation captured in a tall crystal glass. This vibrant, multi-layered cocktail brings together the toasted sweetness of coconut rum with the bright, citrusy punch of fresh fruit juices.
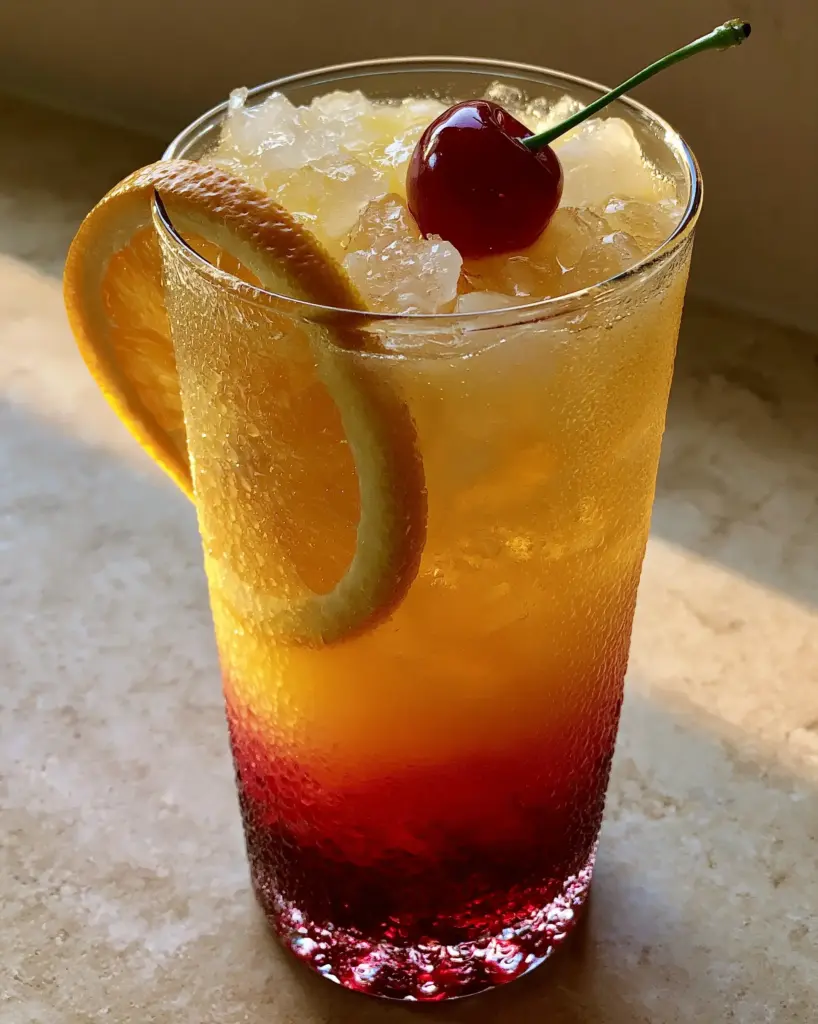
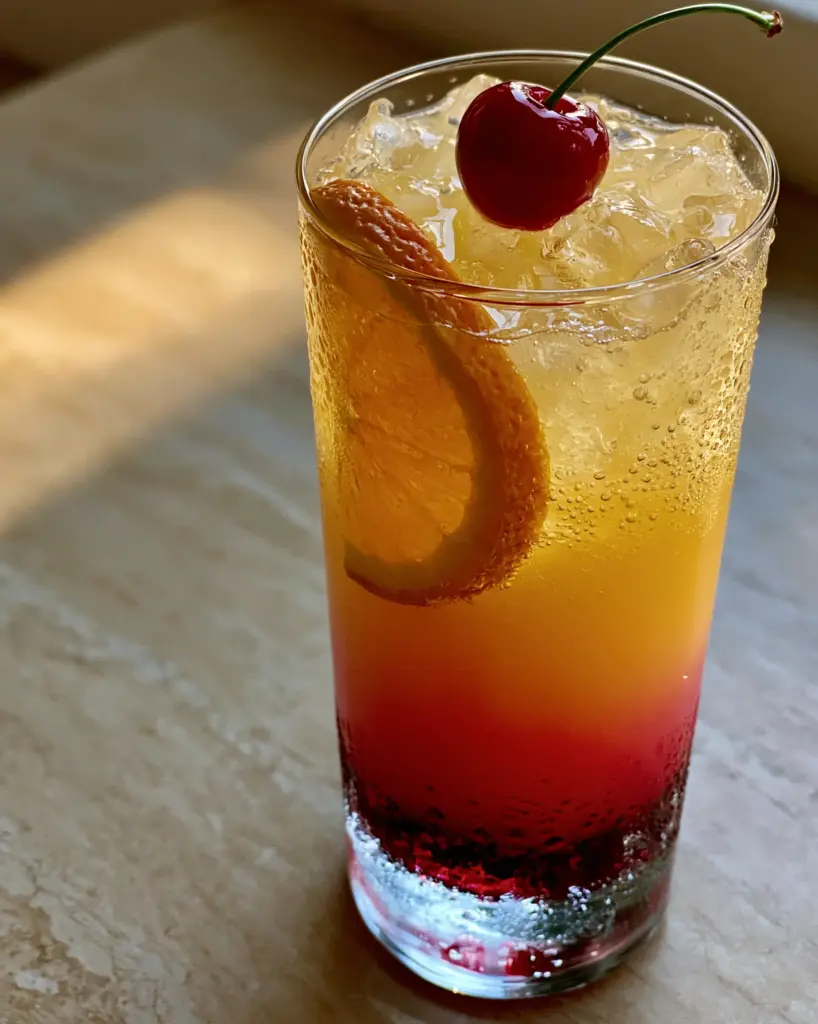
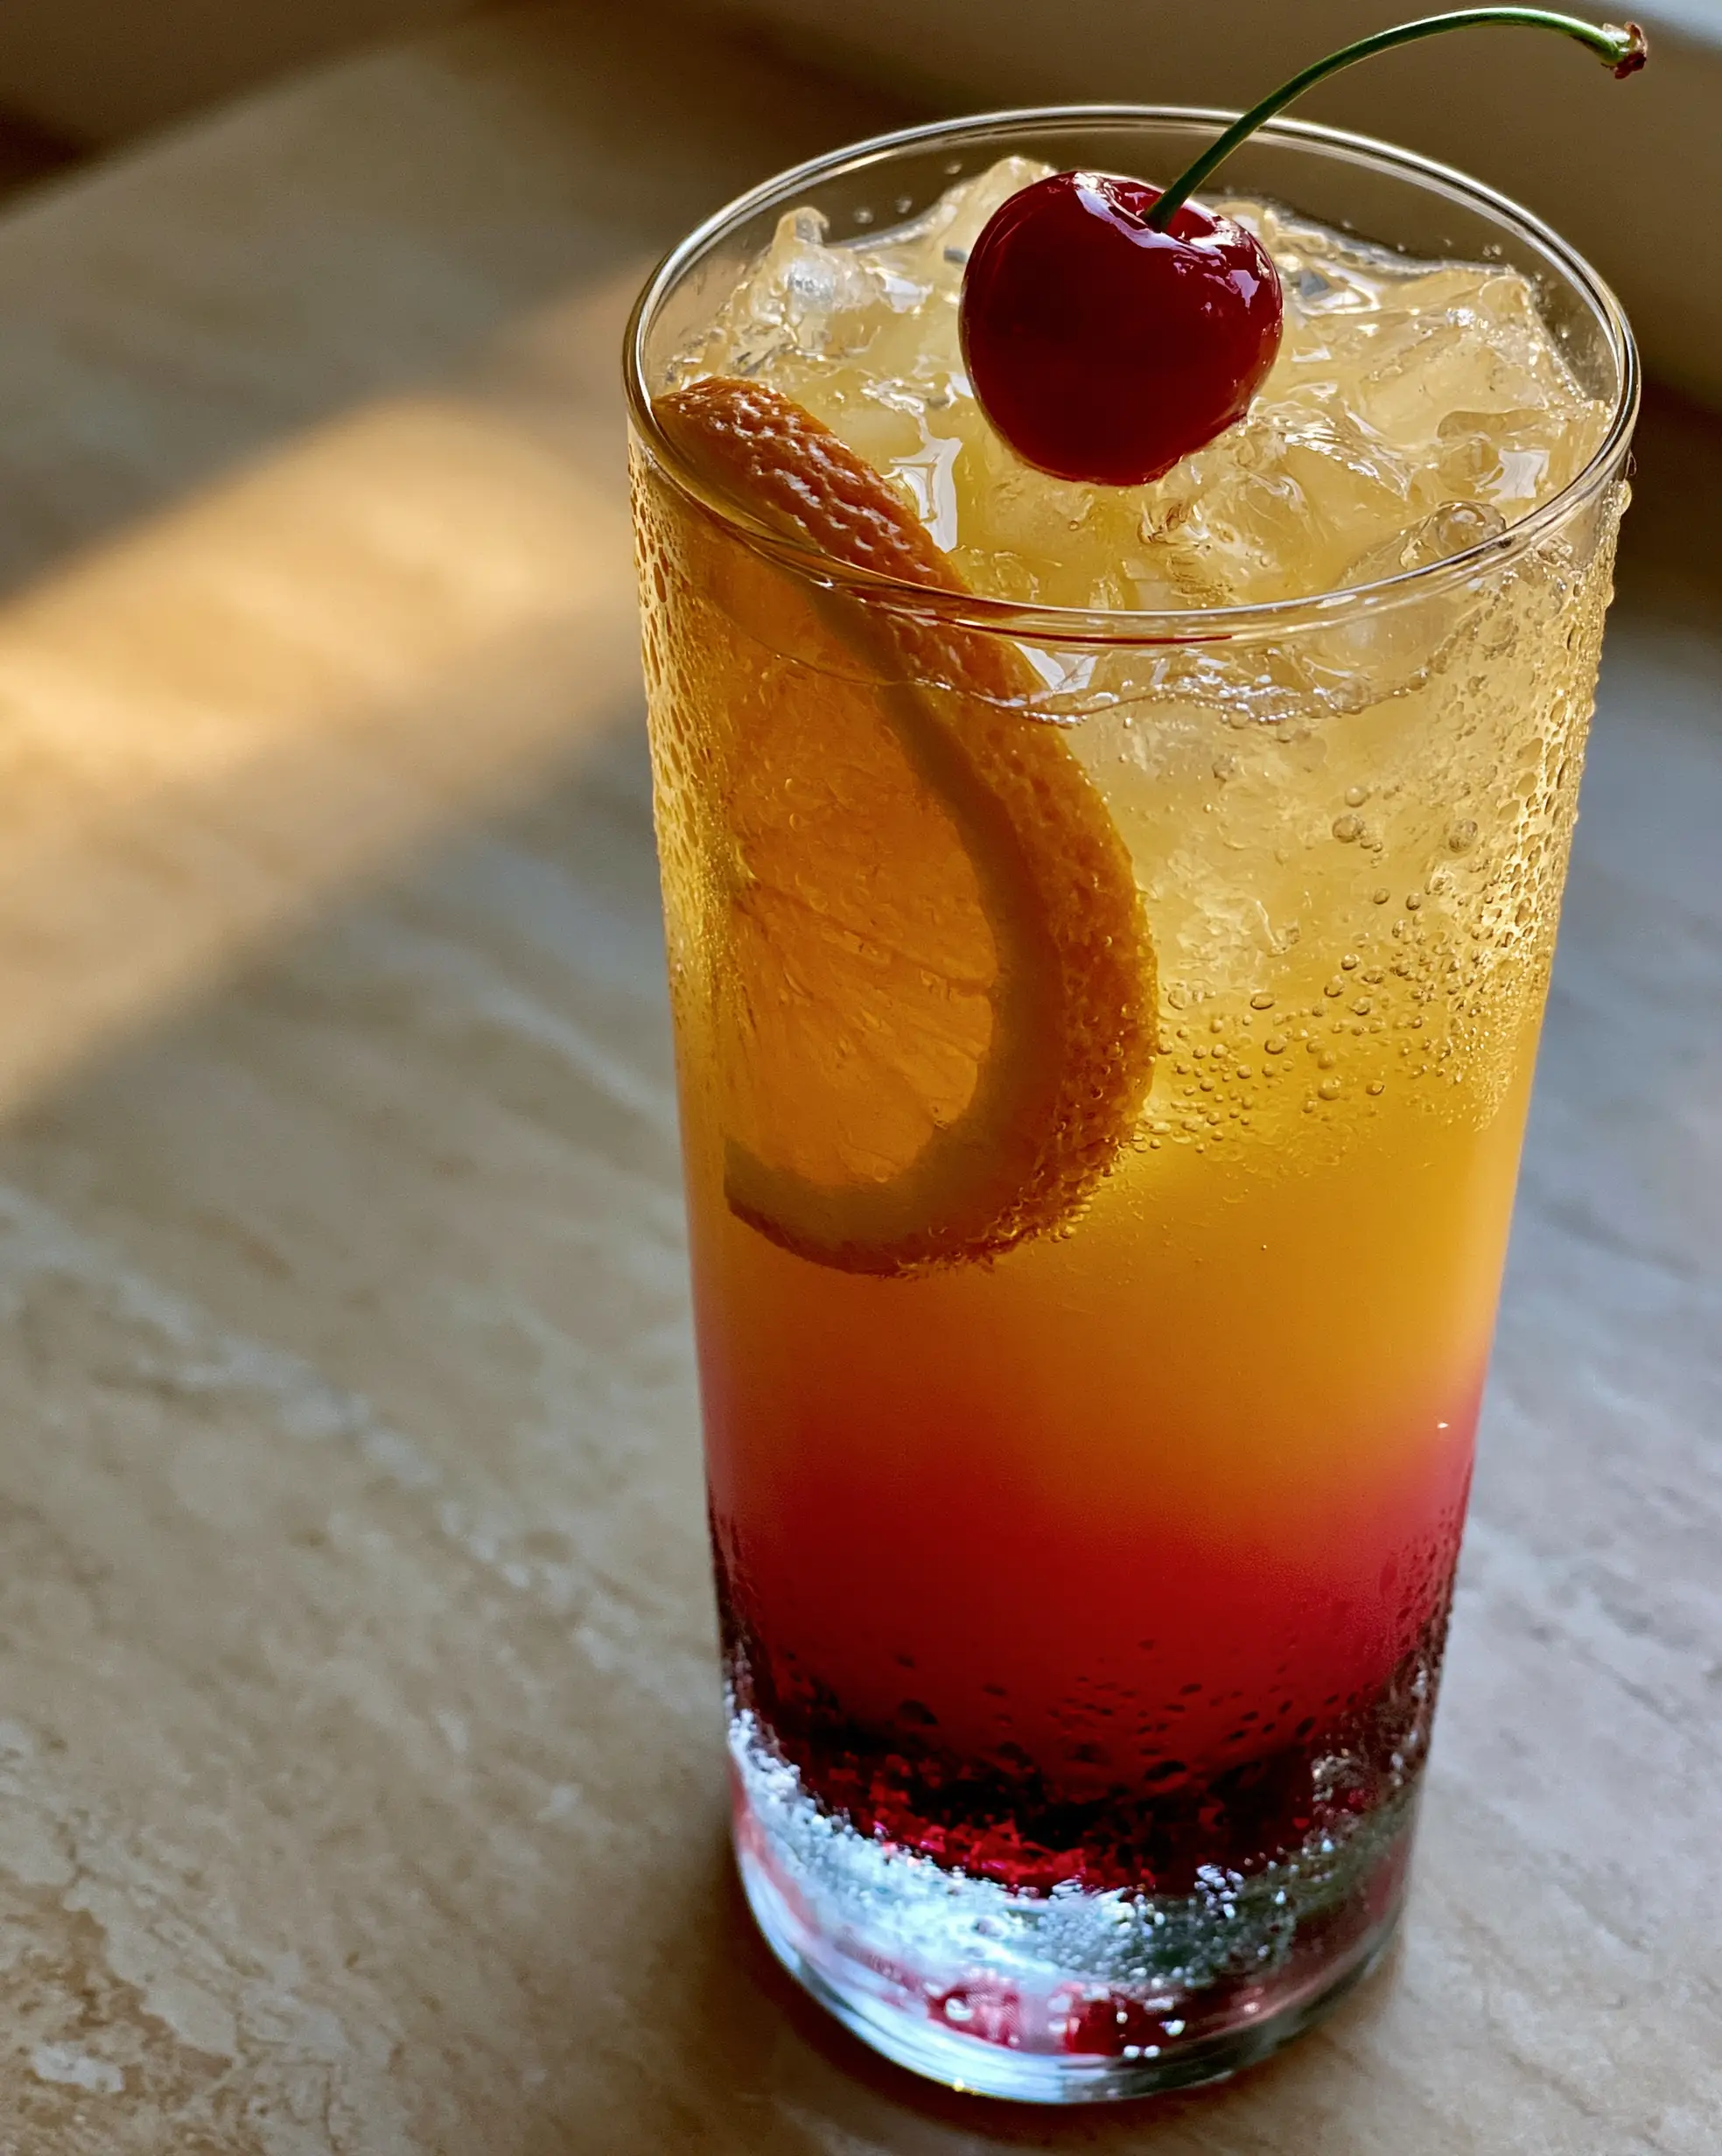
Visually, this drink is a showstopper, featuring a physical gradient that mimics a Caribbean dawn. From the dense, crimson base of grenadine to the sun-drenched orange middle and the golden pineapple crown, every sip offers a new sensory experience.
Whether you are lounging poolside or hosting a summer soirée, mastering the Malibu Sunrise requires a blend of quality ingredients and precise pouring techniques. In this guide, we will break down the science of specific gravity to ensure your layers remain perfectly distinct and crystal clear.
The Aesthetic Allure of a Perfectly Poured Sunrise
- Flawless Visual Stratification: Achieve three distinct physical layers—crimson, vibrant orange, and golden yellow—with zero color bleeding between them.
- Artisanal Textures: The combination of clear, hand-cut ice and glistening exterior condensation creates a professional, high-end bar feel at home.
- Tropical Flavor Profile: A sophisticated balance of tart citrus, rich pomegranate syrup, and smooth, toasted coconut aromatics.
- Sensory Garnish: The aromatic oils from a fresh organic orange wheel and the sweetness of a stemmed maraschino cherry complete the experience.
Essential Ingredients for the Tropical Malibu Sunrise
Malibu Coconut Rum
This is the backbone of the drink, providing a smooth 21% ABV spirit base with a distinct, toasted coconut finish. Its relatively light density compared to syrups is what allows it to sit at the top of the glass when properly prepared.
Fresh-Squeezed Orange Juice
For the most vibrant middle layer, use 100% fresh-squeezed juice from Valencia or Navel oranges. The natural pulp adds body, which helps stabilize the middle layer and prevents the top spirits from sinking too quickly.
Dense Crimson Grenadine Syrup
Grenadine is the heaviest component due to its high sugar content, ensuring it stays firmly at the base. Look for a high-quality pomegranate-based syrup to avoid an overly medicinal taste and achieve that deep red hue.
Pineapple Juice
This adds a necessary acidity and frothiness to the top layer, creating the “golden yellow” finish described in our visual blueprint. When shaken or stirred with the rum, it lightens the density further for perfect floating.
Clear Hand-Cut Artisanal Ice Cubes
Standard cloudy ice melts too quickly and dilutes the layers; artisanal clear ice provides the thermal mass needed to keep the drink cold without immediate dilution. The clarity allows light to pass through the layers, enhancing the “sunrise” glow.
Organic Orange Wheel & Maraschino Cherry
A thin-sliced orange wheel provides essential citrus aromatics every time you take a sip. The glossy red maraschino cherry with its green stem adds a pop of contrasting color and a sweet textural treat at the end.
Professional Mixology Tools for Artisanal Results
Elegant Tall Collins Glass: A thin-walled crystal glass is essential to showcase the precise layering and the glistening condensation on the exterior. The height allows enough room for the physical separation of the three colors.
Bar Spoon: A long-handled, twisted bar spoon is the secret to successful layering. By pouring liquids over the back of the spoon, you break the velocity of the pour, allowing the lighter liquid to rest gently on the heavier one.
Manual Citrus Juicer: To achieve the bright orange middle layer, you need fresh juice. A manual press ensures you get the juice and oils without the bitter pith found in machine-processed alternatives.
Sharp Mandoline or Paring Knife: This is required to create the “thin-sliced” organic orange wheel. A consistent thickness ensures the garnish stays tucked against the glass wall without falling over.
Step-by-Step Guide to Crafting a Flawless Layered Cocktail
Preparing the Vessel and Ice
Begin by chilling your crystal Collins glass in the freezer for at least 10 minutes. Once chilled, carefully pack the glass to the brim with your clear, hand-cut artisanal ice cubes, ensuring they are stacked tightly to support the garnishes later.
Setting the Crimson Foundation
Measure out 1 oz (30ml) of dense crimson grenadine syrup. Pour it directly into the center of the glass; because it is the heaviest liquid, it will settle naturally at the very bottom, creating a thick, vibrant red base.
The Delicate Orange Middle Layer
Take 3 oz (90ml) of fresh-squeezed orange juice. Place the tip of your bar spoon just above the surface of the grenadine and slowly pour the juice down the spiral handle or over the back of the spoon. Watch for the visual cue: the orange juice should sit directly on top of the red syrup with a sharp, clean line of demarcation.
The Golden Pineapple and Rum Crown
In a separate mixing glass, lightly stir 2 oz (60ml) of Malibu coconut rum with 1 oz (30ml) of pineapple juice. Using the bar spoon technique again, gently float this light, golden-yellow mixture over the orange juice layer. You should now see three distinct physical layers with zero color bleeding.
Final Garnish and Presentation
Slide a thin wheel of organic orange down the inside wall of the glass, pressing it against the crystal so it stays submerged in the orange and yellow layers. Place a single plump, glossy red maraschino cherry with its green stem intact on the very top of the ice. Serve immediately as natural condensation begins to bead on the glass exterior.
Pro-Level Tips for Crystal Clear Layers
- Temperature Control: Ensure all your liquid components (rum, juices, syrup) are well-chilled before pouring. Cold liquids are denser and less likely to mix than room-temperature ones.
- The Speed of the Pour: The slower you pour, the better the separation. If you pour too fast, the force will break the surface tension of the layer below, causing the colors to bleed.
- Freshness Matters: Avoid carton orange juice if possible. The natural pectins in fresh juice provide a structural “shelf” that helps the rum layer float more easily.
- Ice Stack: If your ice cubes are too small, they will shift during the pour and disturb the layers. Use large, hand-cut blocks for the best stability.
Storage and Preparation Advice
While the Malibu Sunrise must be assembled fresh to maintain its layers, you can prep the components in advance. Store your fresh-squeezed orange juice in an airtight glass carafe for up to 24 hours to maintain its bright flavor profile.
If you are serving these at a party, do not pre-mix the layers. Instead, set up a “Sunrise Station” with pre-measured shots of grenadine and the rum-pineapple blend. This is a great addition to your 4th of July party ideas where guests can watch the “sunrise” being built.
The ice should remain in the freezer until the very second you are ready to build the drink. Clear ice loses its transparency if it begins to melt before the liquid is added.
What to Serve Alongside Your Malibu Sunrise
The sweet and tropical notes of coconut rum pair beautifully with salty, savory, or spicy appetizers. Think of flavors that complement a day at the beach or a summer afternoon.
If you’re looking for more vibrant summer drinks to serve at your next pool party, consider offering a variety of fruit-forward options. This cocktail also pairs surprisingly well with sweet treats like rice krispie treats for a nostalgic summer vibe.
For those who enjoy bold flavors, check out our guide to spiced rum cocktails to offer a deeper, moodier alternative to the light and bright Malibu Sunrise.
Frequently Asked Questions
Yes, but fresh-squeezed juice has more natural pulp and pectins, which create a better ‘shelf’ for the top rum layer to sit on, resulting in cleaner visual lines.
The key is density and technique. Ensure your grenadine is room temperature (heavy) while your juices are ice-cold. Always pour the top layers slowly over the back of a bar spoon to break the liquid’s velocity.
Malibu is a coconut-flavored liqueur with 21% ABV, making it smoother and lower in alcohol than standard white rum. This makes the Malibu Sunrise a very approachable, sessionable summer drink.
A Tequila Sunrise uses tequila and usually only has two main colors. The Malibu Sunrise uses coconut rum and often incorporates pineapple juice, creating a three-toned golden-yellow, orange, and red gradient.
Clear ice is denser and melts slower, which prevents the drink from becoming diluted. Visually, it allows the vibrant colors of the ‘sunrise’ to shine through without the cloudiness of standard ice.
The Official Malibu Sunrise Recipe
Malibu Sunrise: The Ultimate Layered Coconut Rum Cocktail Recipe
Ingredients
Equipment
Method
- Fill an elegant, tall, thin-walled Collins glass with clear hand-cut artisanal ice cubes.
- Pour 1 oz (30ml) of dense crimson grenadine syrup over the ice. It will settle at the bottom to form the first layer.
- Slowly pour 3 oz (90ml) of fresh-squeezed orange juice over the back of a bar spoon to create a distinct middle orange layer.
- Mix 2 oz (60ml) Malibu rum and 1 oz (30ml) pineapple juice, then gently float this over the orange juice using the bar spoon.
- Tuck a thin orange wheel against the inside glass wall and place the maraschino cherry on top of the ice.
Notes
Pour as slowly as possible over the back of a spoon to prevent color bleeding.
Closing & Call to Action
The Malibu Sunrise is a masterclass in cocktail aesthetics and tropical flavor. By following the physics of layering and using high-quality, fresh ingredients, you can recreate this stunning smartphone-perfect drink in your own kitchen.
Did your layers turn out perfectly distinct? We would love to hear about your results! Leave a comment below and let us know your favorite way to enjoy Malibu rum. Don’t forget to share your beautiful cocktail photos with us on Pinterest!